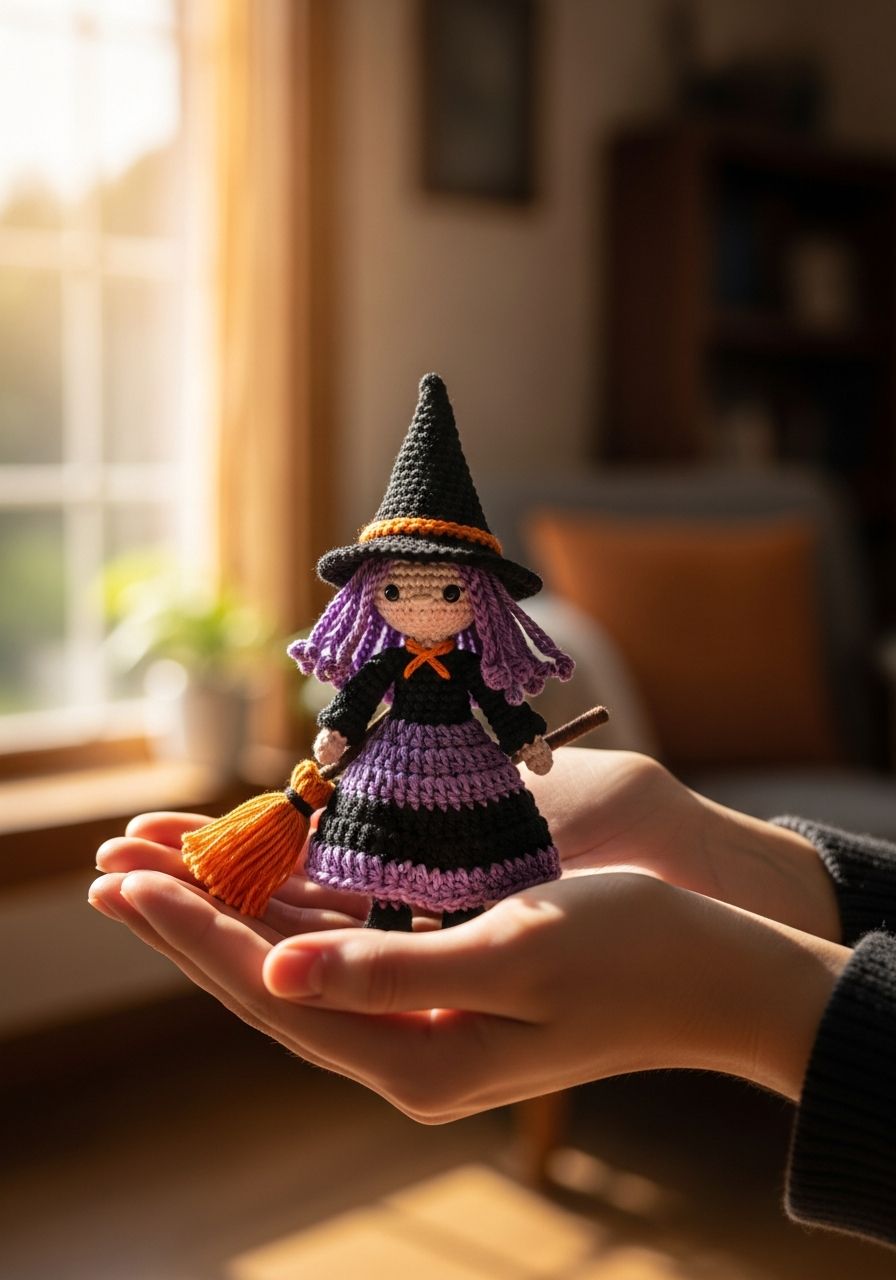
Imagine the delight on faces as you present a tiny, enchanting witch, crafted by your own hands, ready to cast a spell of charm and whimsy! This isn't just another project; it's an opportunity to weave a little magic, creating a character brimming with personality and a touch of the mystical. Get ready to dive into the delightful world of amigurumi with our absolutely free Crochet Witch Amigurumi pattern, designed to bring joy to your hook and a smile to your heart. Whether for Halloween decor, a whimsical gift, or just for the sheer joy of creation, this pattern promises an enchanting journey from the first stitch to the final flourish!
Welcome, fellow yarn enthusiasts, to a spellbinding adventure! This pattern is designed to be accessible for intermediate crocheters, but ambitious beginners with a grasp of basic stitches will find it a fantastic way to expand their skills. We'll guide you through every step of creating your very own adorable witch, complete with a pointy hat and a charming broom. Each piece is worked in continuous rounds, ensuring a smooth, seamless finish that's perfect for cuddles or display. Grab your yarn, your hook, and prepare to be bewitched!
Why You'll Love This Pattern
- Whimsical Charm: This witch isn't scary; she's utterly adorable, making her perfect for all ages.
- Perfect for Gifting: Handmade gifts are always cherished, and this little witch makes a unique present for Halloween, birthdays, or just because.
- Customizable Fun: Easily change yarn colors, add embroidery, or accessorize to give your witch a unique personality.
- Skill Building: Practice essential amigurumi techniques like working in the round, invisible increases/decreases, and seamless joining.
- Festive Decor: A fantastic addition to your autumn or Halloween decorations, bringing a touch of handmade magic to your home.
- Stash Buster: A great way to use up those smaller skeins of yarn you have lying around.
Materials Needed
- Worsted Weight (4) Yarn in:
- Skin Tone (e.g., beige, light brown) - for head, arms, legs
- Green (or color of choice for dress)
- Purple (or color of choice for hat)
- Orange (for hair)
- Black (for boots, hat brim, optional details)
- Brown (for broomstick)
- Tan/Yellow (for broom bristles)
- Crochet Hook: 3.5mm (E/4)
- Safety Eyes: 8mm
- Polyester Fiberfill for stuffing
- Tapestry Needle (for weaving in ends and assembly)
- Stitch Markers
- Scissors
- Optional: Embroidery floss (black or pink for mouth), wire for broomstick stability (if desired)
Gauge & Sizing
Gauge: 5 single crochet stitches and 5 rows = 1 inch (2.5 cm)
Sizing: When made with the recommended yarn and hook, your finished Crochet Witch Amigurumi will stand approximately 6-7 inches (15-18 cm) tall from boot to hat tip. Gauge is not critical for amigurumi, but maintaining a tight, consistent tension will prevent stuffing from showing through your stitches. Adjust hook size if your stitches are too loose or too tight.
Abbreviations
- ch: Chain
- sl st: Slip stitch
- sc: Single crochet
- hdc: Half double crochet
- dc: Double crochet
- inc: Increase (2 sc in one stitch)
- dec: Decrease (sc2tog - single crochet two stitches together)
- FLO: Front Loop Only
- BLO: Back Loop Only
- MR: Magic Ring (or Magic Circle)
- st(s): Stitch(es)
- FO: Fasten Off
- (X): Indicates stitch count at the end of the round
Step-by-Step Pattern
Work all parts in continuous rounds unless otherwise specified. Use a stitch marker to mark the beginning of each round.
Head (Skin Tone Yarn)
- MR, 6 sc (6)
- Inc in each st around (12)
- (Sc, inc) x 6 (18)
- (Sc in next 2 sts, inc) x 6 (24)
- (Sc in next 3 sts, inc) x 6 (30)
- Sc in each st around (30)
- - 10. Sc in each st around (5 rounds) (30)
Insert safety eyes between Rounds 8 and 9, about 6-7 stitches apart. Embroider a small mouth if desired.
- (Sc in next 3 sts, dec) x 6 (24)
- (Sc in next 2 sts, dec) x 6 (18)
Start stuffing the head firmly.
- (Sc, dec) x 6 (12)
- Dec x 6 (6)
FO, leaving a long tail for sewing. Finish stuffing and close the hole.
Body (Start with Black for Boots, then Green for Dress)
Legs (Make 2 - Black)
- MR, 6 sc (6)
- (Sc, inc) x 3 (9)
- Sc in each st around (9)
- - 5. Sc in each st around (9)
- Change to Skin Tone yarn. Sc in each st around (9)
Stuff firmly as you go. FO the first leg. Do not FO the second leg.
Joining Legs and Body (Green Yarn)
- On the second leg, ch 2. Join to the first leg with a sc. Sc around the first leg (9 sc), sc in the 2 chs (2 sc), sc around the second leg (9 sc), sc in the other side of the 2 chs (2 sc) (22)
- - 7. Sc in each st around (22)
- (Sc in next 9 sts, dec) x 2 (20)
- (Sc in next 8 sts, dec) x 2 (18)
- - 12. Sc in each st around (18)
Start stuffing the body. Continue to stuff as you go.
- (Sc in next 7 sts, dec) x 2 (16)
- (Sc in next 6 sts, dec) x 2 (14)
- (Sc in next 5 sts, dec) x 2 (12)
- Sc in each st around (12)
FO, leaving a long tail for sewing to the head.
Arms (Make 2 - Start with Skin Tone, then Green)
- MR, 6 sc (6)
- - 3. Sc in each st around (6)
- Change to Green yarn. Sc in each st around (6)
- - 8. Sc in each st around (6)
Lightly stuff the hand part only. Flatten the opening and sc 3 through both layers to close.
FO, leaving a long tail for sewing to the body.
Hair (Orange Yarn)
- MR, 6 sc (6)
- Inc in each st around (12)
- (Sc, inc) x 6 (18)
- (Sc in next 2 sts, inc) x 6 (24)
- (Sc in next 3 sts, inc) x 6 (30)
- Sc in each st around (30)
- (Sc in next 4 sts, inc) x 6 (36)
- Sc in each st around (36)
- *Ch 10, sl st in 2nd ch from hook, sc in next 8 chs. Skip 1 st on round 8 of the hair cap, sl st into the next st.* Repeat * to * 10-12 times around, creating hair strands. Adjust number of strands and skip stitches as needed to cover the head.
- Sl st into the next st on the hair cap. FO, leaving a long tail for sewing to the head.
Hat (Purple Yarn)
- MR, 4 sc (4)
- (Sc, inc) x 2 (6)
- Sc in each st around (6)
- (Sc in next 2 sts, inc) x 2 (8)
- Sc in each st around (8)
- (Sc in next 3 sts, inc) x 2 (10)
- Sc in each st around (10)
- (Sc in next 4 sts, inc) x 2 (12)
- Sc in each st around (12)
- (Sc in next 5 sts, inc) x 2 (14)
- Sc in each st around (14)
- (Sc in next 6 sts, inc) x 2 (16)
- Sc in each st around (16)
- (Sc in next 7 sts, inc) x 2 (18)
- - 16. Sc in each st around (18)
- (Sc in next 2 sts, inc) x 6 (24)
- (Sc in next 3 sts, inc) x 6 (30)
- (Sc in next 4 sts, inc) x 6 (36)
- (Sc in next 5 sts, inc) x 6 (42)
- In FLO, inc in each st around (84)
FO, weave in ends.
Broom (Brown and Tan/Yellow Yarn)
Broomstick (Brown Yarn)
- MR, 6 sc (6)
- Sc in each st around (6)
- - 15. Sc in each st around (6)
FO, leaving a tail for attaching bristles.
Bristles (Tan/Yellow Yarn)
- Cut several 4-inch (10cm) lengths of tan/yellow yarn.
- Using your hook, loop the yarn pieces through the stitches at one end of the broomstick, creating a fringe effect. Continue until you have a full, bushy broom head.
- Trim the bristles evenly to your desired length.
Assembly
- Attach Head to Body: Using the long tail from the body, sew the head firmly to the body, ensuring it's centered and secure.
- Attach Hair: Position the hair cap onto the head. The starting ring of the hair should be roughly centered on the top of the head. Pin in place and sew securely, shaping the hair strands as desired around the face.
- Attach Arms: Sew the flattened arms to the sides of the body, just below the neck, so they hang naturally.
- Place Hat: Position the hat on top of the head. You can sew it on permanently or leave it unattached for adjustability.
- Attach Broom: You can sew the broomstick to one of the witch's hands, or simply tuck it under an arm.
- Final Touches: Check for any loose ends, weave them in, and ensure all parts are securely attached. Adjust stuffing as needed.
Pro Tips
- Invisible Decrease: For a cleaner finish in amigurumi, use the invisible decrease (insert hook into FLO of first stitch, then into FLO of second stitch, yarn over, pull through both front loops, yarn over, pull through both loops on hook).
- Stuffing Smart: Stuff your pieces firmly but gradually. Use small pieces of fiberfill to avoid lumps. Ensure the neck is well-stuffed to support the head.
- Stitch Markers are Your Best Friend: Always use a stitch marker to mark the first stitch of each round when working in continuous spirals to avoid losing your place.
- Yarn Tails for Sewing: Leave long tails (12-18 inches) on pieces you will be sewing together. This saves yarn and avoids having to attach new pieces.
- Seamless Color Changes: When changing colors, work the last yarn over of the last stitch of the old color with the new color. This creates a smoother transition.
- Security for Safety Eyes: Always double-check that safety eyes are securely fastened, especially if the amigurumi is for a child. For very young children, embroidering eyes is a safer alternative.
Frequently Asked Questions
Q: Can I use different yarn weights for this pattern?
A: Yes, absolutely! You can use any yarn weight you prefer, but be sure to adjust your hook size accordingly. A general rule of thumb is to use a hook one or two sizes smaller than recommended on the yarn label to create tight stitches that prevent stuffing from showing through. Keep in mind that changing yarn weight will alter the finished size of your witch. A thinner yarn will result in a smaller witch, and a bulkier yarn will make a larger one.
Q: How do I make my witch stand upright without tipping over?
A: The key to a stable amigurumi is firm and even stuffing, especially in the feet and lower body. Ensure the legs and base of the body are packed tightly. You can also insert a small, flat, heavy object (like a few pennies or small crafting weights secured in a fabric pouch) into the very bottom of the body before fully stuffing, but ensure it's safe and won't shift. Some crocheters also use floral wire or pipe cleaners internally for poseability and stability, but this makes the toy unsuitable for young children.
Q: Is this pattern suitable for beginners?
A: While this pattern uses basic stitches, the assembly and working in continuous rounds for amigurumi can be a bit challenging for absolute beginners. However, if you're an ambitious beginner who has mastered the magic ring, single crochet, increases, and decreases, this pattern is a fantastic way to practice and build confidence. Take your time, use stitch markers, and don't be afraid to unravel and redo sections if needed. There are many video tutorials online for specific amigurumi techniques that can help!
Congratulations, you've conjured up a charming little witch! We hope you enjoyed every moment of bringing this delightful character to life with your hook and yarn. May your handmade witch bring a touch of magic and whimsy to your home or become a cherished gift. Happy crocheting!