Imagine the pure delight in a child's eyes as they hug a shimmering, soft creation made by your hands. That's the magic you're about to weave with our enchanting Crochet Unicorn Amigurumi pattern! This adorable pattern is designed to bring joy and a touch of fantasy to your crafting world, resulting in a cuddly companion that's perfect for gifting, decorating, or simply brightening your day. Get ready to embark on a magical crochet adventure!
Welcome, fellow crochet enthusiasts, to a world where yarn transforms into pure magic! We're absolutely thrilled to share this delightful free pattern for a charming Unicorn Amigurumi. Whether you're a seasoned crocheter looking for a fun weekend project or a beginner eager to dive into the wonderful world of amigurumi, this pattern is crafted with you in mind. With clear, step-by-step instructions and plenty of helpful tips, you'll create a whimsical unicorn friend that's as unique as your own imagination.
Why You'll Love This Pattern
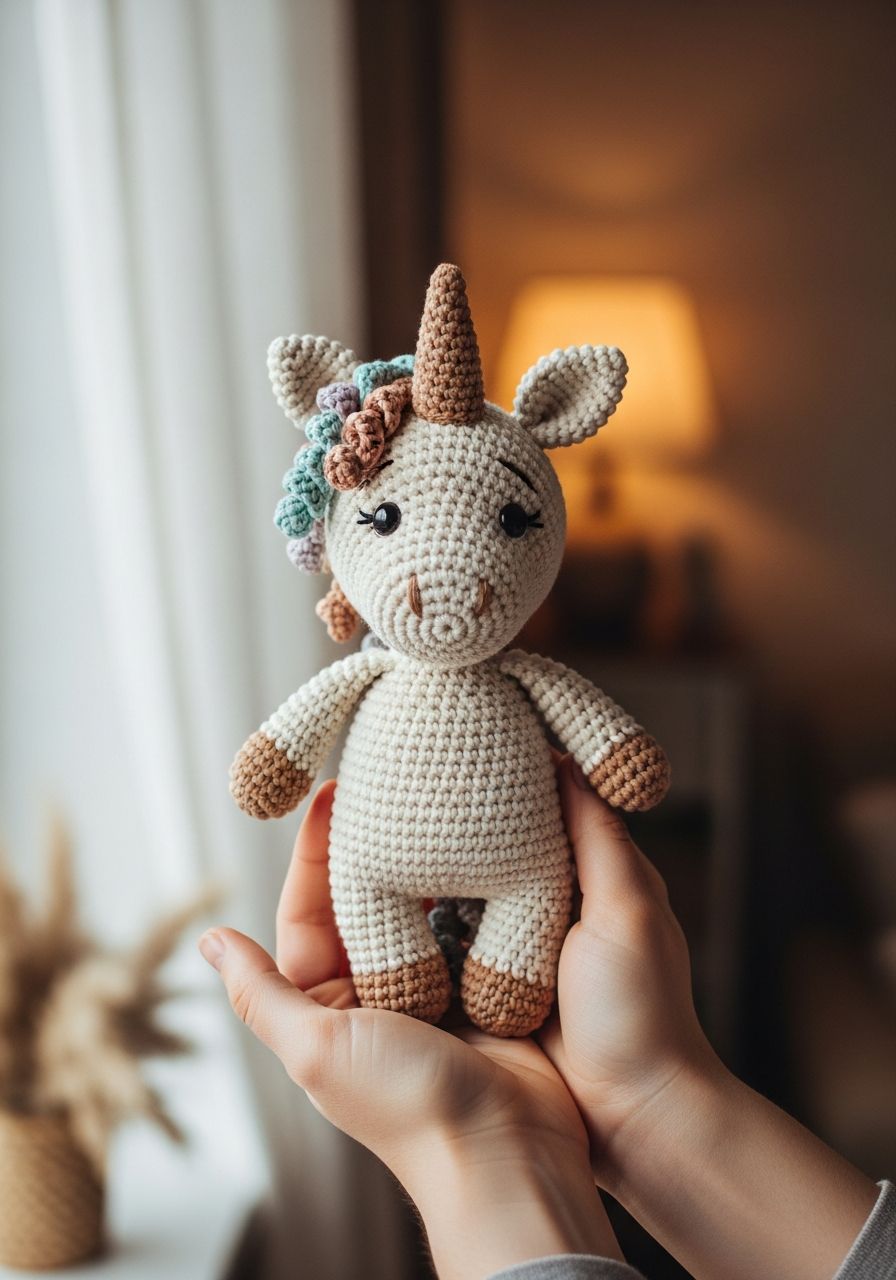
- Whimsical Design: Our unicorn features a classic, sweet design with a spiraling horn, fluffy mane and tail, and endearing eyes that are sure to melt hearts.
- Beginner-Friendly: While the finished product looks intricate, it primarily uses basic crochet stitches, making it accessible for those new to amigurumi. We've broken down every step to ensure a smooth crafting journey.
- Perfect for Gifting: Hand-crocheted gifts carry a special warmth. This unicorn makes an unforgettable present for birthdays, baby showers, or just because!
- Customizable: Experiment with different yarn colors for the body, mane, and horn to create your own unique unicorn character.
- Satisfying Project: Watching your unicorn take shape, piece by adorable piece, is incredibly rewarding. You'll feel a immense sense of accomplishment with each completed step.
Materials Needed
- Yarn: Worsted weight (Aran/10 ply) acrylic yarn in the following colors:
- Main Color (MC): White or light pastel (approx. 100g)
- Horn Color (HC): Gold or Yellow (small amount)
- Mane & Tail Colors (MT): Assorted rainbow colors or your chosen accent colors (small amounts of each)
- Accent Color (AC): Pink for inner ears (very small amount)
- Crochet Hook: 3.0mm (US C/2 or D/3) or 3.5mm (US E/4) – choose a hook size that gives you tight stitches to prevent stuffing from showing.
- Safety Eyes: 8mm or 10mm (black)
- Stuffing: Polyester fiberfill
- Tapestry Needle: For weaving in ends and assembly
- Stitch Markers: Essential for working in continuous rounds
- Scissors
- Optional: Pink embroidery floss for cheek blush, yarn for eyelashes
Gauge & Sizing
Gauge: 4 sc and 4 rows = 1 inch (2.5 cm) with your chosen yarn and hook. Gauge is not overly critical for amigurumi, but maintaining tight stitches is important to ensure your stuffing doesn't show through. Adjust your hook size if your stitches are too loose.
Finished Size: Approximately 8-9 inches (20-23 cm) tall when made with worsted weight yarn and a 3.0mm/3.5mm hook, not including the horn.
Abbreviations
- ch: chain
- sc: single crochet
- hdc: half double crochet
- dc: double crochet
- sl st: slip stitch
- inc: increase (2 sc in one stitch)
- dec: decrease (sc2tog - single crochet 2 stitches together)
- MR: magic ring (or magic circle)
- FO: fasten off
- st(s): stitch(es)
- BLO: back loop only
- FLO: front loop only
- rnd(s): round(s)
- rep: repeat
Step-by-Step Pattern
We'll be working in continuous rounds unless otherwise stated. Use a stitch marker to mark the first stitch of each round.
Head (MC)
- Rnd 1: 6 sc in MR (6)
- Rnd 2: [inc] x 6 (12)
- Rnd 3: [sc, inc] x 6 (18)
- Rnd 4: [sc 2, inc] x 6 (24)
- Rnd 5: [sc 3, inc] x 6 (30)
- Rnd 6: [sc 4, inc] x 6 (36)
- Rnd 7-12: sc in each st around (36) (6 rounds)
- Rnd 13: [sc 4, dec] x 6 (30)
- Rnd 14: [sc 3, dec] x 6 (24)
- Rnd 15: [sc 2, dec] x 6 (18)
Insert safety eyes between Rnd 10 and 11, about 6-7 stitches apart. Begin stuffing firmly.
- Rnd 16: [sc, dec] x 6 (12)
- Rnd 17: [dec] x 6 (6)
FO, leaving a long tail for sewing. Finish stuffing and close the hole by weaving the tail through the front loop of the remaining 6 stitches and pulling tight. Secure and weave in end.
Body (MC)
- Rnd 1: 6 sc in MR (6)
- Rnd 2: [inc] x 6 (12)
- Rnd 3: [sc, inc] x 6 (18)
- Rnd 4: [sc 2, inc] x 6 (24)
- Rnd 5: [sc 3, inc] x 6 (30)
- Rnd 6: [sc 4, inc] x 6 (36)
- Rnd 7-14: sc in each st around (36) (8 rounds)
- Rnd 15: [sc 4, dec] x 6 (30)
- Rnd 16: sc in each st around (30)
- Rnd 17: [sc 3, dec] x 6 (24)
Stuff the body firmly as you go.
- Rnd 18: sc in each st around (24)
- Rnd 19: [sc 2, dec] x 6 (18)
FO, leaving a long tail for sewing to the head.
Ears (Make 2 - MC, with AC for inner ear)
- With AC, ch 4.
- Row 1: sc in 2nd ch from hook, sc in next 2 ch. (3)
Switch to MC.
- Row 2: Ch 1, turn. sc 3. (3)
FO, leaving a long tail for sewing. Fold the bottom corners of the ear together and sew a small stitch to create a slight cup shape. The AC forms the inner part of the ear.
Legs (Make 4 - MC)
- Rnd 1: 6 sc in MR (6)
- Rnd 2: [inc] x 6 (12)
- Rnd 3: sc in BLO in each st around (12)
- Rnd 4-7: sc in each st around (12) (4 rounds)
Stuff firmly. FO, leaving a long tail for sewing. Do not close the opening.
Horn (HC)
- Rnd 1: 4 sc in MR (4)
- Rnd 2: sc in each st around (4)
- Rnd 3: [sc, inc] x 2 (6)
- Rnd 4: sc in each st around (6)
- Rnd 5: [sc 2, inc] x 2 (8)
Stuff lightly. FO, leaving a long tail for sewing.
Mane & Tail (MT Colors)
Cut multiple strands of yarn (approx. 6-8 inches long) in your chosen mane and tail colors. For the mane, you'll need about 20-30 strands, and for the tail, about 15-20 strands. You can use single colors or mix them for a rainbow effect.
To attach: Fold a strand of yarn in half. Insert your hook into a stitch where you want the mane/tail, pull the folded loop through, then pull the two ends of the yarn through the loop. Pull tight to secure.
- Mane: Attach strands along the back of the head/neck, starting from behind the horn and going down to where the head meets the body.
- Tail: Attach strands to the back of the body, centrally located.
Assembly
- Attach Head to Body: Using the long tail from the body, carefully sew the body to the head. Ensure the head is centered and securely attached, shaping as you sew.
- Attach Ears: Position the ears on top of the head, slightly to the sides, around Rnd 11-12 of the head. Sew securely.
- Attach Horn: Place the horn centrally between the ears, slightly forward. Sew securely in place.
- Attach Legs: Position the four legs evenly spaced on the underside of the body. You can place them around Rnd 14-16 of the body. Sew each leg firmly to the body.
- Mane and Tail: If not already done, attach the mane and tail as described above. You can trim them to your desired length and shape.
- Finishing Touches: Use a small amount of pink yarn or embroidery floss to create little blush circles on the cheeks below the eyes, if desired. You can also embroider simple eyelashes with black yarn.
Pro Tips
- Use a Stitch Marker: This is crucial when working in continuous rounds to keep track of your first stitch and prevent mistakes.
- Stuff Firmly and Evenly: Don't be afraid to use plenty of fiberfill. Stuff small amounts at a time, pushing it into all crevices to ensure a smooth, firm shape without lumps.
- Invisible Decreases: For a neater finish on your amigurumi, use invisible decreases (insert hook into FLO of first st, then FLO of second st, yarn over, pull through both loops, yarn over, pull through remaining 2 loops).
- Weave in Ends Securely: When changing colors or finishing off, weave your yarn tails through several stitches inside the piece to prevent them from coming undone.
- Safety Eye Placement: Before securing the backs of the safety eyes, hold them in place and check if you like their position. Symmetry is key!
- Personalize Your Unicorn: Feel free to use different yarn textures, add glitter yarn for the horn, or embroider unique facial expressions. Make it truly yours!
Frequently Asked Questions
Can I use different yarn weights for this pattern?
Yes, absolutely! You can use any yarn weight you prefer. Just remember to adjust your hook size accordingly (usually 1-2 sizes smaller than recommended for the yarn to keep stitches tight). Using a thicker yarn will result in a larger unicorn, and a thinner yarn will create a smaller one.
Is this pattern suitable for complete beginners?
This pattern is designed to be beginner-friendly, assuming you know basic crochet stitches like single crochet, chain, slip stitch, increase, and decrease. The detailed step-by-step instructions for each part, along with the assembly guide, should make it manageable. Don't hesitate to look up video tutorials for specific stitches if you're unsure!
How do I make the mane and tail extra fluffy?
To achieve an extra fluffy mane and tail, you can use a wire pet brush or a slicker brush to gently brush out the yarn strands after they are attached. This separates the plies of the yarn, creating a soft, voluminous effect. Be gentle to avoid damaging the yarn.
And there you have it! Your very own magical Unicorn Amigurumi, brought to life by your skillful hands. We hope you've enjoyed every stitch of this enchanting project. This cuddly friend is ready to spread joy and sparkle wherever it goes. Don't forget to share your creations with us – we love seeing your unique touches!