Imagine feeling the warm sun on your skin, the gentle breeze rustling through your hair, and the effortless confidence of a handmade garment as you stroll along the beach or by the pool. This summer, elevate your beachwear game with a stunning, custom-made accessory that perfectly complements your swimsuit and showcases your incredible crochet skills! We're thrilled to bring you a beautiful, free pattern for a chic and airy Crochet Swimsuit Cover Up that's not only a joy to make but an absolute dream to wear.
As an expert crochet designer, I've poured my heart into creating a pattern that's both accessible for enthusiastic beginners and engaging enough for seasoned crocheters. This cover-up features a lovely open-mesh design, offering just the right amount of coverage while keeping you cool and comfortable. Whether you're lounging poolside, grabbing a snack at the resort, or enjoying a sunset walk on the sand, this cover-up will be your go-to piece for effortless summer style. Get ready to hook your way to your favorite new summer essential!
Why You'll Love This Pattern
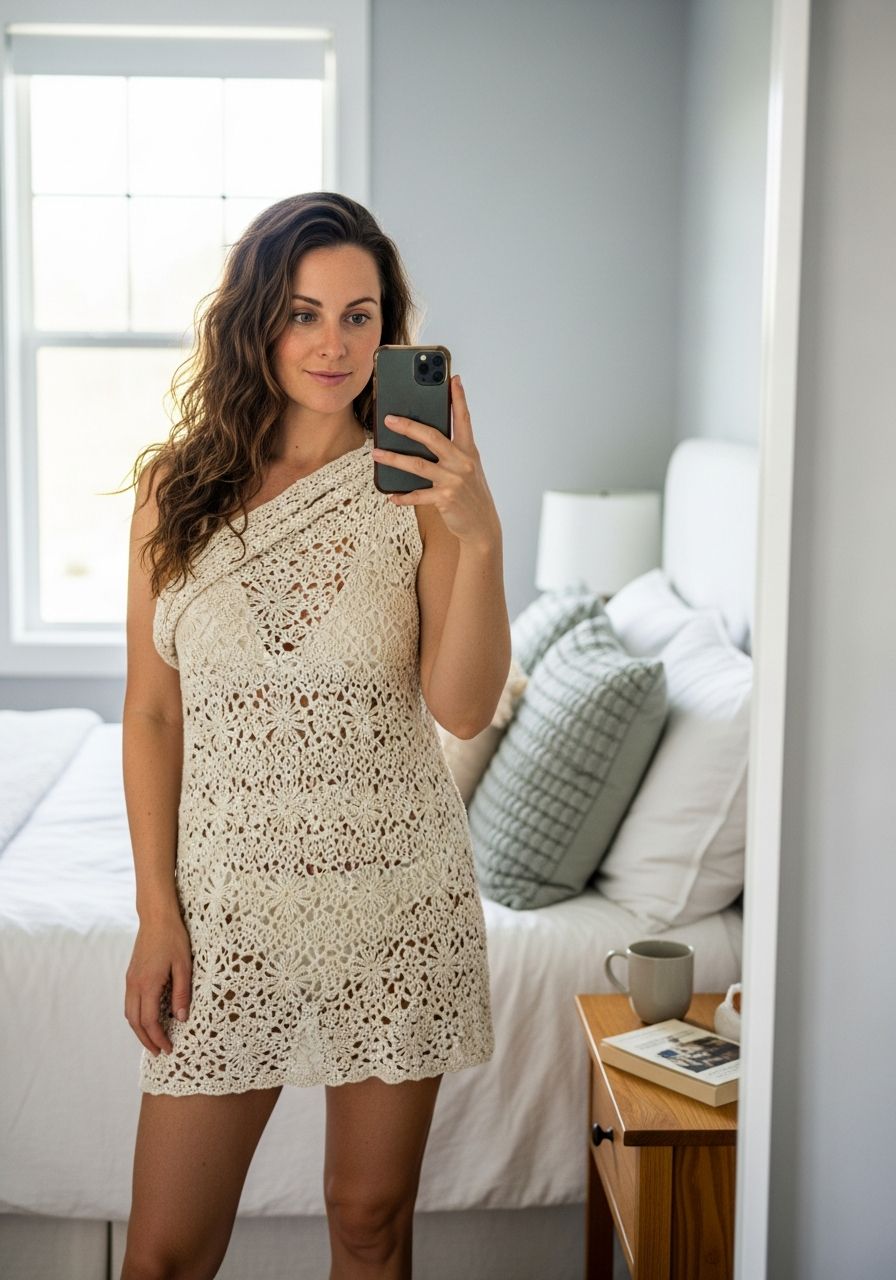
- Effortlessly Chic: The open-work design creates a sophisticated, bohemian look that's perfect for any beach or poolside setting.
- Lightweight & Breathable: Crafted with a lovely mesh stitch, it's designed to keep you cool even on the hottest days.
- Customizable Fit: The pattern is easily adaptable to different body types and lengths, ensuring a perfect fit for everyone.
- Quick to Make: Using primarily double crochet and chains, this project works up surprisingly fast, making it ideal for last-minute vacation prep.
- Skill-Builder: While great for beginners, it introduces techniques like shaping and seaming that will help intermediate crocheters expand their skills.
- Versatile Styling: Not just for swimsuits! Wear it over a tank top and shorts for a casual summer outfit.
Materials Needed
- Yarn: Approximately 800-1000 yards (730-915 meters) of DK weight (Category 3) cotton or cotton blend yarn. Cotton is recommended for its breathability and quick-drying properties. (e.g., Lion Brand 24/7 Cotton, Paintbox Yarns Cotton DK).
- Crochet Hook: 4.0 mm (G/6) or size needed to obtain gauge.
- Yarn Needle: For weaving in ends and seaming.
- Scissors: For cutting yarn.
- Stitch Markers: A few are helpful for marking rows and seams.
- Measuring Tape: Essential for checking gauge and sizing.
Gauge & Sizing
Gauge: 16 DC and 9 rows = 4 inches (10 cm) in pattern stitch (DC, CH 1) after blocking.
Achieving the correct gauge is crucial for ensuring your cover-up turns out the correct size and drape. Take the time to make a swatch!
To make a gauge swatch:
- Chain 20.
- Row 1: DC in 4th ch from hook (counts as 1 DC), *ch 1, skip 1 ch, DC in next ch* repeat from * to * across. (9 DC, 8 ch-1 spaces).
- Row 2: Ch 3 (counts as 1 DC), turn, *DC in ch-1 space, ch 1, skip 1 DC* repeat from * to * across, ending with DC in last DC (top of turning chain). (9 DC, 8 ch-1 spaces).
- Repeat Row 2 for a total of 12 rows.
- Measure your swatch. If it's too small, go up a hook size. If it's too large, go down a hook size.
Sizing Information:
This pattern is written for size Small/Medium (approx. US size 4-10, Bust 32-38 inches). Instructions for adjusting to larger sizes (Large/XL and 2XL/3XL) are provided in the pattern steps by adjusting the starting chain multiples and row counts. Remember, a cover-up is meant to be flowy, so exact sizing isn't as critical as a fitted garment, but gauge still ensures the fabric has the right drape.
- Small/Medium: Finished width approx. 20 inches per panel, length 30 inches.
- Large/XL: Finished width approx. 24 inches per panel, length 32 inches. (Add 16 chains to starting chain of back/front panels, work additional rows).
- 2XL/3XL: Finished width approx. 28 inches per panel, length 34 inches. (Add 32 chains to starting chain of back/front panels, work additional rows).
Abbreviations
- ch: chain
- sl st: slip stitch
- sc: single crochet
- hdc: half double crochet
- dc: double crochet
- inc: increase (usually 2 stitches in one stitch/space)
- dec: decrease (working 2 stitches together)
- st(s): stitch(es)
- sp: space
- FO: finish off
- RS: right side
- WS: wrong side
Step-by-Step Pattern
This cover-up is constructed from three main pieces: one back panel and two front panels, which are then seamed together.
Back Panel
- Foundation Chain: Ch 84 (S/M) / Ch 100 (L/XL) / Ch 116 (2XL/3XL).
- Row 1 (RS): DC in 4th ch from hook (counts as 1 DC), *ch 1, skip 1 ch, DC in next ch* repeat from * to * across. (S/M: 41 DC, 40 ch-1 sps) (L/XL: 49 DC, 48 ch-1 sps) (2XL/3XL: 57 DC, 56 ch-1 sps). Ch 3 (counts as 1 DC), turn.
- Row 2 (WS): *DC in ch-1 space, ch 1, skip 1 DC* repeat from * to * across, ending with DC in last DC (top of turning chain). (S/M: 41 DC, 40 ch-1 sps). Ch 3, turn.
- Rows 3-60 (S/M) / Rows 3-64 (L/XL) / Rows 3-68 (2XL/3XL): Repeat Row 2.
- Finishing: At the end of the last row, FO, leaving a long tail for seaming.
Front Panels (Make 2)
Each front panel will be half the width of the back panel, with a slight shaping for the V-neck.
Left Front Panel
- Foundation Chain: Ch 44 (S/M) / Ch 52 (L/XL) / Ch 60 (2XL/3XL).
- Row 1 (RS): DC in 4th ch from hook (counts as 1 DC), *ch 1, skip 1 ch, DC in next ch* repeat from * to * until 2 chains remain. Ch 1, skip 1 ch, DC in last ch. (S/M: 21 DC, 20 ch-1 sps) (L/XL: 25 DC, 24 ch-1 sps) (2XL/3XL: 29 DC, 28 ch-1 sps). Ch 3, turn.
- Row 2 (WS): *DC in ch-1 space, ch 1, skip 1 DC* repeat from * to * across, ending with DC in last DC (top of turning chain). Ch 3, turn.
- Rows 3-30 (S/M) / Rows 3-32 (L/XL) / Rows 3-34 (2XL/3XL): Repeat Row 2. (This establishes the straight edge of the panel.)
- V-Neck Shaping - Row 31 (S/M) / Row 33 (L/XL) / Row 35 (2XL/3XL) (RS - Decrease): Ch 3 (counts as 1 DC), turn, DC in first ch-1 sp, ch 1, skip next DC, *DC in ch-1 sp, ch 1, skip 1 DC* repeat from * to * until 2 stitches remain. DC2tog (DC in last ch-1 sp, then DC in top of turning ch). (Stitch count reduced by 1 DC). Ch 3, turn.
- V-Neck Shaping - Row 32 (S/M) / Row 34 (L/XL) / Row 36 (2XL/3XL) (WS - Straight): Repeat Row 2 (no decrease on WS rows). Ch 3, turn.
- Repeat V-Neck Shaping: Continue repeating Rows 31 & 32 (or corresponding row numbers for your size) until you have a total of 60 rows (S/M) / 64 rows (L/XL) / 68 rows (2XL/3XL) for the front panel, or until the desired neck depth is achieved. You should have approximately 11 DC / 10 ch-1 sps remaining for the shoulder strap (S/M).
- Finishing: FO, leaving a long tail for seaming.
Right Front Panel
Work exactly as the Left Front Panel, but reverse the shaping for the V-neck on the opposite side. The decrease will be at the beginning of the RS rows.
- Foundation Chain: Ch 44 (S/M) / Ch 52 (L/XL) / Ch 60 (2XL/3XL).
- Row 1 (RS): DC in 4th ch from hook (counts as 1 DC), *ch 1, skip 1 ch, DC in next ch* repeat from * to * until 2 chains remain. Ch 1, skip 1 ch, DC in last ch. (S/M: 21 DC, 20 ch-1 sps). Ch 3, turn.
- Row 2 (WS): *DC in ch-1 space, ch 1, skip 1 DC* repeat from * to * across, ending with DC in last DC (top of turning chain). Ch 3, turn.
- Rows 3-30 (S/M) / Rows 3-32 (L/XL) / Rows 3-34 (2XL/3XL): Repeat Row 2.
- V-Neck Shaping - Row 31 (S/M) / Row 33 (L/XL) / Row 35 (2XL/3XL) (RS - Decrease): Ch 3, turn, skip first DC, DC in next ch-1 sp. *ch 1, skip 1 DC, DC in ch-1 sp* repeat from * to * across, ending with DC in last DC (top of turning chain). (Stitch count reduced by 1 DC). Ch 3, turn.
- V-Neck Shaping - Row 32 (S/M) / Row 34 (L/XL) / Row 36 (2XL/3XL) (WS - Straight): Repeat Row 2 (no decrease on WS rows). Ch 3, turn.
- Repeat V-Neck Shaping: Continue repeating Rows 31 & 32 (or corresponding row numbers for your size) until you have a total of 60 rows (S/M) / 64 rows (L/XL) / 68 rows (2XL/3XL) for the front panel.
- Finishing: FO, leaving a long tail for seaming.
Joining & Finishing
It's always a good idea to block your panels lightly before seaming for a neater finish.
- Shoulder Seams: Lay the back panel flat, RS up. Place the two front panels on top, RS up, aligning the straight edges of the shoulder straps with the top corners of the back panel. Using your yarn needle and the long tails, seam the shoulders together using the mattress stitch or your preferred seaming method. The shoulder seams should be approximately 5 inches (12.5 cm) long for S/M (adjust for larger sizes).
- Side Seams: With the cover-up still laid flat (or folded in half, RS together), measure down approximately 8-10 inches (20-25 cm) from the shoulder seam for the armhole opening. Place a stitch marker. From the stitch marker down to the bottom hem, seam the side edges of the front and back panels together. Repeat on the other side.
- Edging (Optional but Recommended): For a polished look, work a round of SC evenly around the entire opening of the cover-up (neckline and front edges), and also around each armhole opening. Join with a sl st and FO.
- Weave in Ends: Securely weave in all remaining yarn tails using your yarn needle.
Optional: Drawstring
A drawstring can add a nice touch and allow for some waist cinching.
- Make the Cord: Chain approximately 150-200 stitches (or until desired length). Then, sl st into the 2nd ch from hook and each ch across. FO.
- Weave In: Using your yarn needle, weave the drawstring through the mesh stitches at the waist level (around row 30-35) of your cover-up. Start at one front panel, go around the back, and come out the other front panel. Knot the ends to prevent fraying.
Pro Tips
- Blocking is Your Friend: Especially with cotton yarn and openwork, blocking makes a huge difference in the drape and appearance of your finished cover-up. Pin it to shape and let it air dry.
- Yarn Choice Matters: While cotton is recommended, consider a bamboo or linen blend for even more drape and softness. Avoid acrylic if you want good breathability for summer wear.
- Check Your Tension: Consistent tension throughout your project will ensure even stitches and a professional finish. If you notice your stitches are getting tighter or looser, take a break or adjust your grip.
- Don't Be Afraid to Customize: Want it longer? Add more rows to the panels before shaping. Want it shorter? Work fewer rows. Make it truly yours!
- Practice Seaming: A neat seam can make or break a garment. If you're new to seaming, practice on some scrap pieces first to find a method you like.
- Try It On: Periodically hold up or try on your work as you go, especially during shaping, to ensure the fit is as you desire. This is much easier than frogging later!
Frequently Asked Questions
Q: Can I use a different yarn weight for this pattern?
A: Yes, you can, but you will need to adjust your hook size to achieve the correct gauge and likely adjust your starting chain and row counts significantly. A heavier weight yarn will result in a larger, denser cover-up, while a lighter weight might make it too sheer or small. Always make a gauge swatch if changing yarn weight!
Q: How do I make the V-neck deeper or shallower?
A: To make the V-neck deeper, start your V-neck shaping (decrease rows) earlier in the front panels. To make it shallower, start the shaping later. Adjust the number of straight rows you work before beginning the decreases to achieve your desired look.
Q: My cover-up seems a bit stiff. What can I do?
A: Cotton yarn can sometimes feel a bit stiff before washing and blocking. Giving your finished cover-up a good wet block (soaking it, gently squeezing out excess water, pinning it to shape, and letting it air dry) will dramatically soften the fibers and improve the drape. If it's still stiff, consider going up a hook size on your next project with the same yarn to create a looser fabric.
There you have it! Your very own, beautifully handcrafted Crochet Swimsuit Cover Up, ready to accompany you on all your summer adventures. This pattern is designed to be a relaxing, enjoyable project that results in a truly rewarding piece for your wardrobe. Don't be shy about experimenting with colors or even adding some fringe to the bottom hem for an extra bohemian flair. We can't wait to see your stunning creations. Happy hooking!