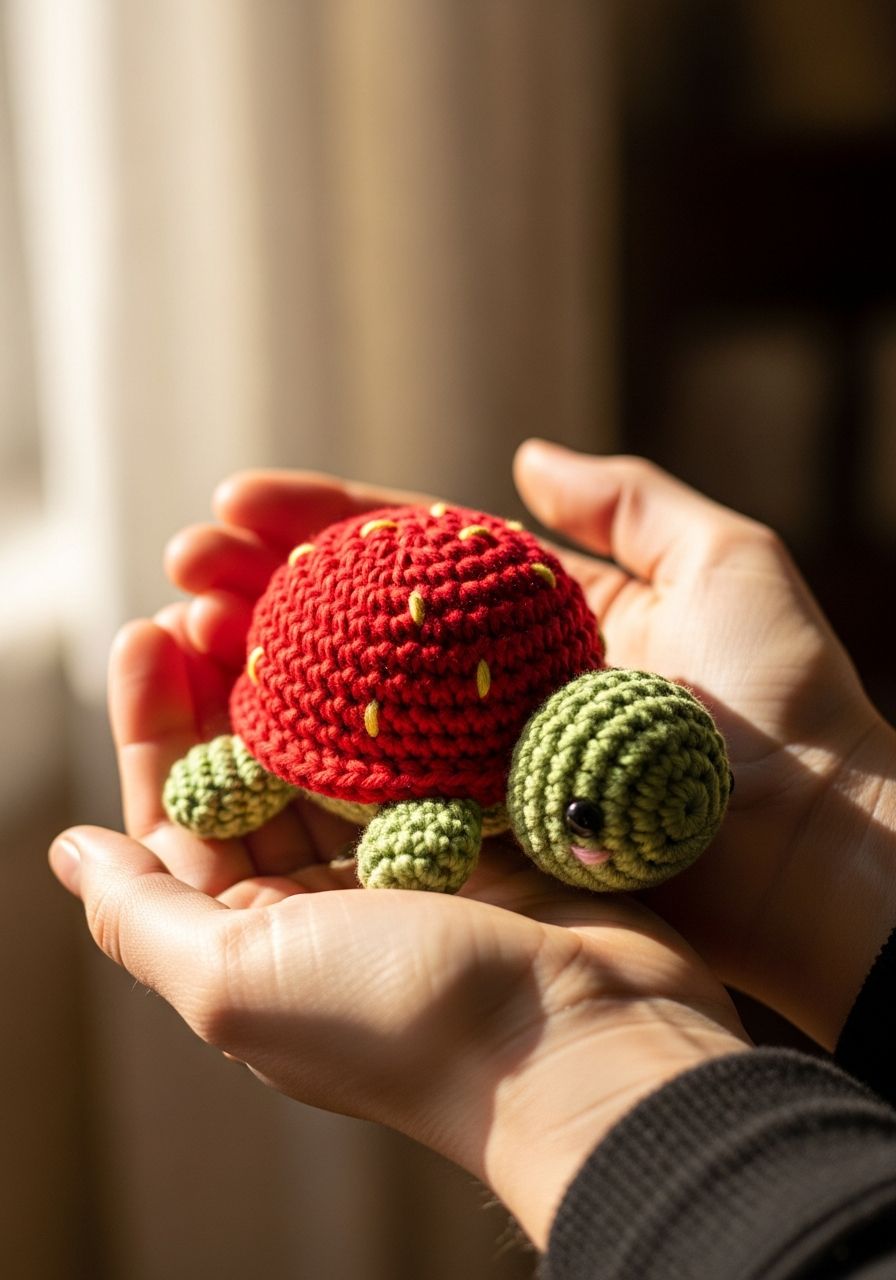
Imagine a tiny, whimsical creature that combines the sweet charm of a ripe strawberry with the serene wisdom of a turtle. Picture it nestled in your palm, a burst of color and a testament to your crafty hands. This isn't just a daydream; it's what you're about to create with our delightful Crochet Strawberry Turtle Amigurumi free pattern! Get ready to embark on a joyful crochet journey that will leave you with an irresistible, huggable friend, perfect for gifting, decorating, or simply bringing a smile to your own face. Let's make some magic, stitch by stitch!
Welcome, fellow yarn enthusiasts, to a pattern that's as sweet as it is simple. This Crochet Strawberry Turtle Amigurumi design is a fresh take on a beloved classic, blending the vibrant hues of a summer berry with the gentle nature of a turtle. Whether you're an amigurumi aficionado or just dipping your hook into the world of stuffed creations, this detailed guide will walk you through every step, ensuring a fun and rewarding experience. Prepare to create an adorable companion that will surely be a conversation starter!
Why You'll Love This Pattern
- Unique & Adorable Design: Stand out with a whimsical strawberry-themed turtle that's sure to capture hearts.
- Beginner-Friendly: Uses fundamental crochet stitches, making it accessible for those new to amigurumi.
- Quick to Make: The compact size means you can whip up one (or a whole patch!) in a weekend.
- Perfect for Gifting: Handmade with love, these turtles make thoughtful presents for birthdays, baby showers, or just because.
- Stash Buster: A great way to use up those smaller skeins of yarn in your collection.
- Customizable: Easily change colors or add embellishments to make your turtle truly one-of-a-kind.
Materials Needed
- Worsted weight (Aran/10-ply) yarn in: Red (for shell top), Green (for shell leaves), Cream or White (for head/body/legs), Black (for embroidering seeds).
- 2.75mm (C) or 3.0mm (D) crochet hook (or size suitable for your yarn to achieve tight stitches).
- 9mm safety eyes (or size appropriate for your turtle's head).
- Polyester fiberfill for stuffing.
- Yarn needle (tapestry needle) for weaving in ends and assembly.
- Stitch markers.
- Scissors.
Gauge & Sizing
Gauge is not critical for this amigurumi project, as long as your stitches are tight enough to prevent stuffing from showing through. If your stitches are too loose, consider going down a hook size. When using worsted weight yarn and a 2.75mm hook, your finished Strawberry Turtle Amigurumi will be approximately 4-5 inches long from head to tail and about 2.5 inches tall.
Abbreviations
- ch: Chain
- sc: Single Crochet
- hdc: Half Double Crochet
- dc: Double Crochet
- sl st: Slip Stitch
- inc: Increase (2 single crochet in one stitch)
- dec: Decrease (single crochet 2 stitches together)
- FLO: Front Loop Only
- BLO: Back Loop Only
- st/sts: Stitch/Stitches
- rnd/rnds: Round/Rounds
- MR: Magic Ring (or adjustable ring)
- ( ) : Repeat instructions within parentheses the specified number of times
- [ ] : Total number of stitches at the end of the round
Step-by-Step Pattern
This pattern is worked in continuous rounds unless otherwise specified. Use a stitch marker to mark the first stitch of each round.
Turtle Shell (Red & Green Yarn)
Start with Red yarn.
- Rnd 1: 6 sc in MR. [6]
- Rnd 2: Inc in each st around. [12]
- Rnd 3: (Sc in next st, inc) 6 times. [18]
- Rnd 4: (Sc in next 2 sts, inc) 6 times. [24]
- Rnd 5: (Sc in next 3 sts, inc) 6 times. [30]
- Rnd 6: (Sc in next 4 sts, inc) 6 times. [36]
- Rnd 7: (Sc in next 5 sts, inc) 6 times. [42]
- Rnd 8: (Sc in next 6 sts, inc) 6 times. [48]
- Rnd 9-13: Sc in each st around. (5 rounds) [48]
- Rnd 14: (Sc in next 6 sts, dec) 6 times. [42]
- Rnd 15: (Sc in next 5 sts, dec) 6 times. [36]
- Rnd 16: (Sc in next 4 sts, dec) 6 times. [30]
- Rnd 17: Sc in each st around. [30]
- Rnd 18: (Sc in next 3 sts, dec) 6 times. [24]
- Rnd 19: Sc in each st around. [24]
- Rnd 20: Working in BLO, sc in each st around. [24]
Fasten off Red yarn and weave in the end. The BLO round creates a ridge for the green leaves. The remaining front loops from Rnd 20 will be used for the green border.
Attach Green yarn to the first FLO of Rnd 20.
- Rnd 21 (Green Leaves): Ch 3 (counts as 1 dc), dc in same FLO. (Ch 2, dc 2 in next FLO) 11 times. Join with sl st to top of first ch 3. [12 leaf clusters]
Fasten off Green yarn, weave in ends. The shell is now complete. Set aside.
Turtle Body & Head (Cream/White Yarn)
Start with Cream/White yarn.
- Rnd 1: 6 sc in MR. [6]
- Rnd 2: Inc in each st around. [12]
- Rnd 3: (Sc in next st, inc) 6 times. [18]
- Rnd 4: (Sc in next 2 sts, inc) 6 times. [24]
- Rnd 5: (Sc in next 3 sts, inc) 6 times. [30]
- Rnd 6: Sc in each st around. [30]
- Rnd 7: (Sc in next 4 sts, inc) 6 times. [36]
- Rnd 8-12: Sc in each st around. (5 rounds) [36]
Insert safety eyes between Rnd 9 and 10, approximately 6-7 stitches apart. Secure washers on the inside.
- Rnd 13: (Sc in next 4 sts, dec) 6 times. [30]
- Rnd 14: (Sc in next 3 sts, dec) 6 times. [24]
- Rnd 15: (Sc in next 2 sts, dec) 6 times. [18]
- Rnd 16: Sc in each st around. [18]
Start stuffing the head firmly. Continue stuffing as you go.
- Rnd 17: (Sc in next st, dec) 6 times. [12]
- Rnd 18-20: Sc in each st around. (3 rounds) [12]
This forms the neck. Continue stuffing the neck lightly.
- Rnd 21: (Sc in next st, inc) 6 times. [18]
- Rnd 22: (Sc in next 2 sts, inc) 6 times. [24]
- Rnd 23: (Sc in next 3 sts, inc) 6 times. [30]
- Rnd 24: Sc in each st around. [30]
- Rnd 25: (Sc in next 3 sts, dec) 6 times. [24]
Lightly stuff the body. Leave the opening for attaching to the shell.
Fasten off, leaving a long tail for sewing. Finish stuffing the body.
Legs (Make 4 - Cream/White Yarn)
Start with Cream/White yarn.
- Rnd 1: 6 sc in MR. [6]
- Rnd 2: (Sc in next st, inc) 3 times. [9]
- Rnd 3-4: Sc in each st around. (2 rounds) [9]
- Rnd 5: (Sc in next st, dec) 3 times. [6]
Fasten off, leaving a long tail for sewing. Lightly stuff each leg. Pinch the opening flat and sew it closed.
Assembly
- Attach Legs: Position the legs evenly around the lower edge of the body (Rnd 25), with two at the front and two at the back. Using the long tails, sew them securely to the body.
- Attach Body to Shell: Place the body (head facing forward) inside the shell, aligning the opening of the body with the opening of the shell (Rnd 20/21). Use the long tail from the body to sew it firmly to the inner edge of the shell (the stitches from Rnd 20, where you worked BLO for the red part). Ensure the body is well-centered and securely attached.
- Embroider Seeds: Using Black yarn and your yarn needle, embroider small V-shaped or straight line stitches randomly over the red part of the shell to resemble strawberry seeds. Space them out for a natural look.
- Weave in all remaining ends: Give your turtle a gentle squeeze and reshape if needed.
Pro Tips
- Invisible Decreases: For a cleaner look, use the invisible decrease method (insert hook into FLO of next st, then FLO of following st, yarn over and pull through both loops, yarn over and pull through remaining 2 loops). This helps prevent gaps.
- Stitch Markers are Your Best Friend: Especially when working in continuous rounds, a stitch marker helps you keep track of the beginning of your rounds and maintain accurate stitch counts.
- Stuffing Consistency: Stuff firmly but evenly. Overstuffing can distort the shape and create gaps, while understuffing can make your amigurumi floppy. Use small bits of fiberfill to get into tight spaces and ensure a smooth finish.
- Long Tails for Sewing: Always leave a generous tail (12-18 inches) when fastening off pieces that need to be sewn together. It saves you from having to join new yarn later.
- Safety Eye Placement: Before securing the washers, hold the eyes in place and step back to check the expression. Slight adjustments can make a big difference in your turtle's personality!
- Color Play: Don't be afraid to experiment with different shades! A lighter pink for the strawberry or a darker sage green for the leaves could create a completely different, yet equally charming, effect.
Frequently Asked Questions
Q: Can I use different yarn weights for this pattern?
A: Yes, absolutely! You can use any yarn weight you prefer. Just be sure to adjust your hook size accordingly. A general rule of thumb is to use a hook size one or two sizes smaller than recommended for the yarn to ensure tight stitches that prevent stuffing from showing. Keep in mind that using different yarn weights will alter the final size of your strawberry turtle. A bulkier yarn will result in a larger turtle, and a finer yarn will make a smaller one.
Q: How do I make the strawberry seeds look good and even?
A: The key to natural-looking seeds is not to make them too perfect! Use a sharp yarn needle and black embroidery floss or a thin strand of black worsted weight yarn. For a classic seed look, make small V-shaped stitches. For simpler seeds, small straight stitches work well too. Vary the angle and position of each seed slightly to avoid a rigid pattern. You can also place them somewhat randomly, focusing more on scattering them across the red shell rather than lining them up. Practicing on a swatch first can help build confidence.
Q: Is this pattern suitable for complete beginners to crochet?
A: While this pattern uses only basic stitches (sc, inc, dec, sl st), some experience with working in the round and reading a pattern is helpful. If you're a complete beginner, it's recommended to first practice the basic stitches and how to create a magic ring. This pattern is definitely a fantastic project for an adventurous beginner who has mastered the fundamentals, as it offers clear, step-by-step instructions. Don't be afraid to try it; the results are incredibly rewarding!
And there you have it – your very own Crochet Strawberry Turtle Amigurumi! Each stitch woven with care, each color chosen with joy, culminates in a little friend that's bursting with personality. Whether it becomes a cherished toy, a quirky desk companion, or a handmade gift, this sweet turtle is a testament to your creativity and skill. Happy crocheting!