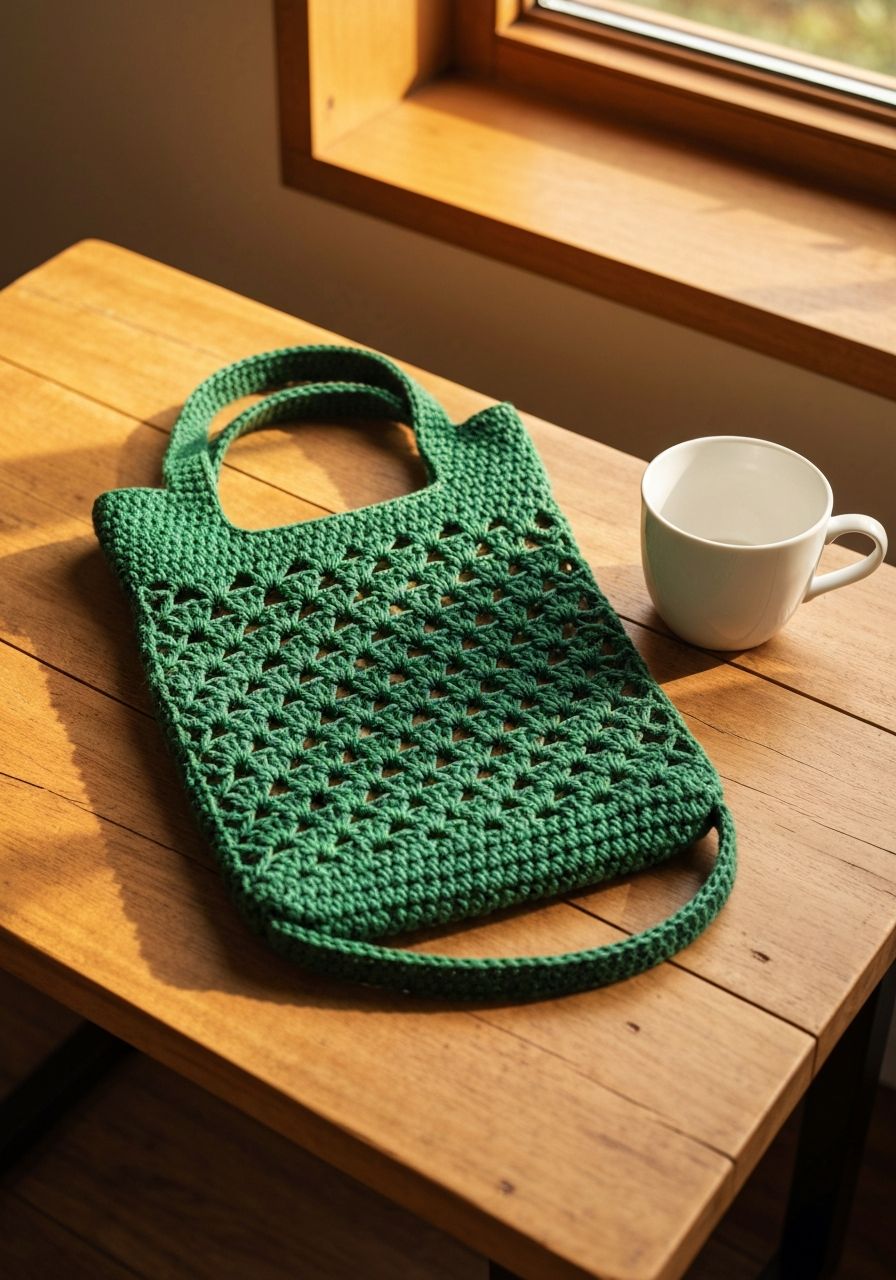
Imagine effortlessly crafting a tiny treasure that not only holds your essentials but also garners endless compliments. That’s the magic of the crochet mini tote! This adorable, versatile project is more than just a bag; it's a statement piece, a thoughtful gift, and a delightful way to explore your creativity. Get ready to fall in love with your hook all over again as we guide you through every stitch to create your very own charming mini tote!
Welcome, fellow yarn enthusiasts! Are you searching for a quick, satisfying crochet project that yields a practical and stylish result? Look no further! This comprehensive guide provides a free pattern for a charming mini tote, perfect for holding your keys, cards, lipstick, or even serving as a chic gift bag. Whether you're a seasoned crocheter looking for a palate cleanser project or a beginner ready to tackle your first bag, this pattern is designed to be accessible, engaging, and utterly rewarding.
Why You'll Love This Pattern
-
Instant Gratification: This mini tote works up quickly, often in just a few hours, making it perfect for when you need a speedy crochet fix or a last-minute gift.
-
Stash Buster Friendly: It uses a relatively small amount of yarn, making it ideal for using up those leftover skeins from larger projects. Say goodbye to yarn scraps!
-
Beginner-Friendly: Utilizing fundamental stitches like single crochet and half double crochet, this pattern is approachable for those new to crochet. Detailed instructions ensure a smooth crafting journey.
-
Incredibly Versatile: What can't a mini tote do? Use it as a cute coin purse, an earbud holder, a chic lipstick case, a small gift bag, or even a mini market bag for tiny treasures. The possibilities are endless!
-
Customizable: Easily adapt the colors, add embellishments like buttons or tassels, or even experiment with different yarn weights to personalize your creation.
Materials Needed
-
Yarn: Worsted weight (Category 4) cotton yarn. Approximately 70-80 yards (65-75 meters). Cotton is recommended for its durability and stitch definition. Choose your favorite color!
-
Crochet Hook: 4.0 mm (G-6 US) or size needed to obtain gauge.
-
Yarn Needle: For weaving in ends.
-
Scissors: For cutting yarn.
-
Stitch Markers (2-3): Highly recommended for marking rounds and handle placement, especially if working in continuous rounds.
Gauge & Sizing
Achieving the correct gauge is crucial for your mini tote to turn out the intended size. While not strictly necessary for a non-fitted item like a bag, it helps ensure your project doesn't end up too small or too large.
-
Gauge Swatch: 16 hdc x 12 rows = 4 inches (10 cm) square using a 4.0 mm hook.
-
Finished Size: Approximately 4.5 inches (11.5 cm) wide x 5 inches (12.5 cm) tall (excluding handles), with handles adding an additional 2.5 inches (6.5 cm) in height when extended.
If your swatch is larger than the gauge, try a smaller hook. If your swatch is smaller, try a larger hook. Don't skip this step for best results!
Abbreviations
-
ch: chain
-
sl st: slip stitch
-
sc: single crochet
-
hdc: half double crochet
-
inc: increase (2 sc or hdc in the same stitch)
-
st(s): stitch(es)
-
Rnd: Round
-
BLO: back loop only
Step-by-Step Pattern
This pattern is worked in the round. The base is worked by crocheting around a starting chain to create an oval. The body is then worked in continuous rounds of half double crochet for a seamless finish, with the handles integrated into the final rounds.
Base of the Mini Tote
-
Chain 11.
-
Rnd 1: Sc in 2nd ch from hook, sc in next 8 ch, 3 sc in last ch. Now working down the other side of the starting chain: sc in next 8 ch, 2 sc in the last ch (this is the same chain where you made your first sc). (22 sts)
-
Rnd 2: Inc (2 sc in first st), sc in next 8 sts, inc in next 3 sts, sc in next 8 sts, inc in next 2 sts. (28 sts)
-
Rnd 3: Sc in first st, inc in next st, sc in next 8 sts, (sc in next st, inc in next st) 3 times, sc in next 8 sts, (sc in next st, inc in next st) 2 times. (34 sts)
-
Sl st to the first sc of Rnd 3 to join. Ch 1. Your base should now be a neat oval.
Body of the Mini Tote
For a clean, defined edge and to help the bag stand up straight, we'll start the body with a round in the back loop only, then continue in continuous rounds for the rest of the body.
-
Rnd 4: Hdc in BLO in each st around. (34 hdc). Sl st to the first hdc to join. Ch 1. This creates a ridge that helps the bag stand upright. From this point, you will work in continuous rounds, so place a stitch marker in the first stitch of the next round.
-
Rnds 5-18: Hdc in each st around. (34 hdc). Continue working in continuous rounds, moving your stitch marker up with each round. (14 rounds total for this section)
Creating the Handles
The handles are integrated into the final rounds, forming a seamless and sturdy look.
-
Rnd 19: Hdc in first 6 sts, ch 12 (first handle chain), skip 5 sts, hdc in next 12 sts, ch 12 (second handle chain), skip 5 sts, hdc in next 6 sts. (24 hdc, 24 ch sts)
-
Rnd 20: Hdc in first 6 sts, then work 12 hdc around the ch-12 space (working over the chain itself), hdc in next 12 sts, work 12 hdc around the next ch-12 space, hdc in next 6 sts. (48 hdc)
-
Rnd 21: Sl st in each st around. This creates a neat, finished edge for the top of your tote and handles.
-
Fasten off, leaving a long tail for weaving in. Weave in all remaining ends securely with your yarn needle.
Pro Tips
-
Use Stitch Markers Generously: Especially when working in continuous rounds, a stitch marker in the first stitch of each round is invaluable for keeping track of your progress and stitch count.
-
Maintain Consistent Tension: Even tension is key for a neat, professional-looking finish. If your stitches are too loose, your bag might be floppy; too tight, and it might become stiff and smaller than intended.
-
Block Your Tote: For a more defined shape and to even out your stitches, consider wet blocking your finished mini tote. Gently wet the bag, reshape it, and let it air dry completely.
-
Experiment with Yarn: While cotton is recommended for durability, you can try other worsted weight yarns like acrylic for a softer feel or even a cotton blend for a different drape. Just be sure to check your gauge!
-
Add a Lining: For extra durability and to prevent small items from slipping through stitches, consider sewing a simple fabric lining for your mini tote. This is a great way to practice basic sewing skills!
Frequently Asked Questions
Can I make this mini tote larger or smaller?
Absolutely! To make it larger, increase the starting chain length and/or add more increase rounds to the base until you reach your desired width. Then, crochet more body rounds and adjust the handle chain length accordingly. For a smaller tote, you could start with a shorter chain and fewer base increase rounds, reducing the stitch count for the body and shortening the handle chains. Remember to adjust your stitch counts evenly.
What type of yarn is best for a mini tote?
Worsted weight (Category 4) cotton yarn is highly recommended for this project. Cotton provides excellent stitch definition, is durable, and holds its shape well, which is ideal for a bag. Blends with cotton are also a good choice. While acrylic yarn can be used, it might result in a softer, less structured bag.
How do I prevent my bag from leaning or becoming lopsided?
A leaning bag often indicates inconsistent tension. Try to keep your tension even throughout the project. Using a stitch marker to identify the first stitch of each round helps prevent accidental increases or decreases that can cause distortion. For a really sturdy base, ensure your base increases are evenly distributed. Blocking the finished bag can also help correct minor leaning and give it a more uniform shape.
And there you have it! Your very own charming crochet mini tote, ready to fill with tiny treasures or to give as a heartfelt, handmade gift. We hope you enjoyed creating this delightful piece as much as we enjoyed sharing the pattern with you. Don't be afraid to experiment with colors and embellishments to make it truly unique. Happy crocheting!