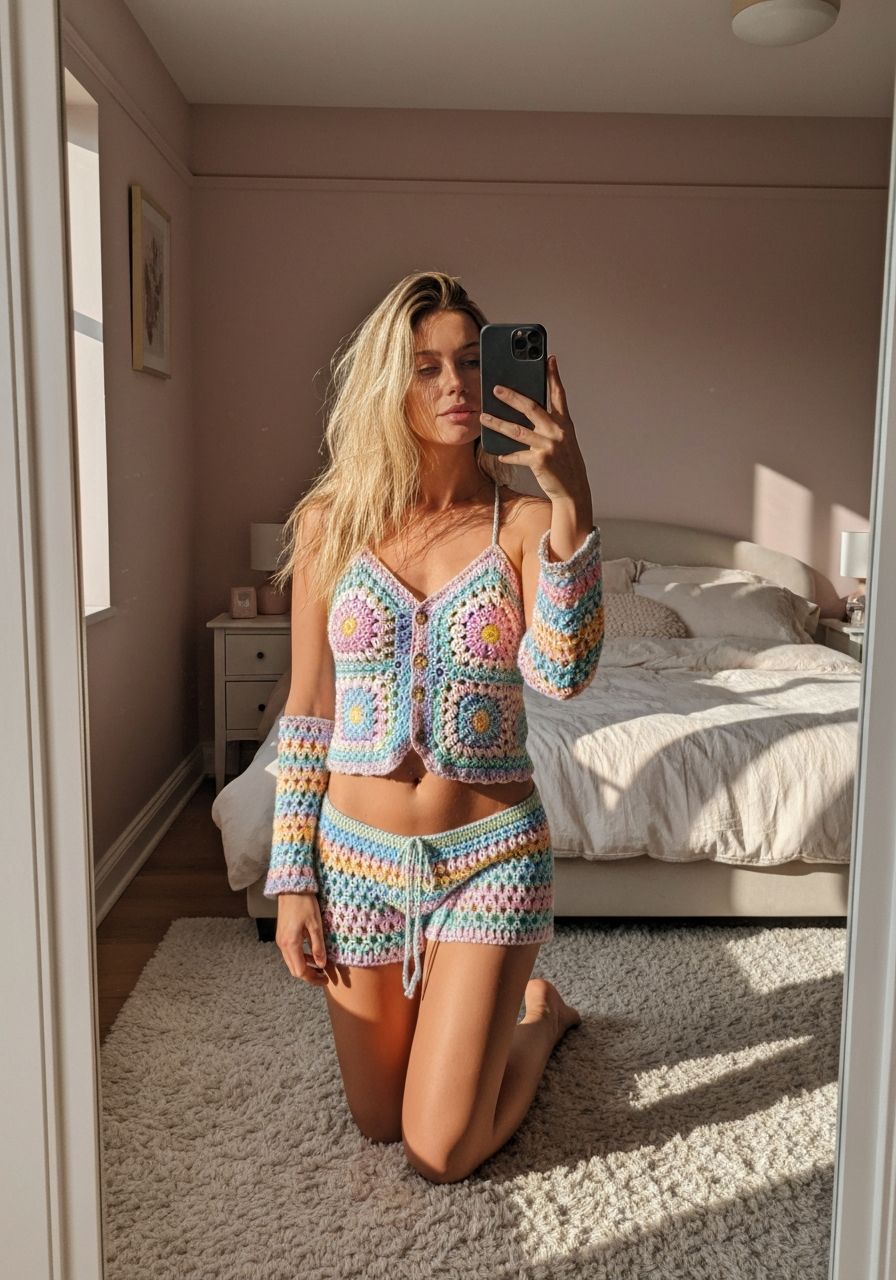
Imagine stepping out, sunshine on your skin, feeling utterly chic and confident in an outfit you crafted with your own hands. That dream is now a stitch away! This season, embrace the joy of creating something truly special with our gorgeous, free crochet matching set pattern. We're talking about a breezy, beautiful crop top paired with an adorable coordinating shoulder bag – the perfect ensemble to elevate your summer style or gift to a loved one. Get ready to fall in love with your hook all over again!
Why You'll Love This Pattern
This isn't just a pattern; it's an invitation to unleash your creativity and build a versatile wardrobe staple. The "Summer Bloom Set," featuring a charming crop top and a practical mini shoulder bag, offers so much to love:
- Versatility at Its Best: Wear the top with high-waisted shorts, skirts, or jeans. Pair the bag with any outfit for a pop of handmade charm. Or, rock them together for a cohesive, head-to-toe handmade look that's sure to turn heads.
- Customization Heaven: The simple yet elegant design is a blank canvas for your color palette. Go bold with vibrant hues, subtle with pastels, or classic with neutrals. Experiment with different yarn fibers for varied textures and drape.
- Skill-Building Project: While designed to be accessible for intermediate crocheters, this pattern introduces you to various techniques like working in rows, working in the round, shaping, and strap construction. It’s a rewarding way to expand your crochet repertoire.
- Quick Gratification: Both pieces work up relatively quickly, especially the bag, offering that satisfying feeling of a finished project without weeks of commitment.
- Gift-Worthy: Hand-crocheted gifts are always cherished. This matching set makes a thoughtful and unique present for birthdays, holidays, or just because.
Materials Needed
- Yarn: DK (weight 3) Cotton Yarn. Approximately 400-500 yards for the top (depending on size) and 150-200 yards for the bag. I used a blend of white and a dusty rose pink.
- Crochet Hook: 4.0 mm (G/6)
- Stitch Markers: Essential for tracking rows and increases/decreases
- Tapestry Needle: For weaving in ends
- Scissors: For cutting yarn
- (Optional for Bag): 1 button (approx. 0.75-1 inch diameter) or a magnetic snap closure
Gauge & Sizing
Achieving the correct gauge is crucial, especially for the crop top, to ensure your finished garment fits as intended. Take the time to make a swatch!
Gauge: 16 HDC x 12 rows = 4 inches (10 cm) using a 4.0 mm hook.
To check your gauge, chain 18. HDC in the 2nd chain from hook and across (17 HDC). Chain 1, turn. Repeat for 13 rows. Measure the center 4x4 inch square. If your swatch is too small, try a larger hook. If it's too large, try a smaller hook.
Sizing for Crop Top:
- Small (S): Bust 32-34 inches
- Medium (M): Bust 36-38 inches
- Large (L): Bust 40-42 inches
- Extra Large (XL): Bust 44-46 inches
Instructions will be written for size S with M, L, XL in parentheses (S, M, L, XL). For example, "Chain 60 (68, 76, 84)" means chain 60 for Small, 68 for Medium, 76 for Large, and 84 for Extra Large.
Abbreviations
- ch: chain
- sl st: slip stitch
- sc: single crochet
- hdc: half double crochet
- dc: double crochet
- inc: increase (2 stitches in the same stitch)
- dec: decrease (crochet 2 stitches together)
- st(s): stitch(es)
- rep: repeat
- RS: right side
- WS: wrong side
- FO: fasten off
Step-by-Step Pattern
Part 1: The 'Summer Bloom' Crop Top
This top is worked in two identical panels (front and back), then seamed together. The straps and bottom edging are added last.
Front & Back Panel (Make 2 - in main color, e.g., white)
- Row 1 (RS): Ch 60 (68, 76, 84). Hdc in 2nd ch from hook and in each ch across. (59, 67, 75, 83 hdc). Ch 1, turn.
- Row 2: Hdc in each st across. (59, 67, 75, 83 hdc). Ch 1, turn.
- Rows 3-10 (12, 14, 16): Repeat Row 2. (You should have a rectangular panel).
- Shape Armholes:
- Row 11 (13, 15, 17): Sl st 3 (4, 5, 6), ch 1. Hdc in next st and in each st until 3 (4, 5, 6) sts remain. Leave remaining sts unworked. (53, 59, 65, 71 hdc). Ch 1, turn.
- Row 12 (14, 16, 18): Hdc in each st across. (53, 59, 65, 71 hdc). Ch 1, turn.
- Rows 13-20 (15-22, 17-24, 19-26): Repeat Row 12. (Work until armhole measures approximately 6 (6.5, 7, 7.5) inches from the start of armhole shaping).
- Shape Neckline (Front Panel ONLY):
- Next Row (RS): Hdc in first 17 (19, 21, 23) sts. (Shoulder 1). Ch 1, turn.
- Next 2 Rows: Hdc in each st across. (17, 19, 21, 23 hdc). FO.
- Reattach yarn to the other side of the neckline, skipping the middle 19 (21, 23, 25) sts.
- Next Row (RS): Hdc in next 17 (19, 21, 23) sts. (Shoulder 2). Ch 1, turn.
- Next 2 Rows: Hdc in each st across. (17, 19, 21, 23 hdc). FO.
- For Back Panel: Continue working straight for 3 more rows after armhole shaping. (Total of 23 (25, 27, 29) rows after armhole shaping). This creates a higher back neckline. FO.
Assembly
- Place front and back panels with RS facing each other.
- Seam shoulders: Using sl st or tapestry needle, join the shoulder sts of the front panel to the shoulder sts of the back panel.
- Seam sides: Join side seams from the bottom edge up to the armhole shaping, leaving armholes open. FO.
Straps (Make 2 - in accent color, e.g., pink)
- Ch 5. Sc in 2nd ch from hook and in next 3 chs. (4 sc). Ch 1, turn.
- Sc in each st across. (4 sc). Ch 1, turn.
- Repeat Row 2 until strap measures approximately 14 (15, 16, 17) inches, or desired length. FO.
- Attach straps to the front and back of the top using a tapestry needle, ensuring even placement.
Bottom Edging (in accent color)
- Join yarn with a sl st to any st along the bottom edge of the top.
- Round 1: Ch 1. Sc evenly around the entire bottom edge of the top. Sl st to first sc to join.
- Round 2: Ch 2 (does not count as st). Dc in each sc around. Sl st to first dc to join.
- FO and weave in ends.
Part 2: The 'Daisy Chain' Shoulder Bag
This bag is constructed by first creating a flat base, then working the body in the round, adding a flap, and finally the strap.
Base (in main color, e.g., white)
- Ch 21.
- Round 1: Sc in 2nd ch from hook. Sc in next 18 chs. 3 sc in last ch. Working along the other side of the foundation chain: Sc in next 18 chs. 2 sc in last ch. Sl st to first sc to join. (42 sc).
- Round 2: Ch 1. Sc in first st. [Inc, sc in next 18 sts, inc] twice. Sc in next st. Sl st to first sc to join. (46 sc).
- Round 3: Ch 1. Sc in first 2 sts. [Inc, sc in next 19 sts, inc] twice. Sc in next st. Sl st to first sc to join. (50 sc).
- Round 4: Ch 1. Sc in first 3 sts. [Inc, sc in next 20 sts, inc] twice. Sc in next st. Sl st to first sc to join. (54 sc).
Body of Bag (in main color)
- Round 5: Ch 1. Working in the back loops only (BLO) for this round, sc in each st around. Sl st to first sc to join. (54 sc). (This creates a nice defined edge for the base).
- Round 6: Ch 1. Sc in each st around. Sl st to first sc to join. (54 sc).
- Rounds 7-18: Repeat Round 6. (Total of 14 rounds for the body).
- FO.
Flap (in accent color, e.g., pink)
- Count 12 sts in from one side of the back of the bag (or center it as desired). Join yarn with a sl st in that st.
- Row 1 (RS): Ch 1. Sc in same st and in next 29 sts. (30 sc). Ch 1, turn.
- Row 2: Sc in each st across. (30 sc). Ch 1, turn.
- Rows 3-8: Repeat Row 2.
- Row 9 (Buttonhole Row - if adding a button): Sc in first 14 sts. Ch 2, skip 2 sts. Sc in next 14 sts. (28 sc, 2 ch). Ch 1, turn. (Adjust ch/skip count for your button size)
- Row 10: Sc in each st and in each ch-sp across. (30 sc). Ch 1, turn.
- Rows 11-12: Sc in each st across. (30 sc). FO.
- Attach button to the front of the bag, aligning with the buttonhole. If using a magnetic snap, sew it on now.
Strap (in accent color)
- Ch 5. Sc in 2nd ch from hook and in next 3 chs. (4 sc). Ch 1, turn.
- Sc in each st across. (4 sc). Ch 1, turn.
- Repeat Row 2 until strap measures approximately 45-50 inches, or desired length for a crossbody/shoulder bag.
- FO, leaving a long tail for sewing.
- Attach one end of the strap to each side of the bag, securely sewing it to the top edges where the flap begins.
Pro Tips for Success
- Check Your Gauge Religiously: We can't stress this enough! It's the key to ensuring your top fits correctly and your bag isn't too large or small.
- Use Stitch Markers: Especially when working in the round for the bag base or counting rows for the top, stitch markers are your best friend for accuracy.
- Block Your Pieces: Blocking your finished crochet items (especially the top) can make a huge difference in the drape, evening out stitches, and giving it a professional, polished look.
- Weave in Ends as You Go: This saves you a big task at the end and keeps your project looking tidy.
- Don't Be Afraid to Experiment: Once you've made the pattern as written, feel free to play with color changes, add decorative stitches, or incorporate embellishments to truly make it your own!
Frequently Asked Questions
Can I use a different yarn weight for this crochet matching set?
Yes, you can, but be prepared for significant adjustments. Using a chunkier yarn (e.g., worsted weight) will result in a larger garment and bag, and you'll likely need to use a larger hook and fewer stitches/rows. Conversely, a finer yarn (e.g., fingering weight) will make the items smaller, requiring more stitches/rows and a smaller hook. Always re-check your gauge and adjust your foundation chain and row counts accordingly to achieve the desired dimensions.
How do I adjust the top for a longer length?
To make the crop top longer, simply add more rows to the main body panels before you start the armhole shaping. For example, if the pattern calls for 10 (12, 14, 16) rows, you might add an extra 4-6 rows to achieve a tunic length. Remember that adding length will increase your yarn requirements.
Is this pattern suitable for beginners?
While an adventurous beginner could tackle the bag, the top involves shaping for armholes and necklines, which makes it more suited for intermediate crocheters. If you're a beginner, make sure you're comfortable with basic stitches (ch, sc, hdc, sl st) and reading patterns before diving in. Don't hesitate to consult video tutorials for specific techniques if needed!
There's an undeniable magic in creating something beautiful and functional with your own hands. This crochet matching set is more than just a pattern; it's a project that promises enjoyment, skill development, and a stunning addition to your wardrobe. We can't wait to see your unique creations – be sure to share them with us!