Imagine the satisfying click of your hook, the soft yarn gliding through your fingers, and the joy of watching a beautiful fabric grow row by row, created entirely by your own hands. If you’re a left-handed crafter, you might have felt a pang of frustration trying to follow right-handed tutorials, but today, that changes! Welcome to the ultimate guide to left-handed crochet, where we'll unravel the mysteries, demystify the techniques, and empower you to confidently create stunning pieces, turning every stitch into a step towards your next handmade masterpiece.
Crochet is a wonderfully versatile craft that allows you to create everything from cozy blankets and stylish garments to intricate amigurumi and delicate lace. While most online tutorials and published patterns are geared towards right-handed crocheters, learning to crochet as a left-hander is not only possible but incredibly rewarding. This guide is specifically designed to address the unique perspective of left-handed beginners, providing clear, mirrored instructions to get you started on your creative journey without the usual struggle of 'translating' right-handed lessons.
Why It Matters: Embracing Your Left-Handed Advantage
For too long, left-handed crafters have been told to either 'learn right-handed' or simply 'mirror' everything, often without clear guidance. This can lead to frustration, slow progress, and even giving up on a potentially beloved hobby. But here's the truth: learning to crochet with your dominant left hand is not a disadvantage; it's simply a different approach. By embracing your natural handedness, you'll find the movements feel more intuitive, your tension more consistent, and your overall experience more enjoyable. This guide aims to validate and facilitate that natural approach, ensuring your introduction to crochet is as smooth and successful as possible.
When you crochet left-handed, you are creating fabric in the same direction as a right-handed crocheter (usually from right to left across the row, or counter-clockwise in the round), but your dominant hand handles the hook and forms the stitches. This means the visual representation of stitches and the method of holding your tools will be tailored to you, removing the guesswork and allowing you to focus purely on the joy of learning.
What You Need to Know Before You Start
Before diving into your first stitches, let's cover some fundamental concepts and gather your essential tools. Don't worry, the list is short and sweet!
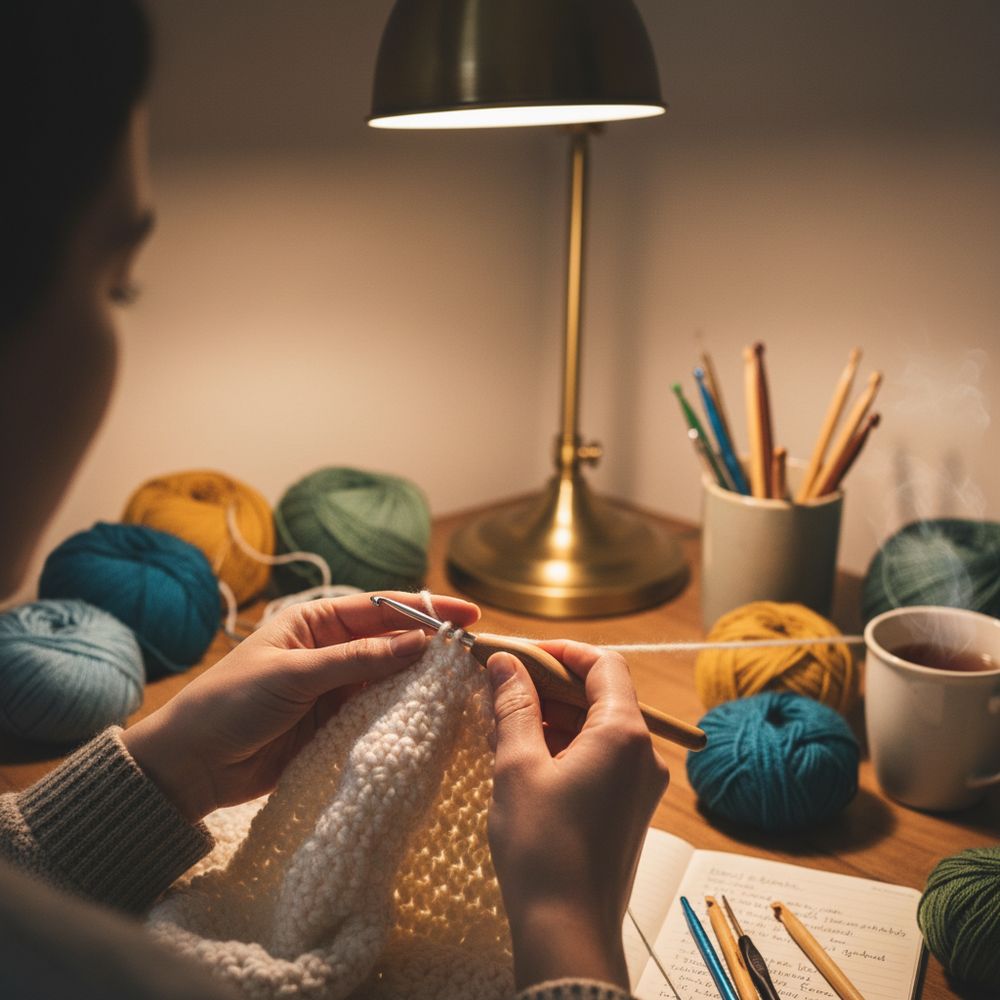
- Yarn: Start with a smooth, light-colored worsted weight (medium #4) yarn. Acrylic or cotton blends are excellent choices as they are easy to work with and show stitch definition clearly. Avoid dark colors, fuzzy, or very thin yarns for your first projects.
- Crochet Hook: For worsted weight yarn, a size H-8 (5.0 mm) or I-9 (5.5 mm) hook is typically recommended. Choose a hook that feels comfortable in your left hand. Hooks come in various materials (aluminum, plastic, wood) – experiment to find your preference.
- Scissors: For cutting yarn tails.
- Yarn Needle/Tapestry Needle: A blunt needle with a large eye for weaving in yarn ends.
Holding the Yarn and Hook
The way you hold your yarn and hook is crucial for consistent tension and comfort. As a left-handed crocheter, your left hand is the primary tool, holding and manipulating the hook, while your right hand manages the yarn tension.
- Hook Hold: Most left-handed crocheters find either the 'pencil grip' (holding the hook like a pencil) or the 'knife grip' (holding it like a knife) comfortable. Experiment to see which feels more natural for you. The hook's 'throat' (the curved part) should generally face you or slightly upward.
- Yarn Hold: Drape the working yarn (the strand coming from the skein) over your right index finger. You can weave it through other fingers (e.g., under your pinky, over your ring finger, under your middle finger, and over your index finger) to create consistent tension. Your right hand will gently control the flow of yarn, ensuring it feeds smoothly to your hook without being too loose or too tight.
Understanding Mirroring
When you see a right-handed tutorial, simply imagine it as a reflection. If a right-hander works from right to left, you'll still work from right to left. If they insert their hook from front to back, you will too. The key is that the *actions* are the same, but the *hand doing the action* is your dominant left hand, and the *yarn-holding hand* is your non-dominant right hand. Don't flip the pattern instructions (e.g., turning left into right), just flip the hands performing the actions.
Your First Stitches: A Left-Handed Journey
Let's get started with the foundational stitches that form the building blocks of almost every crochet project. Practice each one until you feel comfortable and consistent.
The Slip Knot
This is the starting point for most crochet projects. It creates the first loop on your hook.
- Take the working yarn and make a loop, ensuring the tail end is underneath the working yarn.
- Insert your hook into the loop from front to back.
- Catch the working yarn with your hook and pull it through the loop.
- Gently pull both the working yarn and the tail end to tighten the knot around your hook, but not so tight that it can't slide easily.
The Chain Stitch (ch)
Chain stitches form your foundation row, from which all other stitches grow.
- Hold the hook in your left hand, with the slip knot on the hook.
- Wrap the working yarn from back to front over the hook (yarn over or yo) with your right hand.
- Use the hook to catch the wrapped yarn and draw it through the loop already on your hook.
- One chain stitch is made. Repeat steps 2-3 to create a chain of desired length (e.g., practice making 15-20 chains).
Single Crochet (sc)
The single crochet is one of the most basic and common stitches, creating a dense fabric.
- Start with a chain (e.g., 10 ch).
- Insert your hook into the second chain from the hook (skip the first chain).
- Yarn over (yo) with your right hand and draw a loop through the chain stitch (you now have 2 loops on your hook).
- Yo again and draw the yarn through both loops on your hook.
- One single crochet is made. Repeat across the row, inserting your hook into the next chain stitch each time.
- To start a new row: Chain 1 (ch 1), then turn your work (flip it over). The ch 1 does not count as a stitch; it simply gives you height for the next row of single crochets.
- Insert your hook into the first stitch of the previous row (under both loops of the 'V' shape). Repeat steps 3-4 across the row.
Half Double Crochet (hdc)
Slightly taller than a single crochet, the half double crochet offers a bit more drape.
- Start with a chain (e.g., 10 ch).
- Yarn over (yo) with your right hand.
- Insert your hook into the third chain from the hook.
- Yo and draw a loop through the chain stitch (3 loops on hook).
- Yo and draw the yarn through all three loops on your hook.
- One half double crochet is made. Repeat across the row.
- To start a new row: Chain 2 (ch 2), then turn your work. The ch 2 usually counts as a stitch.
- Yo, then insert your hook into the next stitch (or the first stitch if ch 2 doesn't count as a stitch). Repeat steps 4-5 across the row.
Double Crochet (dc)
The double crochet is a taller stitch, creating a looser fabric with more drape and speed.
- Start with a chain (e.g., 10 ch).
- Yarn over (yo) with your right hand.
- Insert your hook into the fourth chain from the hook.
- Yo and draw a loop through the chain stitch (3 loops on hook).
- Yo and draw through the first two loops on your hook (2 loops remaining).
- Yo again and draw through the remaining two loops on your hook.
- One double crochet is made. Repeat across the row.
- To start a new row: Chain 3 (ch 3), then turn your work. The ch 3 usually counts as a stitch.
- Yo, then insert your hook into the next stitch (or the first stitch if ch 3 doesn't count as a stitch). Repeat steps 4-6 across the row.
Slip Stitch (sl st)
A slip stitch is the smallest crochet stitch, used for joining, moving across a row invisibly, or finishing. It doesn't add height to your work.
- Insert your hook into the desired stitch.
- Yarn over (yo) with your right hand.
- Draw the yarn through the stitch AND directly through the loop already on your hook in one smooth motion.
Increase (inc) and Decrease (dec)
These techniques allow you to shape your crochet fabric, making it wider or narrower.
- Increase (inc): To increase, simply work two or more stitches into the same stitch. For example, '2 sc in next st' means you make two single crochet stitches into the very next stitch. This adds a stitch to your row.
- Decrease (dec): To decrease, you work two or more stitches together to form a single stitch. For example, 'sc2tog' (single crochet two together) is a common decrease. You would start a single crochet in one stitch, but before completing it, you start another single crochet in the next stitch, then complete both together as one. This removes a stitch from your row.
Magic Ring (Magic Circle/Adjustable Ring)
The magic ring is ideal for starting projects worked in the round (like amigurumi) as it creates a tightly closed center hole.
- Drape the yarn over the palm of your right hand, with the tail hanging down. Wrap the yarn around your index and middle fingers of your right hand, crossing over the working yarn to form an 'X'.
- Insert your hook under the first strand of yarn on your right-hand fingers, then catch the second strand with your hook.
- Pull the second strand through to form a loop on your hook.
- Chain 1 (ch 1) to secure the loop. This ch 1 usually does not count as a stitch.
- Now, work your desired number of stitches (e.g., 6 sc) into the ring you've created on your fingers. Make sure your hook goes under both strands of the ring.
- Once stitches are made, pull the yarn tail tightly to close the center hole, gathering your stitches into a circle.
- Join with a slip stitch to the first stitch to close the round.
Common Mistakes to Avoid
Everyone makes mistakes when learning, but being aware of common pitfalls can help you avoid unnecessary frustration.
- Inconsistent Tension: Your fabric might look lumpy or uneven. This is very common! Practice is key. Your yarn-holding hand needs to feed the yarn consistently.
- Skipping Stitches or Adding Extra: This leads to uneven edges or a widening/narrowing project. Always count your stitches at the end of each row or round, especially when starting out. Stitch markers can be incredibly helpful.
- Working into the Wrong Part of the Stitch: Beginners sometimes work into only one loop of a stitch instead of both, or miss the first/last stitch of a row. Ensure you're inserting your hook under both loops of the 'V' unless the pattern specifies otherwise.
- Too Tight or Too Loose Slip Knots/Chains: If your slip knot is too tight, it will be hard to work into. If your chain is too tight, it will be difficult to insert your hook into for the next row. Practice making a foundation chain that is firm but flexible.
Pro Tips for Left-Handed Crocheters
- Use a Mirror: When watching right-handed video tutorials, sit in front of a mirror and watch your reflection. This effectively 'flips' the instruction, making it easier to follow along with your left hand.
- Slow Down: Don't rush! Crochet is a mindful craft. Take your time with each stitch, focusing on the mechanics. Speed will come with practice.
- Practice Swatches: Before starting a big project, make small squares (swatches) to practice new stitches. This helps you get a feel for the yarn, hook, and stitch without the pressure of a finished item.
- Invest in Good Lighting: Good lighting reduces eye strain and makes it easier to see your stitches, especially with darker yarns.
- Don't Be Afraid to Undo: 'Frogging' (pulling out your work) is a natural part of crochet. It's better to undo a few rows to correct a mistake than to continue with something you're not happy with.
- Join Left-Handed Communities: Look for online groups or forums specifically for left-handed crocheters. They can offer invaluable support, tips, and a sense of community.
Left-Handed Crochet FAQ
Is it harder to crochet left-handed?
No, it's not inherently harder! It's simply different from the majority of published instructions. Once you learn the correct left-handed movements and understand how to 'mirror' right-handed instructions, it feels just as natural and easy as for a right-handed person. The challenge often comes from finding clear left-handed resources, which this guide aims to provide.
Can I use right-handed patterns?
Absolutely! All crochet patterns are written using universal stitch abbreviations (ch, sc, dc, etc.). As a left-handed crocheter, you simply perform those stitches with your left hand. The direction of work (right to left for rows, counter-clockwise for rounds) remains the same. The only time you might need to adapt is for complex stitch patterns where directionality is crucial, or if you're watching a right-handed video and need to visually 'flip' it.
How do I find left-handed patterns specifically?
While most patterns don't specify handedness, many designers and bloggers now offer left-handed video tutorials in addition to their written patterns. Search YouTube or Pinterest for 'left-handed crochet tutorial' for specific stitches or projects. You'll find a growing community eager to help!
Congratulations, you've taken the first big step into the wonderful world of crochet! As a left-handed crafter, you now have the tools and knowledge to confidently approach your first projects. Remember, every master was once a beginner. Be patient with yourself, celebrate every stitch you learn, and most importantly, enjoy the process. Pick up your hook, choose your favorite yarn, and let your left hand guide you to creating beautiful, handmade treasures. Happy crocheting!