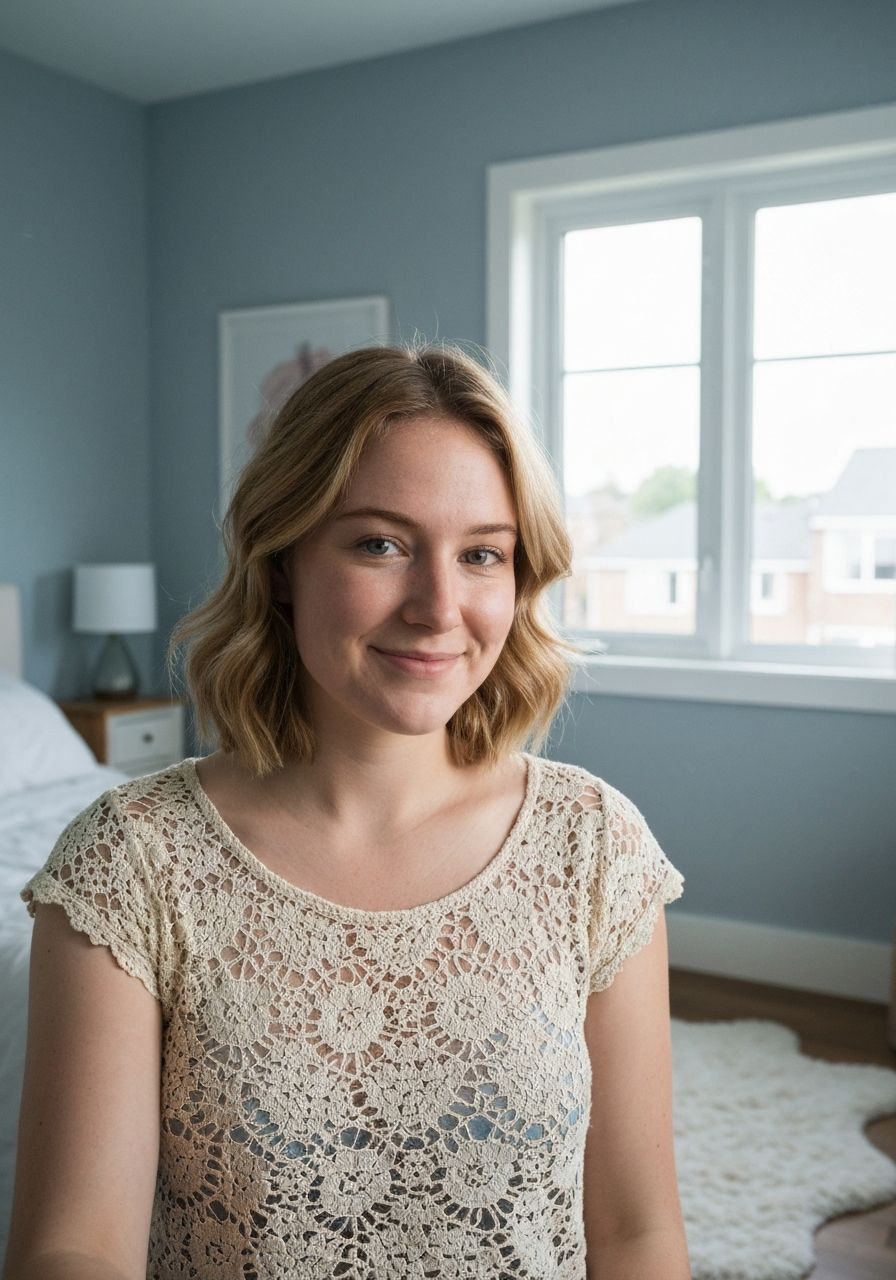
Imagine stepping out on a warm day, feeling the gentle breeze through a beautifully handcrafted top that perfectly blends elegance with comfort. You’re not just wearing a garment; you’re wearing a piece of art, made by your own hands, that embodies effortless style and a touch of personal magic. This summer, elevate your wardrobe with our stunning, easy-to-follow pattern for a gorgeous Crochet Lace Top – a project that promises not only a stunning finished piece but also a deeply satisfying creative journey. Get ready to fall in love with your hook all over again!
Welcome to your next favorite crochet project! This article will guide you through creating a beautiful, lightweight lace top perfect for spring and summer. Whether you're dressing it up for a special occasion or keeping it casual for a beach day, this versatile top will quickly become a staple in your handmade wardrobe. We’ve designed this pattern to be accessible for intermediate crocheters and adventurous beginners, focusing on clear instructions and a simple, elegant stitch repeat that yields stunning results.
Why You'll Love This Pattern
- Effortlessly Chic: The delicate lace design adds a touch of sophistication to any outfit, perfect for both casual and dressy occasions.
- Perfect for All Seasons: While ideal for summer, layered over a camisole, it transitions beautifully into cooler weather.
- Beginner-Friendly Lace: Our chosen lace stitch is a simple two-row repeat, making it easy to memorize and master, even if you're new to lace crochet.
- Customizable Fit: Instructions are provided for multiple sizes, and tips are included on how to adjust length and fit to perfectly suit your body.
- Quick to Make: Using a lightweight yarn and simple construction, you'll be amazed at how quickly this top comes together, making it an ideal weekend project.
- Skill-Building: Practice essential techniques like working in rows, shaping, and seaming while creating a wearable piece you'll be proud to show off.
Materials Needed
- Yarn: DK weight (Category 3) cotton or cotton blend yarn. Approximately 800-1200 yards, depending on size and desired length. We recommend a mercerized cotton for beautiful stitch definition and drape. (Sample shown in Lion Brand Comfy Cotton Blend)
- Crochet Hook: 4.0 mm (G/6) or size needed to obtain gauge.
- Stitch Markers: A few to mark key stitches or rows.
- Tapestry Needle: For weaving in ends and seaming.
- Scissors: For cutting yarn.
- Measuring Tape: Essential for checking gauge and sizing.
Gauge & Sizing
Achieving the correct gauge is crucial for your top to fit as intended. Please take the time to make a gauge swatch before you begin.
Gauge Swatch Instructions: Ch 22. Work in dc for 10 rows. Measure the center 4 inches. You should have 18 dc and 10 rows = 4 inches (10 cm).
If your swatch is too small, try a larger hook. If it's too large, try a smaller hook. If your row gauge is off, your top might be too short or too long. Adjust hook size or add/subtract rows as needed.
Finished Bust Circumference (approximate, before blocking):
- S: 32-34 inches (81-86 cm)
- M: 36-38 inches (91-96 cm)
- L: 40-42 inches (101-106 cm)
- XL: 44-46 inches (111-117 cm)
- 2X: 48-50 inches (122-127 cm)
- 3X: 52-54 inches (132-137 cm)
The pattern is written for size M, with instructions for other sizes in parentheses (S, L, XL, 2X, 3X).
Abbreviations
- ch: chain
- sl st: slip stitch
- sc: single crochet
- hdc: half double crochet
- dc: double crochet
- sk: skip
- st(s): stitch(es)
- sp: space
- rep: repeat
- RS: Right Side
- WS: Wrong Side
- V-st: (dc, ch 1, dc) in indicated stitch/space
Step-by-Step Pattern
This top is constructed from two identical panels (front and back), worked from the bottom up. They are then seamed at the shoulders and sides. A final trim is added around the neckline and armholes.
Main Lace Stitch Pattern (MLSP)
Worked over a multiple of 3 + 2 stitches.
- Row 1 (RS): Ch 3 (counts as 1st dc here and throughout), dc in first st. *Sk 2 sts, V-st in next st; rep from * across, ending with dc in last st. Turn.
- Row 2 (WS): Ch 3, dc in first dc. *V-st in ch-1 sp of next V-st; rep from * across, ending with dc in top of starting ch-3. Turn.
Repeat Row 2 for the remainder of the MLSP.
Front Panel
- Starting Chain: Ch 74 (80, 86, 92, 98, 104).
- Row 1 (Set-up Row - RS): Dc in 4th ch from hook (sk chs count as 1st dc). Dc in each remaining ch across. You should have 72 (78, 84, 90, 96, 102) dc. Turn.
- Row 2 (WS): Ch 1, sc in each dc across. Turn. (72 (78, 84, 90, 96, 102) sc)
- Row 3 (RS): Ch 1, sc in each sc across. Turn. (72 (78, 84, 90, 96, 102) sc)
- Begin Lace Pattern: The stitch count for the MLSP requires a multiple of 3 + 2. Your current stitch count of 72 (78, 84, 90, 96, 102) is a multiple of 3. We will adjust in the first MLSP row to achieve the correct count.
- MLSP Row 1 (RS): Ch 3, dc in first sc. *Sk 2 sc, V-st in next sc; rep from * across, ending with dc in last sc. You will have 24 (26, 28, 30, 32, 34) V-sts and 2 dc. Turn.
- MLSP Row 2 (WS): Ch 3, dc in first dc. *V-st in ch-1 sp of next V-st; rep from * across, ending with dc in top of starting ch-3. Turn.
- Repeat MLSP Row 2: Continue repeating MLSP Row 2 until piece measures approximately 14 (14.5, 15, 15.5, 16, 16.5) inches from the bottom edge, or desired length before armholes. End on a WS row.
- Shape Armholes:
- Next Row (RS): Sl st in first dc, sl st into first ch-1 sp, sl st in next dc (this creates a clean edge and skips the first V-st). Ch 3, dc in same ch-1 sp. Continue MLSP across until you reach the last V-st. Sk last V-st and last dc. Turn. (You have decreased by 2 V-sts).
- Next Row (WS): Ch 3, dc in first dc. Continue MLSP across until you reach the last V-st. Sk last V-st and last dc. Turn.
- Repeat the last row 0 (0, 1, 1, 2, 2) more times.
- Continue Straight for Armhole: Continue MLSP (repeating MLSP Row 2) until armhole measures approximately 7 (7.5, 8, 8.5, 9, 9.5) inches from the start of armhole shaping. End on a WS row.
- Shape Neckline (Front):
- Next Row (RS - Right Shoulder): Ch 3, dc in first dc. Work MLSP across 9 (10, 10, 11, 11, 12) V-sts. Make 1 dc in the ch-1 sp of the last V-st, 1 dc in the dc of the last V-st. Turn. (This forms the V-neck edge).
- Next Row (WS): Ch 3, dc in first dc. Work MLSP across, ending with dc in top of starting ch-3. Turn.
- Repeat previous row 1 (1, 2, 2, 3, 3) more times. Fasten off.
- Next Row (RS - Left Shoulder): Sk the center 4 (4, 4, 4, 4, 4) V-sts of the panel. Join yarn with a sl st in the ch-1 sp of the next V-st. Ch 3, dc in same ch-1 sp. Continue MLSP across, ending with dc in top of starting ch-3. Turn.
- Next Row (WS): Ch 3, dc in first dc. Work MLSP across, ending with dc in top of starting ch-3. Turn.
- Repeat previous row 1 (1, 2, 2, 3, 3) more times. Fasten off.
For all sizes:
You should now have 22 (24, 24, 26, 26, 28) V-sts remaining.
This section will create the V-neck.
Back Panel
Follow steps 1-8 of the Front Panel exactly. The back neckline is less deep than the front.
- Shape Armholes: Same as Front Panel steps 9a-c.
- Continue Straight for Armhole: Continue MLSP (repeating MLSP Row 2) until armhole measures approximately 9 (9.5, 10, 10.5, 11, 11.5) inches from the start of armhole shaping. End on a WS row.
- Shape Neckline (Back):
- Next Row (RS - Right Shoulder): Ch 3, dc in first dc. Work MLSP across 9 (10, 10, 11, 11, 12) V-sts. Make 1 dc in the ch-1 sp of the last V-st, 1 dc in the dc of the last V-st. Turn.
- Next Row (WS): Ch 3, dc in first dc. Work MLSP across, ending with dc in top of starting ch-3. Turn. Fasten off.
- Next Row (RS - Left Shoulder): Sk the center 4 (4, 4, 4, 4, 4) V-sts of the panel. Join yarn with a sl st in the ch-1 sp of the next V-st. Ch 3, dc in same ch-1 sp. Continue MLSP across, ending with dc in top of starting ch-3. Turn.
- Next Row (WS): Ch 3, dc in first dc. Work MLSP across, ending with dc in top of starting ch-3. Turn. Fasten off.
Finishing & Assembly
- Seam Shoulders: With WS facing, align the shoulder edges of the front and back panels. Using a tapestry needle and yarn, seam the shoulder edges together using your preferred method (e.g., whip stitch, mattress stitch).
- Seam Sides: With WS facing, align the side edges of the front and back panels, matching rows. Seam from the bottom edge up to the armhole shaping, leaving the armholes open.
- Neckline Trim: Join yarn with a sl st at the back of the neckline. Ch 1, sc evenly around the entire neckline opening. Aim for 1 sc per dc and 2-3 sc per V-st edge. Sl st to first sc to join. Fasten off.
- Armhole Trim: Join yarn with a sl st at the bottom of an armhole. Ch 1, sc evenly around the entire armhole opening. Sl st to first sc to join. Fasten off. Repeat for the second armhole.
- Weave in Ends: Securely weave in all loose ends with your tapestry needle.
- Blocking (Optional but Recommended): Gently wet your finished top, reshape it to the desired dimensions, and pin it to a blocking mat. Allow it to air dry completely. Blocking opens up the lace pattern beautifully and evens out your stitches.
Pro Tips for Success
- Yarn Choice Matters: For a breathable summer top, cotton or a cotton blend is ideal. Avoid heavy acrylics as they can feel too warm and may not drape as nicely with this lace pattern.
- Check Your Gauge: We can't stress this enough! Even a slight difference in tension can drastically alter the final size of your garment.
- Use Stitch Markers: Place markers at the beginning of rows or at specific stitch counts, especially when shaping, to help keep track and prevent errors.
- Read Ahead: Always read the instructions for the next row or section before you start crocheting it. This helps you anticipate changes and understand the construction.
- Take Breaks: If your hands or eyes get tired, take a break! Crochet should be enjoyable, not a chore.
- Customize Length: If you prefer a longer or cropped top, simply add or subtract repeats of MLSP Row 2 before starting the armhole shaping. Remember to adjust yarn requirements accordingly.
Frequently Asked Questions
Q: Can I use a different yarn weight for this pattern?
A: Yes, you can! However, be aware that changing yarn weight will significantly alter your gauge and therefore the finished size of your top. If you choose a different weight (e.g., fingering or worsted), you will need to adjust your hook size to achieve a fabric you like, and then recalculate your starting chain and stitch counts based on your new gauge to match the desired bust circumference. Always swatch!
Q: Is this pattern suitable for an adventurous beginner?
A: Absolutely! While it involves basic stitches and shaping, the lace pattern itself is a simple two-row repeat, making it easy to learn. The construction is straightforward (two panels seamed), and the step-by-step instructions are detailed. If you're comfortable with dc, ch, and sc, you're ready for this!
Q: How can I make the neckline higher or lower?
A: To make the neckline higher, you can start the V-neck shaping a few rows later on the front panel, or decrease fewer stitches for the V. To make it lower, start the V-neck shaping earlier. For the back panel, you can adjust the number of 'straight' rows before the shoulder shaping to make it higher or lower, similar to the front adjustments.
We hope you enjoy crafting this beautiful Crochet Lace Top! There's nothing quite like the satisfaction of wearing something you've created with your own hands. Don't forget to share your finished project with us – we love seeing your unique interpretations!