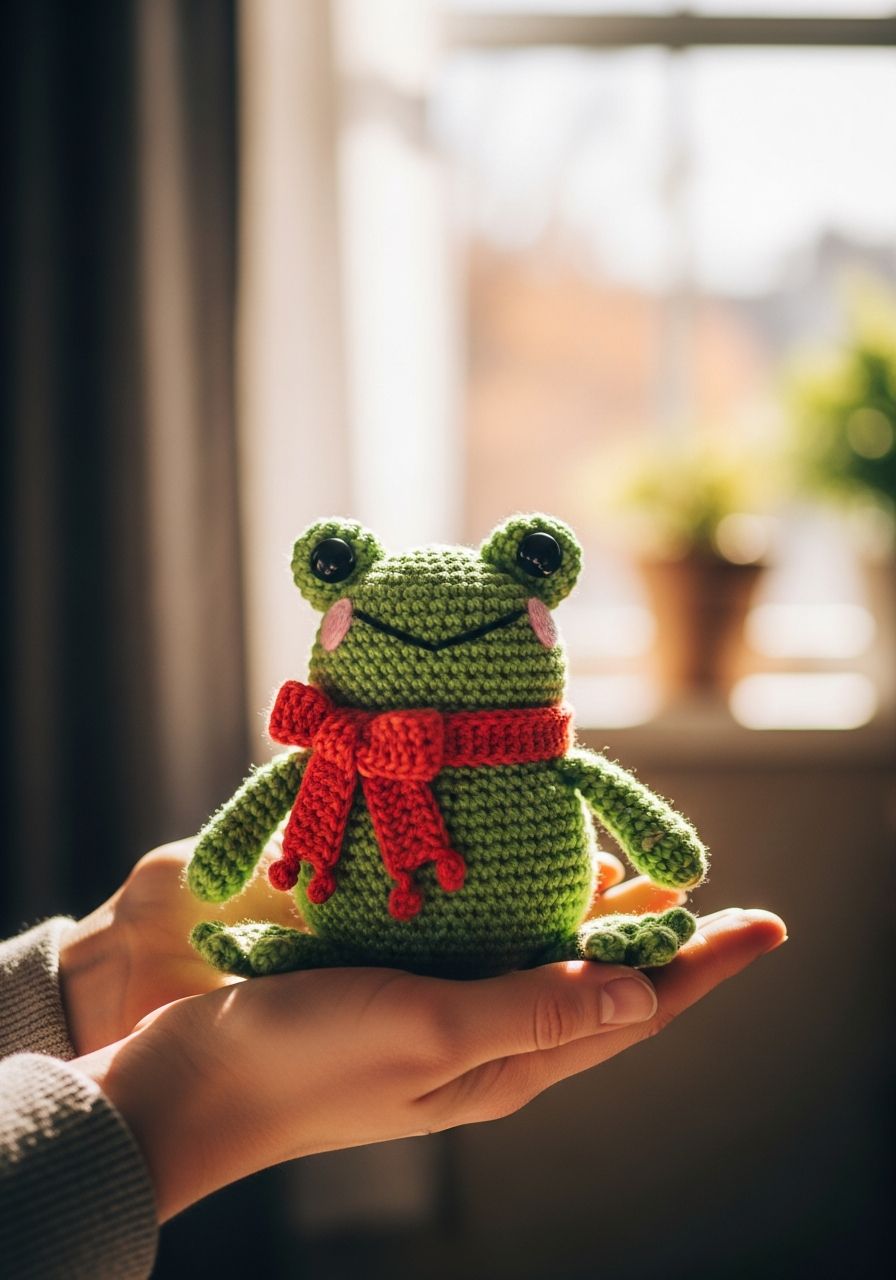
Imagine the pure joy on a child's face, or the whimsical charm added to your desk, by a little creature handcrafted with love. There's something truly magical about bringing a character to life with just yarn and a hook, and this project promises to leap straight into your heart! Get ready to create the most adorable, squishy companion with our complete, free Crochet Frog Amigurumi pattern – a delightful project that's as fun to make as it is to behold. You'll be amazed at how quickly this charming little amphibian hops off your hook and into your life, ready for endless cuddles and imaginative play!
Welcome, fellow yarn enthusiasts, to a world where stitches transform into the cutest critters! Today, we're embarking on a delightful journey to crochet a charming frog amigurumi. This pattern is designed with both beginners and experienced crocheters in mind, offering clear, detailed instructions to ensure your frog turns out perfectly. Whether you're making a gift, adding to your amigurumi collection, or simply seeking a relaxing and rewarding craft project, this little frog is sure to bring a smile. So grab your hooks, choose your favorite shades of green, and let's hop to it!
Why You'll Love This Pattern
This isn't just another amigurumi pattern; it's an invitation to create something truly special. Here’s why you’ll be absolutely smitten with our Crochet Frog Amigurumi:
- Beginner-Friendly: We break down every step, making it accessible even if you’re new to amigurumi. Basic stitches are all you need!
- Quick & Satisfying: This project works up relatively fast, giving you that wonderful sense of accomplishment in no time.
- Customizable: Easily adapt the colors, add stripes, or even embroider unique expressions to make your frog one-of-a-kind.
- Perfect Gift: Handmade amigurumi make incredibly thoughtful gifts for birthdays, baby showers, or just because. Who wouldn't love a cute crochet frog?
- Skill Builder: You'll practice essential amigurumi techniques like working in the round, increasing, decreasing, and seamless assembly.
Materials Needed
- Worsted Weight Yarn (Category 4) in:
- Main Color (MC): Green (approx. 50-60 yards)
- Contrast Color (CC1): White (approx. 10 yards for eye bases)
- Contrast Color (CC2): Black (small amount for pupils/mouth if embroidering)
- Crochet Hook: 3.5mm (E) or 4.0mm (G) – choose based on your tension to get a tight fabric.
- Safety Eyes: 8mm or 10mm (x2) – alternatively, embroider eyes for baby-safe frogs.
- Polyester Fiberfill: For stuffing.
- Yarn Needle: For weaving in ends and assembly.
- Stitch Marker: Essential for working in continuous rounds.
- Scissors
Gauge & Sizing
For amigurumi, gauge isn't critical for size accuracy, but it IS important for fabric tightness. You want a tight fabric with no holes where stuffing can show through. If your stitches are too loose, go down a hook size. If they are too stiff, go up a hook size.
Our sample frog, made with worsted weight yarn and a 3.5mm hook, measures approximately 4.5 inches (11.5 cm) tall from head to bottom, not including the legs. Your frog's size may vary slightly depending on your yarn, hook, and tension.
Abbreviations
- ch: chain
- sc: single crochet
- hdc: half double crochet
- dc: double crochet
- sl st: slip stitch
- inc: increase (2 sc in one stitch)
- dec: decrease (sc2tog - single crochet two together)
- MR: Magic Ring (also known as Magic Circle or Adjustable Ring)
- st(s): stitch(es)
- FO: Fasten Off
- (X): Stitch count at the end of the round
Step-by-Step Pattern
This pattern is worked in continuous rounds unless otherwise specified. Use a stitch marker to keep track of your first stitch in each round.
Head (MC: Green)
- MR 6 sc. (6)
- Inc in each st around. (12)
- (Sc, inc) x6. (18)
- (Sc in next 2 sts, inc) x6. (24)
- (Sc in next 3 sts, inc) x6. (30)
- (Sc in next 4 sts, inc) x6. (36)
- Sc in each st around for 8 rounds. (Rounds 7-14) (36)
- (Sc in next 4 sts, dec) x6. (30)
- (Sc in next 3 sts, dec) x6. (24)
- (Sc in next 2 sts, dec) x6. (18)
- (Sc, dec) x6. (12)
- Stuff the head firmly.
- Dec x6. (6)
- FO, leaving a long tail for sewing. Weave the tail through the front loop of the remaining 6 stitches and pull tight to close.
Body (MC: Green)
- MR 6 sc. (6)
- Inc in each st around. (12)
- (Sc, inc) x6. (18)
- (Sc in next 2 sts, inc) x6. (24)
- (Sc in next 3 sts, inc) x6. (30)
- (Sc in next 4 sts, inc) x6. (36)
- Sc in each st around for 6 rounds. (Rounds 7-12) (36)
- (Sc in next 4 sts, dec) x6. (30)
- (Sc in next 3 sts, dec) x6. (24)
- (Sc in next 2 sts, dec) x6. (18)
- Stuff the body firmly.
- FO, leaving a long tail for sewing.
Legs (Make 4) (MC: Green)
Each leg will be made in two parts (upper and lower) and then joined.
Upper Leg
- MR 6 sc. (6)
- (Sc, inc) x3. (9)
- Sc in each st around for 3 rounds. (Rounds 3-5) (9)
- Stuff lightly.
- FO, leaving a long tail for sewing.
Lower Leg
- MR 5 sc. (5)
- Sc in each st around for 4 rounds. (Rounds 2-5) (5)
- Do NOT stuff.
- FO, leaving a long tail for sewing.
Assembly of Legs
Using the tail from the upper leg, sew the open end of the upper leg to the open end of the lower leg. The upper leg is slightly wider, so gather it slightly to fit. The frog's legs will be slightly bent at this "knee" joint.
Eyes (Make 2) (CC1: White)
- MR 6 sc. (6)
- Inc in each st around. (12)
- (Sc, inc) x6. (18)
- Sc in each st around. (18)
- (Sc, dec) x6. (12)
- Insert safety eyes between rounds 3 and 4, centered.
- Stuff lightly.
- Dec x6. (6)
- FO, leaving a long tail for sewing. Weave the tail through the front loop of the remaining 6 stitches and pull tight to close.
Assembly
- Attach Head to Body: Position the head on top of the body. Using the long tail from the head, whip stitch or mattress stitch the head securely to the body. Ensure it's centered and straight.
- Attach Eyes: Position the finished eyes on top of the head, slightly towards the front and top, for that classic froggy look. Using the long tails, sew them firmly to the head.
- Attach Legs: Sew the front two legs to the sides of the body, just below the neck seam. Sew the back two legs to the lower sides of the body, slightly further back and angled slightly down. You can bend and position them to give your frog a sitting or jumping pose.
- Embroider Mouth (Optional): Using black yarn and a yarn needle, embroider a small "V" shape or a simple straight line for a mouth just below the eyes on the face.
- Weave in all remaining ends: Securely weave in any loose tails to ensure your frog is durable and tidy.
Pro Tips
- Use a Stitch Marker: This is crucial for amigurumi worked in continuous rounds. Place it in the first stitch of each round to avoid losing your place.
- Invisible Decrease: For a neater finish, especially on visible parts, use an invisible decrease (insert hook into front loop of first stitch, then front loop of second stitch, yarn over, pull through both front loops, yarn over, pull through both loops on hook).
- Stuffing Technique: Stuff firmly and evenly, using small pieces of fiberfill. Don't overstuff to the point of distorting stitches, but ensure no major indentations or soft spots. Use the blunt end of your hook or a chopstick to push stuffing into tight spots.
- Seamless Color Changes: When changing colors, work the last yarn over of the last stitch of the old color with the new color. This creates a cleaner transition.
- Check Your Work: Periodically count your stitches to ensure you're on track. It's easier to fix a mistake early on than several rounds later.
- Yarn Tails for Sewing: Always leave a long tail (at least 12-18 inches) when finishing a piece that needs to be sewn onto another.
Frequently Asked Questions
How do I make my frog safe for babies?
To make your Crochet Frog Amigurumi baby-safe, you must avoid using safety eyes, which can be a choking hazard. Instead, embroider the eyes using black yarn. You can create small French knots or satin stitches for the pupils. Also, ensure all parts are sewn on very securely and all ends are woven in tightly so nothing can come loose.
Can I use different yarn weights?
Yes, absolutely! You can use any yarn weight you prefer. Just remember to adjust your hook size accordingly. A general rule is to use a hook one or two sizes smaller than recommended on the yarn label to achieve the tight fabric necessary for amigurumi. Using a thicker yarn will result in a larger frog, and a thinner yarn will create a smaller one.
My magic ring keeps unraveling, what am I doing wrong?
The magic ring can be tricky at first! Make sure you're pulling the tail end of the yarn very tightly after you've made your stitches into the ring. You can also try securing it with a knot or weaving the tail through the stitches a second time after pulling it tight. If it's still an issue, you can start with "ch 2, then work X sc into the second chain from the hook" as an alternative, though it might leave a slightly larger hole in the center.
Congratulations, you've just brought a charming little frog to life with your own two hands! This delightful Crochet Frog Amigurumi is more than just a toy; it's a testament to your creativity and skill. We hope you enjoyed every stitch of this journey and that your new amphibian friend brings a splash of joy to your home. Keep crocheting, keep creating, and remember the magic you can make with just yarn and a hook!