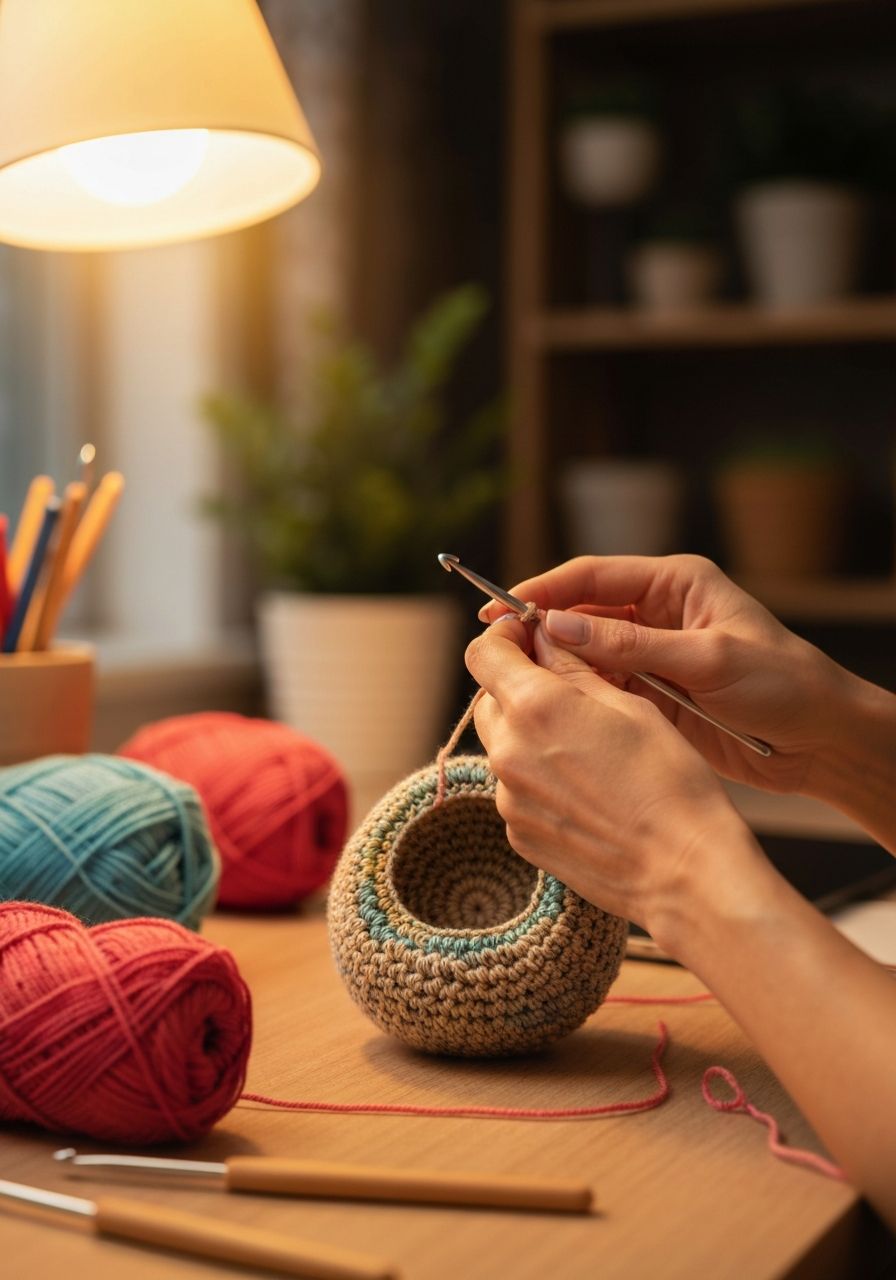
Imagine creating charming little creatures, perfectly shaped hats, or seamless, spiraling blankets that look like they were spun from pure magic. This isn't just a daydream; it's the incredible reality waiting for you when you master the art of crochet in the round! This fundamental technique is the gateway to a universe of three-dimensional crochet projects, transforming flat fabric into beautifully sculpted forms. Get ready to embark on a thrilling journey that will unlock endless possibilities and fill your life with handmade wonders!
Welcome, budding crocheters, to the enchanting world of working in the round! While flat crochet, worked back and forth in rows, forms the foundation for many projects, crocheting in the round opens up an entirely new dimension (quite literally!). This guide is designed to demystify the process, breaking down complex steps into easy-to-follow instructions. By the end, you'll feel confident tackling patterns that require this essential skill, paving the way for adorable amigurumi, cozy wearables, and so much more.
Why It Matters
Learning how to crochet in the round is more than just adding another technique to your repertoire; it's about expanding your creative horizons exponentially. Here's why it's a game-changer:
- Seamless Projects: Unlike working in rows, where you often have seams to join, crocheting in the round creates a continuous, unbroken fabric. This is ideal for items like hats, sweaters, bags, and most amigurumi (stuffed toys).
- Three-Dimensional Shapes: It's the primary method for creating 3D objects. From simple spheres and cylinders to intricate character parts, the ability to work in a circular motion allows you to build volume and form.
- Versatility: Once you understand the principles, you can apply them to various stitches and yarns, adapting patterns to suit your unique vision.
- Professional Finish: A well-executed circular crochet piece often looks more polished and professional, free from visible seams or turning chains (depending on the method).
- Endless Possibilities: Think beyond flat squares! Imagine crafting custom baskets, ornate mandalas, beautiful coasters, or the perfect base for a granny square blanket. The potential is truly limitless.
What You Need to Know
Before we dive into the practical steps, let's ensure you're familiar with a few foundational concepts and tools:
- Basic Crochet Stitches: You should be comfortable with chaining (ch), single crochet (sc), half double crochet (hdc), double crochet (dc), and slip stitch (sl st). We'll primarily use single crochet for our examples, as it's the most common for amigurumi and tightly-worked circular pieces.
- Yarn and Hook: Choose a smooth, light-colored worsted weight yarn and a corresponding hook size (usually 4.0mm to 5.5mm for worsted). This will make your stitches easy to see as you learn.
- Stitch Markers: These are your best friends when working in the round! They help you keep track of the beginning/end of your rounds, which is crucial for maintaining accurate stitch counts.
- Understanding Increases (inc) and Decreases (dec):
- Increase (inc): To increase your stitch count, you simply work two stitches (e.g., 2 sc) into a single stitch from the previous round. This adds stitches and expands your work.
- Decrease (dec): To decrease your stitch count, you work two stitches together (e.g., sc2tog for single crochet). This reduces stitches and tapers your work, helping to create curves and shapes.
- Working in Continuous vs. Joined Rounds: There are two main ways to crochet in the round, each with its own benefits:
- Continuous Rounds (Spiral): You work continuously without joining at the end of each round, creating a seamless spiral. This is common for amigurumi.
- Joined Rounds: You join the last stitch of the round to the first stitch with a slip stitch, and then usually chain up to begin the next round. This creates a more defined round edge and is often used for hats, garments, or projects where a clear division between rounds is desired.
Crocheting In The Round: Your Step-by-Step Guide
Let's get our hooks moving! We'll start with the essential beginning and then explore both continuous and joined methods with simple flat circle patterns.
Starting Your Round: The Magic Ring
The Magic Ring (also known as a Magic Circle or Adjustable Ring) is the cleanest and most popular way to start crocheting in the round, creating a tight center hole with no gaps.
- Hold the Yarn: Take your yarn tail and drape it over the palm of your non-dominant hand.
- Wrap Your Fingers: Wrap the working yarn (coming from the ball) around two fingers (or one for a very small ring) of your non-dominant hand, crossing over the tail to form an 'X' on your palm side.
- Insert Hook: Insert your hook under the first strand of yarn on your fingers.
- Hook and Pull: Hook the second strand (the working yarn) and pull it through to create a loop on your hook.
- Chain to Secure: Chain 1. This secures the loop but does not count as a stitch.
- Work Stitches into Ring: Now, work your first stitches (e.g., 6 single crochet) *into* the ring. Make sure your hook goes under both strands of yarn on your fingers.
- Close the Ring: Gently pull the yarn tail tightly. This will cinch the center hole closed, forming a neat, tight circle.
- Continue: Place a stitch marker in the last stitch if working continuous rounds, or join with a slip stitch to the first stitch if working joined rounds.
Alternative Start: Chain 2 Method
If the Magic Ring feels tricky at first, you can start by chaining 2, then working all your stitches into the first chain you made. Pulling the tail can help tighten this hole, but it will generally not be as tight as a Magic Ring.
Method 1: Working in Continuous Rounds (Spiral)
This method is fantastic for amigurumi and projects where you want a truly seamless look. Remember to use your stitch marker!
Flat Single Crochet Circle Pattern:
- R1: Make a Magic Ring. Ch 1 (does not count as a stitch). Work 6 sc into the ring. Pull tail to close. (6 stitches) *Place a stitch marker in the last sc made.*
- R2: Work 2 sc in each stitch around (inc in each stitch). (12 stitches) *Move stitch marker to the last sc of this round.*
- R3: *[1 sc in the next stitch, 2 sc in the next stitch (inc)]* repeat around. (18 stitches) *Move stitch marker.*
- R4: *[1 sc in the next 2 stitches, 2 sc in the next stitch (inc)]* repeat around. (24 stitches) *Move stitch marker.*
- R5: *[1 sc in the next 3 stitches, 2 sc in the next stitch (inc)]* repeat around. (30 stitches) *Move stitch marker.*
Continue this pattern: For each subsequent round, you'll add one more single crochet between increases (e.g., R6 would be [1 sc in the next 4 stitches, inc] repeat around, resulting in 36 stitches). Your circle should lay flat.
Method 2: Working in Joined Rounds
This method is great for projects like hats or mandalas where a clean, visible round transition is acceptable or desired.
Flat Single Crochet Circle Pattern:
- R1: Make a Magic Ring. Ch 1 (does not count as a stitch). Work 6 sc into the ring. Pull tail to close. Join with a sl st to the first sc. (6 stitches)
- R2: Ch 1 (does not count as a stitch). Work 2 sc in each stitch around (inc in each stitch). Join with a sl st to the first sc. (12 stitches)
- R3: Ch 1 (does not count as a stitch). *[1 sc in the next stitch, 2 sc in the next stitch (inc)]* repeat around. Join with a sl st to the first sc. (18 stitches)
- R4: Ch 1 (does not count as a stitch). *[1 sc in the next 2 stitches, 2 sc in the next stitch (inc)]* repeat around. Join with a sl st to the first sc. (24 stitches)
- R5: Ch 1 (does not count as a stitch). *[1 sc in the next 3 stitches, 2 sc in the next stitch (inc)]* repeat around. Join with a sl st to the first sc. (30 stitches)
Continue this pattern: Just like with continuous rounds, add one more single crochet between increases for each new round. Your circle should lay flat.
Increasing and Decreasing for Shape
The examples above create flat circles using only increases. To create 3D shapes:
- To curve inwards (e.g., top of a hat, head of a toy): You will decrease stitches. For example, a sphere will start with increases, work several rounds even (no increases or decreases), then transition to decreasing until the opening closes.
- To curve outwards (e.g., a bell shape or wider base): You will increase more rapidly or space your increases differently than a flat circle formula.
Common Mistakes to Avoid
Don't worry, everyone makes these at first! Being aware helps you fix them quickly:
- Forgetting Your Stitch Marker: This is the number one culprit for inaccurate stitch counts and wonky shapes, especially in continuous rounds. Always move it up!
- Incorrect Stitch Count: Missing an increase or adding an extra stitch can make your circle ripple (too many stitches) or cup (not enough stitches). Count frequently!
- Too Tight or Too Loose Tension: Inconsistent tension leads to uneven fabric. Practice maintaining an even grip on your yarn.
- Not Closing the Magic Ring Tightly: A loose magic ring leaves a hole in the center of your project, which is undesirable for most items. Give that tail a good tug!
- Confusing Continuous and Joined Rounds: Make sure you're following the pattern's instructions for the specific method. If a pattern says to join, don't work in a spiral, and vice-versa.
- Forgetting Turning Chains in Joined Rounds (if they count as a stitch): Sometimes the chain 1 or chain 2 at the beginning of a joined round counts as your first stitch. If so, make sure to skip the first stitch of the previous round and work into the second. Always check pattern instructions.
Pro Tips for Perfect Circles
- Practice Your Magic Ring: The more you do it, the easier and neater it becomes. Consistency here sets the tone for your whole project.
- Count, Count, COUNT!: Seriously, count your stitches at the end of every single round. It's much easier to fix a mistake in the current round than several rounds later.
- Use the Right Light: Good lighting helps you see your stitches clearly, reducing eye strain and mistakes.
- Relax Your Grip: If your hands are getting tired or your stitches are too tight, try to relax your grip on both the hook and the yarn.
- Experiment with Hook Sizes: If your fabric is too gappy (showing stuffing in amigurumi), go down a hook size. If it's too stiff, try going up.
- Weave in Ends as You Go: Especially for the Magic Ring tail, weave it in securely to prevent it from unraveling later.
- Read the Pattern Ahead: Before starting a new section, read through the instructions for the next few rounds. This helps you anticipate changes and avoid surprises.
Frequently Asked Questions
What's the difference between continuous and joined rounds?
Continuous rounds are worked in a spiral, creating a seamless fabric without any visible joins. You typically use a stitch marker to keep track of the beginning of each round. Joined rounds involve making a slip stitch to connect the last stitch of a round to the first, often followed by a chain-up to start the next round. This creates a more defined, stacked look for each round.
How do I make my circle lay flat?
If your circle is ruffling or cupping, it's usually an issue with your increase rate. A flat circle in single crochet typically requires 6 increases per round, evenly spaced. If your circle is cupping (bowling upwards), you likely need more increases. If it's ruffling (wavy edges), you likely have too many increases or your tension is too loose. Always count your stitches carefully!
Can I use any stitch for crocheting in the round?
Yes, absolutely! While single crochet is popular for its dense fabric, you can use half double crochet, double crochet, or even taller stitches. The principles of starting with a magic ring (or chain 2) and increasing to create a flat or shaped piece remain the same. Just remember that taller stitches will grow your project much faster and often require different initial stitch counts and increase rates to maintain flatness.
Congratulations, you've taken a significant step into the exciting world of crochet in the round! With these techniques under your belt, you're now equipped to create a vast array of beautiful and intricate projects. Remember, practice is key. Don't be afraid to unravel and try again; every stitch is a learning opportunity. Grab your hook and yarn, let your creativity flow, and start making those magical circles and three-dimensional wonders today!