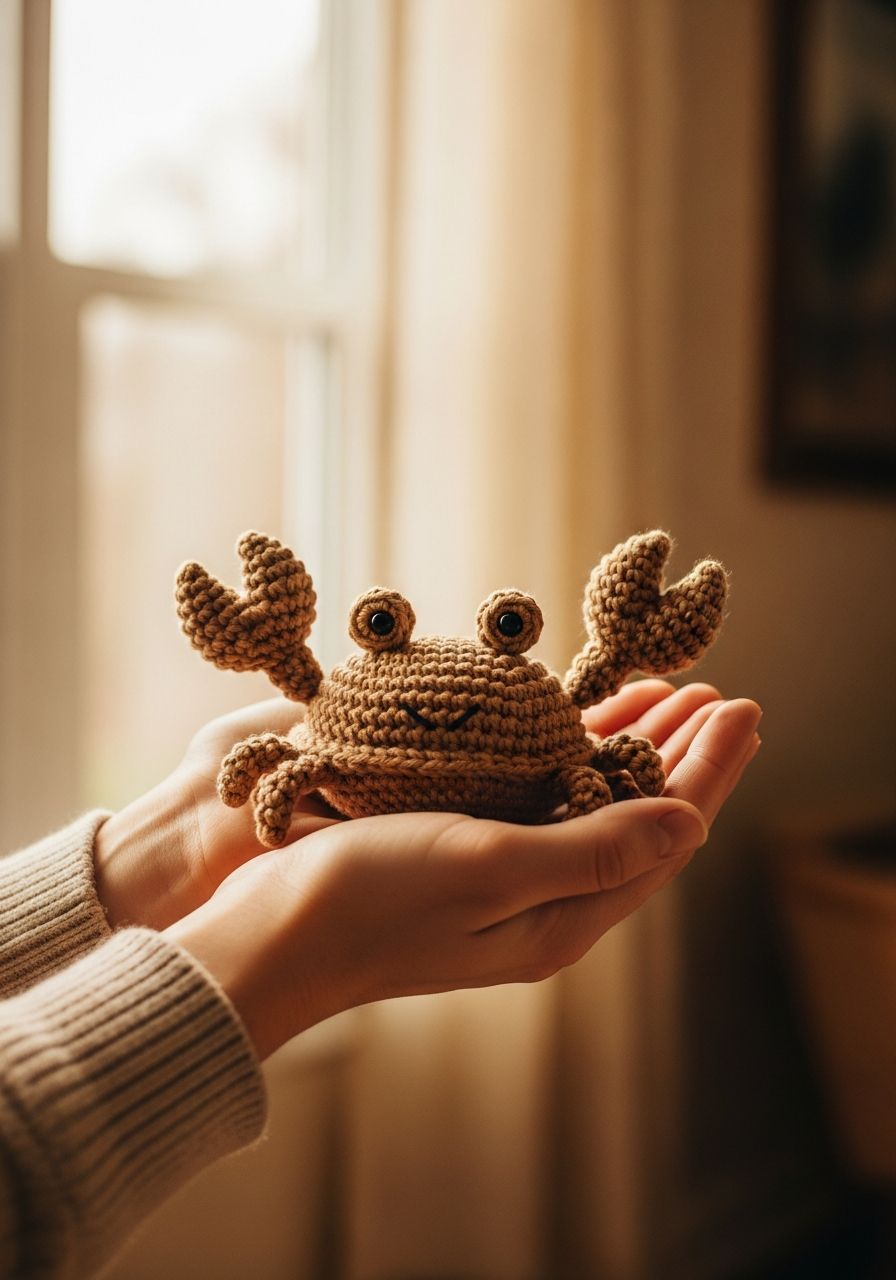
Imagine the warm sun on your face, the gentle sound of waves, and the sheer joy of bringing a little piece of the ocean to life with your own hands! This adorable Crochet Crab Amigurumi pattern is your ticket to crafting a charming, squishy friend that’s bursting with personality. Whether you’re looking for a quick and satisfying project, a unique gift, or just a delightful addition to your amigurumi collection, this little crustacean is sure to make a splash and put a huge smile on your face!
Why You'll Love This Pattern
There's something incredibly satisfying about creating a tangible, adorable object from a simple ball of yarn, and this crochet crab is no exception. This pattern is designed to be accessible yet engaging, offering a rewarding experience for crocheters of various skill levels. Here's why you'll absolutely adore making this little guy:
- Irresistibly Cute: With its bright colors, charming claws, and big, expressive eyes, this crab is designed to be utterly endearing. It’s a guaranteed conversation starter and a favorite among kids and adults alike.
- Quick & Satisfying Project: Craving a project that you can start and finish in a relatively short amount of time? This amigurumi crab works up quickly, offering that instant gratification every crafter loves.
- Perfect for Gifting: Handmade gifts carry a special warmth. This little crab makes a fantastic present for birthdays, baby showers, or just to brighten someone's day. Imagine it as a desk buddy, a keychain, or a nursery decoration!
- Skill-Building Opportunity: While beginner-friendly, this pattern introduces you to essential amigurumi techniques like working in the round, increasing, decreasing, and assembly. It's a great way to refine your skills or learn new ones.
- Customizable Fun: Don't feel limited to classic red or orange! Experiment with different yarn colors to create a rainbow of crabs. Imagine a sparkly blue crab, a vibrant green one, or even a pastel-hued friend.
- Stash Buster: This project uses relatively small amounts of yarn, making it perfect for using up those leftover skeins from previous projects.
Materials Needed
- Yarn: Worsted weight (Aran/10-ply) 100% acrylic yarn in:
- Main Color (MC): Approximately 50g (e.g., Red, Orange, or Bright Pink)
- Small amount of Black (for eye details or embroidery)
- Crochet Hook: 3.5mm (E/4) or 4.0mm (G/6) – choose one that gives you tight stitches to prevent stuffing from showing.
- Safety Eyes: Two 6mm or 8mm safety eyes (if not embroidering)
- Stuffing: Polyester fiberfill
- Yarn Needle: For weaving in ends and assembly
- Stitch Marker: Essential for working in continuous rounds
- Scissors: For cutting yarn
Gauge & Sizing
For amigurumi, exact gauge isn't critical, but consistency is key. You want your stitches to be tight enough so that the stuffing doesn't show through. If your stitches are too loose, go down a hook size. If they are too tight, go up a hook size.
Approximate Gauge: 4 sc x 4 rounds = 1 inch (2.5 cm)
Finished Size: When made with worsted weight yarn and a 3.5mm hook, your crab will measure approximately 4-5 inches (10-12.5 cm) wide (including legs and claws) and about 2 inches (5 cm) tall.
Abbreviations
- ch: chain
- sl st: slip stitch
- sc: single crochet
- hdc: half double crochet
- dc: double crochet
- inc: increase (2 single crochet in one stitch)
- dec: decrease (single crochet 2 together)
- MR: magic ring (also known as magic circle/adjustable ring)
- FO: fasten off
- st(s): stitch(es)
- Rnd: round
- BLO: back loop only
- FLO: front loop only
- (X): indicates the number of stitches you should have at the end of the round
Step-by-Step Pattern
We'll be working in continuous rounds unless otherwise specified. Use a stitch marker to keep track of your first stitch in each round.
Body (MC Yarn)
- Rnd 1: Start with a MR, sc 6 into the ring. (6)
- Rnd 2: Inc in each st around. (12)
- Rnd 3: (Sc, inc) x6. (18)
- Rnd 4: (2 sc, inc) x6. (24)
- Rnd 5: (3 sc, inc) x6. (30)
- Rnd 6: (4 sc, inc) x6. (36)
- Rnd 7-12: Sc in each st around (6 rounds). (36)
- Rnd 13: (4 sc, dec) x6. (30)
- Rnd 14: (3 sc, dec) x6. (24)
- Rnd 15: (2 sc, dec) x6. (18) Begin stuffing the body firmly.
- Rnd 16: (Sc, dec) x6. (12)
- Rnd 17: Dec x6. (6) Finish stuffing.
- FO, leaving a long tail. Weave the tail through the front loop of the remaining 6 stitches and pull tight to close. Secure and weave in the end.
Claws (Make 2) (MC Yarn)
- Rnd 1: Start with a MR, sc 6 into the ring. (6)
- Rnd 2: (Sc, inc) x3. (9)
- Rnd 3-4: Sc in each st around (2 rounds). (9)
- Rnd 5: (Sc, dec) x3. (6) Lightly stuff the claw.
- Pincer Point: Ch 3, sl st into the 2nd ch from hook, sc in the next ch. Sl st back into the same stitch on Rnd 5 where you started the chain.
- FO, leaving a long tail for sewing.
Legs (Make 6) (MC Yarn)
- Ch 8.
- Sc in the 2nd ch from the hook and in each remaining chain across. (7 sc)
- FO, leaving a long tail for sewing.
Eye Stalks (Make 2) (MC Yarn for stalk, Black for eye if not using safety eyes)
- Rnd 1: Start with a MR, sc 6 into the ring. (6)
- Rnd 2-4: Sc in each st around (3 rounds). (6)
- Rnd 5: Inc in each st around. (12) If using safety eyes, insert them now between Rnd 5 and Rnd 6. If embroidering, skip this and use black yarn for Rnd 6.
- Rnd 6: Sc in each st around. (12) If not using safety eyes, switch to black yarn for this round and embroider a small white dot later.
- Rnd 7: Dec x6. (6) Lightly stuff the eye stalk.
- FO, leaving a long tail. Weave the tail through the front loop of the remaining 6 stitches and pull tight to close. Secure and leave the tail for sewing.
Assembly
- Attach Eyes: Position the two eye stalks on top of the crab's body, slightly towards the front and center. Use your yarn needle and the long tails to sew them securely in place.
- Attach Claws: Sew the two claws onto the sides of the crab's body, just below and slightly forward from the eye stalks. Make sure they are symmetrical.
- Attach Legs: Sew the six legs onto the bottom sides of the crab's body. Distribute them evenly, three on each side, behind the claws. You can slightly curve them to give the crab a more dynamic pose.
- Weave in Ends: Carefully weave in all remaining loose ends with your yarn needle to ensure a neat finish.
Pro Tips
- Use a Stitch Marker: Amigurumi is worked in continuous rounds, making a stitch marker essential to avoid losing your place. Place it in the first stitch of each round and move it up as you go.
- Tight Stitches: To prevent stuffing from showing through, always strive for tight, even stitches. If your fabric is too loose, try going down a hook size.
- Invisible Decrease: For a neater finish, use an invisible decrease (insert hook into FLO of first stitch, then into FLO of second stitch, yarn over, pull through both loops, yarn over, pull through remaining two loops).
- Stuffing: Stuff your amigurumi firmly but evenly. Use small pieces of fiberfill to avoid lumps. A chopstick or the back of your hook can help push stuffing into tight spots like the eye stalks and claws.
- Facial Features: If you're not using safety eyes, you can embroider eyes using black yarn and a small white French knot or straight stitch for a highlight. This is also a safer option for toys intended for very young children.
- Assembly is Key: Take your time with assembly. Pin the pieces in place before sewing to ensure proper placement and symmetry. A well-assembled amigurumi looks polished and professional.
- Yarn Tails for Sewing: Always leave a long tail (about 12-18 inches) when fastening off pieces that need to be sewn to the main body. This saves you from having to attach new yarn for sewing.
Frequently Asked Questions
Q: What if my stitches are too loose and the stuffing shows through?
A: This is a common issue in amigurumi! The best solution is to try a smaller crochet hook. Even a half-millimeter difference can make your stitches tighter and create a denser fabric, preventing the stuffing from peeking out. Also, ensure you're pulling your yarn snugly after each stitch.
Q: Can I use different types of yarn for this pattern?
A: Absolutely! While worsted weight yarn is recommended for beginners, you can experiment with other weights. Keep in mind that changing yarn weight will alter the finished size of your crab. If you use a thinner yarn (like sport or fingering weight), your crab will be smaller. If you use a bulkier yarn, it will be larger. Always adjust your hook size accordingly to maintain tight stitches.
Q: Is this pattern suitable for complete beginners?
A: This pattern assumes familiarity with basic crochet stitches (chain, single crochet, slip stitch) and the magic ring. If you know these fundamentals, you should be able to follow along! The pattern includes increases and decreases, which are standard amigurumi techniques. Don't be afraid to look up video tutorials for specific stitches or techniques if you get stuck; there are many excellent resources online.
We hope you've enjoyed diving into this delightful Crochet Crab Amigurumi pattern! Creating your own little ocean dweller is a truly rewarding experience, and we can't wait to see the unique personalities you bring to life. Remember, crochet is all about fun and creativity, so feel free to personalize your crab with different colors, expressions, or even add a tiny bow tie or hat. Happy crocheting!