Imagine stepping out in a garment that perfectly sculpts your silhouette, whispers tales of vintage elegance, and yet feels as comfortable as your favorite handmade top. That dream is about to become your reality! Get ready to unleash your inner fashionista and create a stunning, custom-fit Crochet Corset that will turn heads, spark compliments, and boost your confidence every time you wear it.
Welcome to the ultimate guide for crafting your very own crochet corset! Whether you're a seasoned crocheter looking for a stylish new project or an adventurous beginner ready to tackle a rewarding challenge, this free pattern is designed to empower you. We'll walk you through every step, from selecting the perfect yarn to shaping intricate details, ensuring your finished corset is not just a garment, but a wearable work of art that reflects your unique style and craftsmanship. Say goodbye to mass-produced fashion and hello to a piece that truly celebrates your individuality and skill.
Why You'll Love This Pattern
- Customizable Fit: Unlike off-the-rack clothing, this pattern allows you to adjust the sizing, length, and shaping to perfectly flatter your unique body.
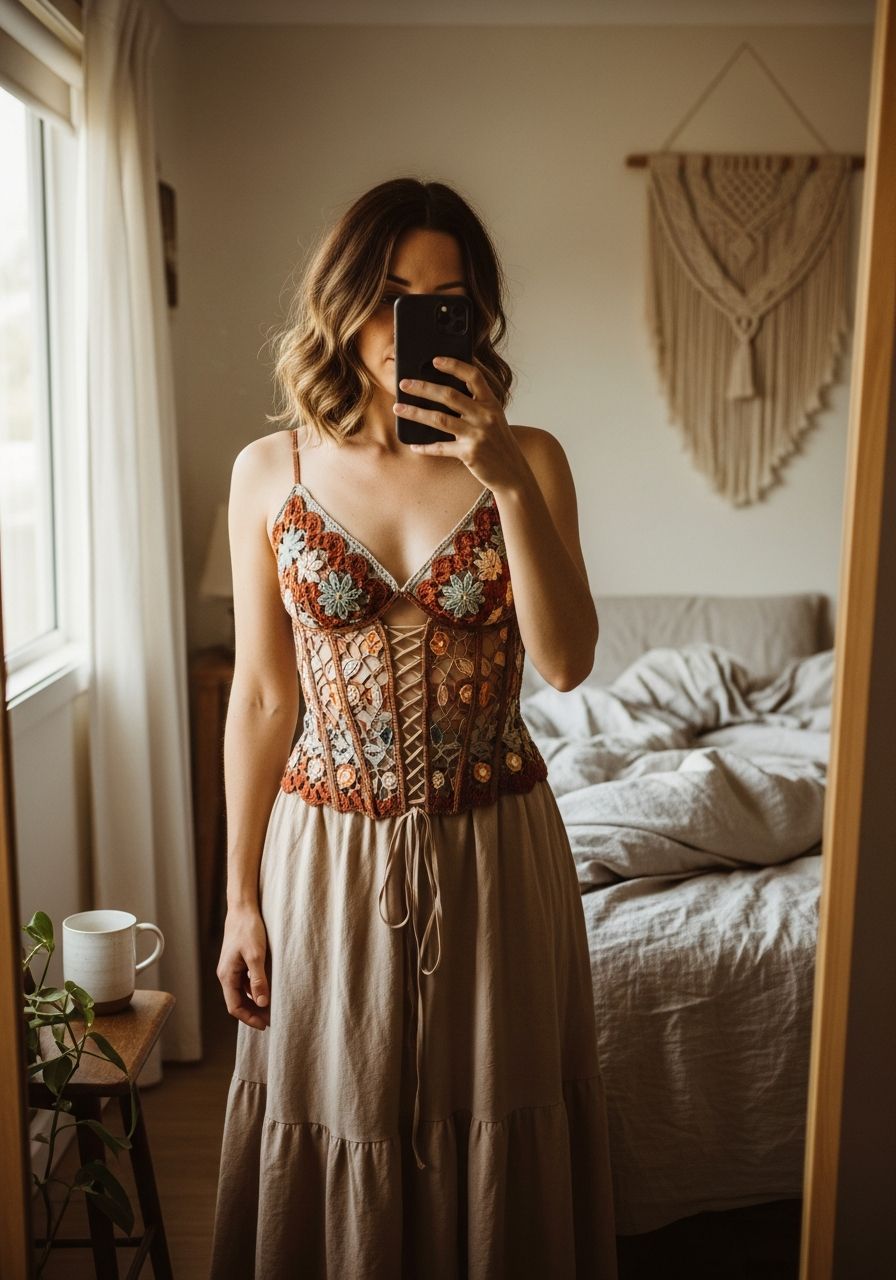
- Stylish & Versatile: A crochet corset is a trendy and eye-catching piece that can be dressed up or down. Pair it with high-waisted jeans for a casual chic look, or layer it over a flowy dress for bohemian elegance.
- Rewarding Project: Creating a fitted garment like a corset is incredibly satisfying. You'll learn valuable techniques like shaping with increases and decreases, and the finished result is truly stunning.
- Unique Wardrobe Addition: Stand out from the crowd with a handmade piece that showcases your creativity and talent. This isn't just a top; it's a conversation starter!
- Skill-Building: While using basic stitches, the shaping involved will help you level up your crochet skills, preparing you for more complex garment projects in the future.
Materials Needed
- Yarn: Approximately 300-450 yards (275-410 meters) of DK weight (Light Worsted / #3) cotton or cotton blend yarn. Cotton provides excellent stitch definition, breathability, and structure. (e.g., Paintbox Yarns Cotton DK, Lion Brand Comfy Cotton Blend)
- Crochet Hook: 4.0 mm (G-6) or size needed to obtain gauge.
- Stitch Markers: Essential for marking rows, increases/decreases, and panel alignment.
- Tapestry Needle: For weaving in ends and seaming panels.
- Scissors: For cutting yarn.
- Measuring Tape: Crucial for gauge and sizing adjustments.
- Lacing Cord: Approximately 2-3 yards (2-3 meters) of thin ribbon, braided cord, or a chain of crochet stitches for the back lacing.
Gauge & Sizing
Creating a gauge swatch is perhaps the most critical step for any fitted garment, especially a corset. It ensures your finished piece will match the intended dimensions and fit you perfectly. Do not skip this step!
To make your swatch:
- Chain 20.
- Row 1: Hdc in 2nd ch from hook and across. (19 hdc)
- Rows 2-10: Ch 1, turn, hdc across. (19 hdc)
Measure a 4x4 inch (10x10 cm) square in the center of your swatch.
My gauge: 17 hdc stitches x 10 rows = 4 inches (10 cm).
If your swatch is larger than 4 inches, go down a hook size. If it's smaller, go up a hook size. Repeat until your gauge matches. Remember, even a slight difference in gauge can lead to a significant difference in fit for a garment like this!
This pattern is written for an approximate S/M size (Bust 32-34 inches, Waist 26-28 inches). Instructions for adjusting are provided in the Pro Tips and FAQ sections.
Abbreviations
- ch: Chain
- sc: Single Crochet
- hdc: Half Double Crochet
- dc: Double Crochet
- sl st: Slip Stitch
- inc: Increase (usually 2 sts in one st)
- dec: Decrease (usually working 2 sts together)
- hdc inc: 2 hdc in the same stitch
- hdc dec (hdc2tog): Half Double Crochet 2 Together (yarn over, insert hook into next st, yarn over, pull up a loop, insert hook into next st, yarn over, pull up a loop, yarn over, pull through all 4 loops on hook)
- st(s): Stitch(es)
- rep: Repeat
- (...) : Stitch count at the end of the row/round
- [...] : Instructions to be repeated
Step-by-Step Pattern
Pattern Notes
- Ch 1 at the beginning of a row does NOT count as a stitch.
- Always work into the top of the previous row's stitches, not into the chain space.
- Measure frequently as you go to ensure fit.
Front Panel (Make 2)
We'll start each front panel from the bottom edge and work upwards. This section includes shaping for the waist and bust.
- Foundation Chain: Ch 36.
- Row 1: Hdc in 2nd ch from hook and in each ch across. (35 hdc)
- Rows 2-5: Ch 1, turn, hdc in each st across. (35 hdc)
- Row 6 (Waist Decrease): Ch 1, turn, hdc dec, hdc in each st until last 2 sts, hdc dec. (33 hdc)
- Row 7: Ch 1, turn, hdc in each st across. (33 hdc)
- Row 8 (Waist Decrease): Ch 1, turn, hdc dec, hdc in each st until last 2 sts, hdc dec. (31 hdc)
- Rows 9-12: Ch 1, turn, hdc in each st across. (31 hdc)
- Row 13 (Bust Increase): Ch 1, turn, hdc inc in first st, hdc in each st until last st, hdc inc in last st. (33 hdc)
- Row 14: Ch 1, turn, hdc in each st across. (33 hdc)
- Row 15 (Bust Increase): Ch 1, turn, hdc inc in first st, hdc in each st until last st, hdc inc in last st. (35 hdc)
- Rows 16-20: Ch 1, turn, hdc in each st across. (35 hdc)
- Fasten off, leaving a long tail for seaming.
Back Panel (Make 2)
These two panels will form the back of your corset and will be laced together. They have less dramatic shaping than the front panels.
- Foundation Chain: Ch 28.
- Row 1: Hdc in 2nd ch from hook and in each ch across. (27 hdc)
- Rows 2-5: Ch 1, turn, hdc in each st across. (27 hdc)
- Row 6 (Waist Decrease): Ch 1, turn, hdc dec, hdc in each st until last 2 sts, hdc dec. (25 hdc)
- Row 7: Ch 1, turn, hdc in each st across. (25 hdc)
- Rows 8-12: Ch 1, turn, hdc in each st across. (25 hdc)
- Row 13 (Slight Increase): Ch 1, turn, hdc inc in first st, hdc in each st until last st, hdc inc in last st. (27 hdc)
- Rows 14-20: Ch 1, turn, hdc in each st across. (27 hdc)
- Fasten off, leaving a long tail for seaming.
Joining the Panels
- Side Seams: Lay the two Front Panels side-by-side, then place a Back Panel next to each Front Panel. You should have a layout of Back Panel > Front Panel > Front Panel > Back Panel.
- Using your tapestry needle and the long tails, seam one side of a Front Panel to one side of a Back Panel. Use the mattress stitch or whip stitch for a clean, strong seam. Repeat for the other Front Panel and Back Panel.
- Next, seam the two Front Panels together down the center front.
- Weave in all remaining loose ends securely.
Edging & Lacing Holes
Now we'll add a neat border and create the lacing holes for the back.
- Bottom Edging: Join yarn with a sl st to any stitch on the bottom edge of the corset. Ch 1, then sc evenly around the entire bottom edge. Place 1 sc in each hdc st and 1 sc in the side of each hdc row. Sl st to first sc. Fasten off.
- Top Edging: Join yarn with a sl st to any stitch on the top edge of the corset. Ch 1, then sc evenly around the entire top edge, making sure to work 1 sc into each hdc st and 1 sc in the side of each hdc row. Sl st to first sc. Fasten off.
- Back Lacing Edging: Join yarn with a sl st to the bottom corner of one of the raw back edges. Ch 1, then work sc stitches evenly up the raw edge. For lacing holes, work [sc in next 2 sts, ch 2, skip 2 sts]. Repeat this pattern up the entire back edge, ensuring your ch-2 spaces are evenly spaced. End with sc stitches to the top corner. Fasten off.
- Repeat the Back Lacing Edging instructions for the other raw back edge, making sure the ch-2 spaces align horizontally across from each other.
- Lacing: Thread your chosen lacing cord through the ch-2 spaces, starting from the bottom, crossing over to create the classic corset lacing pattern. Tie a bow at the top or bottom, or tuck the ends in.
Optional Straps (Make 2)
For added support or a different look, you can add simple shoulder straps.
- Strap: Ch 50 (adjust length as needed by trying on the corset).
- Row 1: Sc in 2nd ch from hook and in each ch across. (49 sc)
- Fasten off, leaving a long tail.
- Attach Straps: Using a tapestry needle, sew one end of each strap to the front top corner of the corset. Try on the corset and pin the other end of each strap to the back top corner, adjusting for comfortable length. Securely sew in place.
Pro Tips
- Try It On As You Go: This is crucial for a fitted garment. Periodically hold the panels up to your body or pin them together to check the fit and make adjustments before seaming.
- Blocking is Your Friend: After finishing all panels but before seaming, gently wet block them. This helps to even out your stitches, relax the yarn, and achieve the best shape and drape for your corset.
- Consider Boning: For a more structured, traditional corset feel, you can add flexible plastic boning (available at fabric stores) into channels sewn along the seams or sides. This is an advanced technique but can dramatically enhance the shaping.
- Customize the Length: To make your corset longer or shorter, simply add or subtract rows in the straight sections (e.g., Rows 2-5 or 9-12 for the Front Panel, or similar for the Back Panel) before or after the shaping sections.
- Yarn Choice Matters: While cotton is recommended for its structure and breathability, you can experiment with other fibers. Just be sure to check your gauge diligently, as different yarns will behave differently.
- Invisible Seams: Practice the mattress stitch for joining panels. It creates a nearly invisible seam that looks professional and neat.
Frequently Asked Questions
Can I use a different yarn weight?
Yes, you can, but it will significantly affect your gauge and therefore the finished size of your corset. If you use a different yarn weight (e.g., worsted or sport weight), you will need to adjust your hook size and likely your starting chain and stitch counts to achieve the desired dimensions. Always make a large gauge swatch with your chosen yarn and hook, and then calculate how many stitches per inch you have. You'll then need to adjust the initial chain length and the number of stitches in each row accordingly to match your desired measurements.
How do I adjust the size?
To adjust the width: For a smaller size, start with fewer chains for each panel and/or reduce the number of straight rows. For a larger size, add more chains to your foundation chains (in multiples of the stitch repeat, typically 2 or 4 stitches at a time) and/or add more straight rows to increase overall width. For bust adjustments, add more increase rows (for a larger bust) or fewer (for a smaller bust) in the Front Panel section. For a longer or shorter corset, add or subtract rows from the straight sections of the pattern.
Is this pattern beginner-friendly?
This pattern uses basic crochet stitches (hdc, sc, sl st, ch) that are suitable for beginners. However, the shaping involved with increases and decreases requires attention to detail and a good understanding of stitch placement. If you're a complete beginner, practice these stitches and consider making a few simpler projects first. With patience, careful reading of the instructions, and diligent gauge checking, an adventurous beginner can absolutely succeed with this pattern!
Congratulations, you now have all the tools and knowledge to embark on crafting your very own gorgeous Crochet Corset! This project is a wonderful way to express your personal style and create a truly unique piece for your wardrobe. Don't be afraid to experiment with colors, add embellishments, or customize it further to make it truly yours. Happy crocheting, and enjoy the confidence that comes with wearing something so beautifully handmade!