Imagine the sun on your face, a gentle breeze, and the perfect accessory slung over your shoulder – a vibrant, hand-crocheted bag that screams personality! This isn't just any bag; it's a statement piece you've crafted yourself, a testament to your creativity and skill. Get ready to fall in love with making your very own Crochet Color Block Bag, a stylish, versatile tote that will brighten any outfit and turn heads wherever you go. It’s time to unleash your inner designer and stitch something truly spectacular!
Welcome, fellow yarn enthusiasts! Today, we're diving into the delightful world of color and texture to create a truly stunning accessory: the Crochet Color Block Bag. This isn't just a pattern; it's an opportunity to play with hues, experiment with modern design, and create a functional piece that reflects your unique style. Whether you're a seasoned crocheter looking for a fun weekend project or an adventurous beginner ready to tackle something new, this comprehensive guide will walk you through every step, ensuring your finished bag is a masterpiece of both form and function.
Why You'll Love This Pattern
- Modern & Chic: The color block design is timelessly stylish, making this bag a perfect accessory for any season or occasion.
- Customizable: With endless color combinations, you can truly make this bag your own. Choose bold contrasts, soft pastels, or even ombre shades!
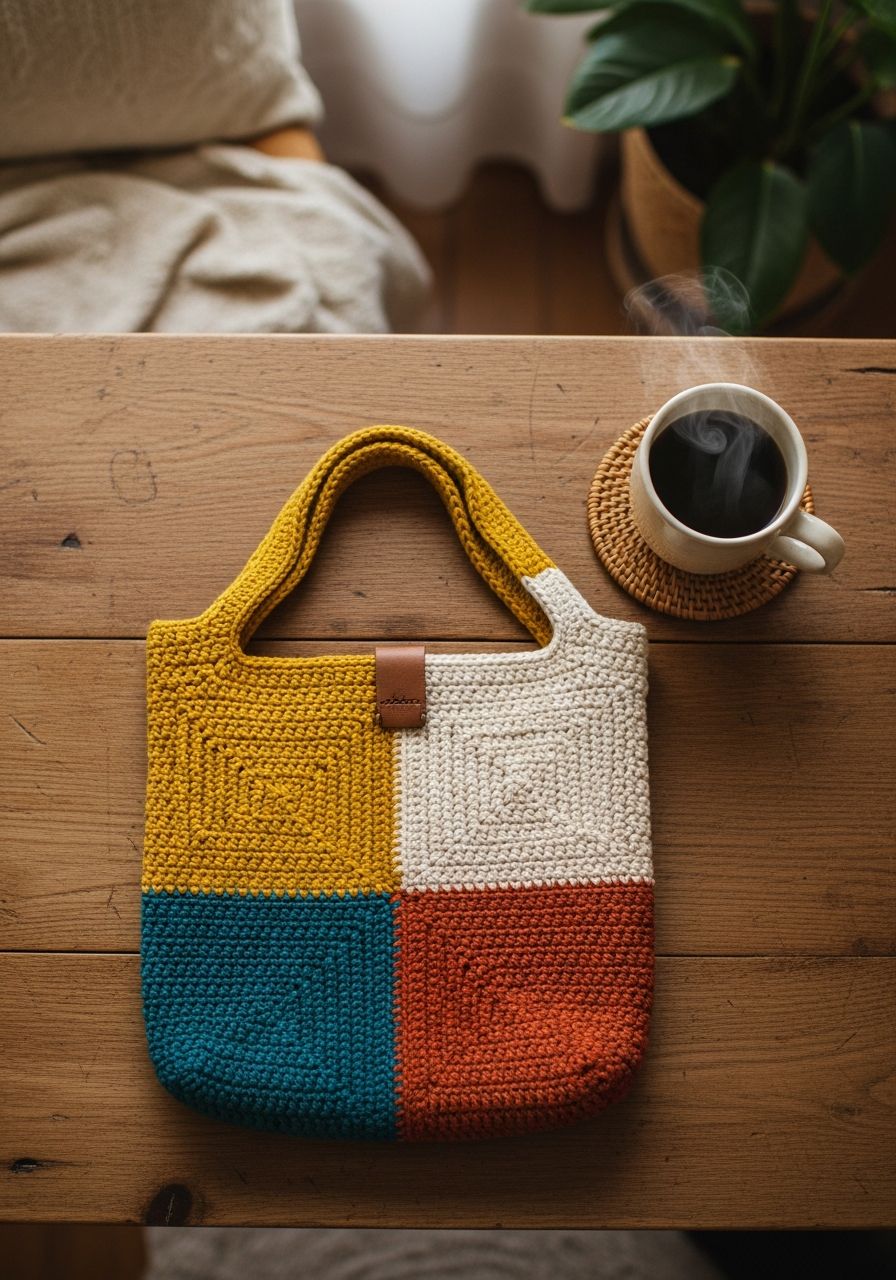
- Practical & Spacious: Designed with an oval base and a sturdy body, this bag is large enough to carry your essentials, whether it's for a trip to the market, a day out, or just holding your current WIP.
- Skill-Building: While using basic stitches, this pattern introduces you to working in the round, color changes, and creating a structured accessory, helping you expand your crochet repertoire.
- Free & Detailed: Enjoy a completely free pattern with clear, step-by-step instructions, stitch counts, and helpful tips to guide you from start to finish.
Materials Needed
- Yarn: Worsted weight (Aran/10-ply) cotton yarn in three contrasting or complementary colors.
- Color A (Base/Bottom Block): Approximately 200 yards
- Color B (Middle Block): Approximately 200 yards
- Color C (Top Block): Approximately 200 yards
- Crochet Hook: H/8 (5.0 mm) or size needed to obtain gauge.
- Yarn Needle: For weaving in ends.
- Scissors: For cutting yarn.
- Stitch Markers: Highly recommended for marking the beginning of rounds and increase points.
Gauge & Sizing
Gauge: 13 HDC and 10 rows = 4 inches (10 cm) using an H/8 (5.0 mm) hook.
It's crucial to check your gauge to ensure your bag turns out the correct size. If your swatch is too small, try a larger hook. If it's too large, try a smaller hook. While gauge isn't as critical for bags as for garments, it will affect the overall dimensions and yarn usage.
Finished Size (approximate):
- Base: 12 inches (30 cm) long x 5 inches (12.5 cm) wide
- Height: 12 inches (30 cm) tall (excluding straps)
- Straps: 20 inches (50 cm) long (each)
Abbreviations
- ch: chain
- sl st: slip stitch
- sc: single crochet
- hdc: half double crochet
- inc: increase (work 2 stitches into the same stitch)
- st(s): stitch(es)
- rep: repeat
- FO: fasten off
- ( ): repeat instructions in parentheses the specified number of times
- [ ]: final stitch count for the round
Step-by-Step Pattern
This pattern is worked in continuous rounds for the base and then joined rounds for the body. Always join with a slip stitch to the first stitch of the round (not the turning chain, unless specified) and chain up for the next round.
Bag Base (Color A)
- Foundation Chain: With Color A, ch 26.
- Round 1: Sc in 2nd ch from hook, sc in next 23 ch, 3 sc in last ch. Turn to work along the opposite side of the foundation chain. Sc in next 23 ch, 2 sc in last ch. Join with sl st to first sc. [52 sts]
- Round 2: Ch 1 (does not count as st), 2 sc in first st, sc in next 23 sts, (2 sc in next st) 3 times, sc in next 23 sts, (2 sc in next st) 2 times. Join with sl st. [60 sts]
- Round 3: Ch 1, *sc in next st, 2 sc in next st*, rep once. Sc in next 23 sts, *(sc in next st, 2 sc in next st)* rep 3 times. Sc in next 23 sts, *(sc in next st, 2 sc in next st)* rep twice. Join with sl st. [68 sts]
- Round 4: Ch 1, *(sc in next 2 sts, 2 sc in next st)* rep once. Sc in next 23 sts, *(sc in next 2 sts, 2 sc in next st)* rep 3 times. Sc in next 23 sts, *(sc in next 2 sts, 2 sc in next st)* rep twice. Join with sl st. [76 sts]
- Round 5: Ch 1, *(sc in next 3 sts, 2 sc in next st)* rep once. Sc in next 23 sts, *(sc in next 3 sts, 2 sc in next st)* rep 3 times. Sc in next 23 sts, *(sc in next 3 sts, 2 sc in next st)* rep twice. Join with sl st. [84 sts]
- Round 6: Ch 1, *(sc in next 4 sts, 2 sc in next st)* rep once. Sc in next 23 sts, *(sc in next 4 sts, 2 sc in next st)* rep 3 times. Sc in next 23 sts, *(sc in next 4 sts, 2 sc in next st)* rep twice. Join with sl st. [92 sts]
- Round 7: Ch 1, *(sc in next 5 sts, 2 sc in next st)* rep once. Sc in next 23 sts, *(sc in next 5 sts, 2 sc in next st)* rep 3 times. Sc in next 23 sts, *(sc in next 5 sts, 2 sc in next st)* rep twice. Join with sl st. [100 sts]
- Round 8: Ch 1, *(sc in next 6 sts, 2 sc in next st)* rep once. Sc in next 23 sts, *(sc in next 6 sts, 2 sc in next st)* rep 3 times. Sc in next 23 sts, *(sc in next 6 sts, 2 sc in next st)* rep twice. Join with sl st. [108 sts]
Bag Body (Color Blocking)
For the body, we will work in half double crochet (hdc) stitches to create a sturdy yet flexible fabric. Work in joined rounds. The ch 2 at the beginning of each round counts as the first hdc.
Color Block 1 (Color A)
- Round 9: Ch 2 (counts as first hdc), hdc in each st around. Join with sl st to the top of the beginning ch 2. [108 hdc]
- Rounds 10-16: Rep Round 9. (Total 8 rounds of Color A for the body.) At the end of Round 16, when joining the last sl st, switch to Color B. Do not FO Color A yet, carry it up for a cleaner join if you wish, or cut and weave.
Color Block 2 (Color B)
- Round 17: With Color B, ch 2, hdc in each st around. Join with sl st to the top of the beginning ch 2. [108 hdc]
- Rounds 18-24: Rep Round 17. (Total 8 rounds of Color B.) At the end of Round 24, switch to Color C.
Color Block 3 (Color C)
- Round 25: With Color C, ch 2, hdc in each st around. Join with sl st to the top of the beginning ch 2. [108 hdc]
- Rounds 26-32: Rep Round 25. (Total 8 rounds of Color C.) At the end of Round 32, FO Color C.
Bag Top Edge (Color C)
To create a neat and sturdy top edge for your bag, we'll add two rounds of single crochet.
- Round 33: With Color C, join yarn with sl st in any st (if you cut yarn after R32, otherwise just ch 1). Ch 1 (does not count as st), sc in each st around. Join with sl st to first sc. [108 sc]
- Round 34: Ch 1, sc in each st around. Join with sl st to first sc. FO and weave in all ends. [108 sc]
Straps (Make 2 - Color C)
The straps are made separately and then sewn onto the bag for added durability and a clean finish.
- With Color C, ch 81.
- Row 1: Hdc in 2nd ch from hook, hdc in each remaining ch across. Ch 1, turn. [80 hdc]
- Row 2-3: Sc in each st across. Ch 1, turn. [80 sc]
- At the end of Row 3, FO, leaving a long tail (approx. 12-18 inches / 30-45 cm) for sewing.
Finishing
- Attach Straps: Position the ends of one strap on the inside of the bag's top edge. Place one end approximately 8 stitches in from the side seam (or about 3-4 inches from the side) and the other end similarly spaced on the other side. Ensure the strap is not twisted. Pin in place.
- Using your yarn needle and the long tail, securely sew the strap ends to the inside of the bag, making sure to go through both layers of the bag's top edge for strength. Repeat for the second strap.
- Weave in all remaining ends: Neatly hide any loose yarn tails throughout your bag. A clean finish makes all the difference!
Pro Tips
- Neat Color Changes: When switching colors, work the last yarn over of the final stitch of the old color with the new color. This creates a seamless transition. For hdc, pull through all three loops with the new color.
- Carrying Yarn: For short color blocks or stripes, you can carry the yarn up the inside seam to avoid excessive cutting and weaving. However, for longer sections like in this pattern, it's often cleaner to cut and re-attach.
- Stitch Markers are Your Friend: Especially for the oval base, use stitch markers to clearly delineate the increase sections at the ends. This helps maintain symmetry and an even shape.
- Blocking: While not strictly necessary for a cotton bag, a light steam block can help even out your stitches and give the bag a more polished, defined shape.
- Lining Your Bag: For added durability and to prevent small items from slipping through stitches, consider sewing a fabric lining. This is a great beginner sewing project and can really elevate the finished look of your bag.
- Customize Your Straps: Feel free to adjust the length and width of the straps to your preference. You could even make them from a different material, like leather or canvas, for a unique touch.
Frequently Asked Questions
Q: Can I use different yarn weights?
A: Yes, you can, but be aware that using a different yarn weight will significantly alter the finished size and drape of your bag. If you use a thicker yarn (e.g., bulky), your bag will be larger and stiffer. If you use a thinner yarn (e.g., DK or sport), it will be smaller and potentially floppier. You will also need to adjust your hook size to match the yarn. Always make a gauge swatch if you deviate from the recommended materials to ensure you're happy with the fabric created.
Q: How do I change colors neatly?
A: The most common method for a clean color change is to complete the stitch *before* the color change with the new color. For example, if your last stitch in Color A is an HDC, yarn over with Color A, insert hook, yarn over with Color A, pull up a loop (3 loops on hook). Then, drop Color A, pick up Color B, yarn over with Color B, and pull through all 3 loops on the hook. This way, the top of the last stitch is already the new color. When joining rounds, ensure you join with the new color as well. Weave in both the old and new yarn tails securely to prevent unraveling.
Q: What's the best way to line this bag?
A: To line your bag, you'll need to cut fabric pieces slightly larger than the bag's dimensions. Measure the base and body of your crocheted bag. Cut an oval piece of fabric for the bottom and a rectangular piece for the sides (width equal to the bag's circumference, height equal to the bag's height plus seam allowance). Sew the fabric pieces together to form a fabric 'bag' that fits snugly inside your crochet bag. Fold the top edge of the fabric lining inwards and hand-stitch or machine-stitch it discreetly to the inside of the crocheted bag's top edge, just below the last round of crochet stitches. This adds structure, prevents stretching, and keeps small items from poking through.
Congratulations, you've just created your very own stunning Crochet Color Block Bag! This versatile accessory is not just a testament to your crafting skills but also a functional piece of art that you can proudly carry wherever you go. Experiment with different color palettes to match your wardrobe or gift these beautiful bags to friends and family. Happy crocheting!