Imagine strolling through a bustling farmer's market, your hands free, your essentials tucked neatly into a bag you made with your own two hands. Or picture a relaxed day at the beach, your sunscreen and book carried in a unique, handmade accessory that perfectly complements your style. That's the magic of creating your very own Crochet Bucket Bag! This isn't just a pattern; it's an invitation to infuse your wardrobe with personality, hone your skills, and carry a piece of your creativity wherever you go. Get ready to fall in love with this versatile, chic, and surprisingly simple project!
Welcome, fellow yarn enthusiasts, to a truly exciting project that combines functionality with undeniable style: the Crochet Bucket Bag! Whether you're a seasoned hooker looking for your next quick make or a confident beginner eager to tackle a rewarding wearable, this pattern is designed with you in mind. We'll guide you through every step, from selecting the perfect yarn to weaving in the last end, ensuring you create a sturdy, beautiful, and utterly practical bag that you'll be proud to show off. So grab your hook, choose your favorite colors, and let's create something beautiful together!
Why You'll Love This Pattern
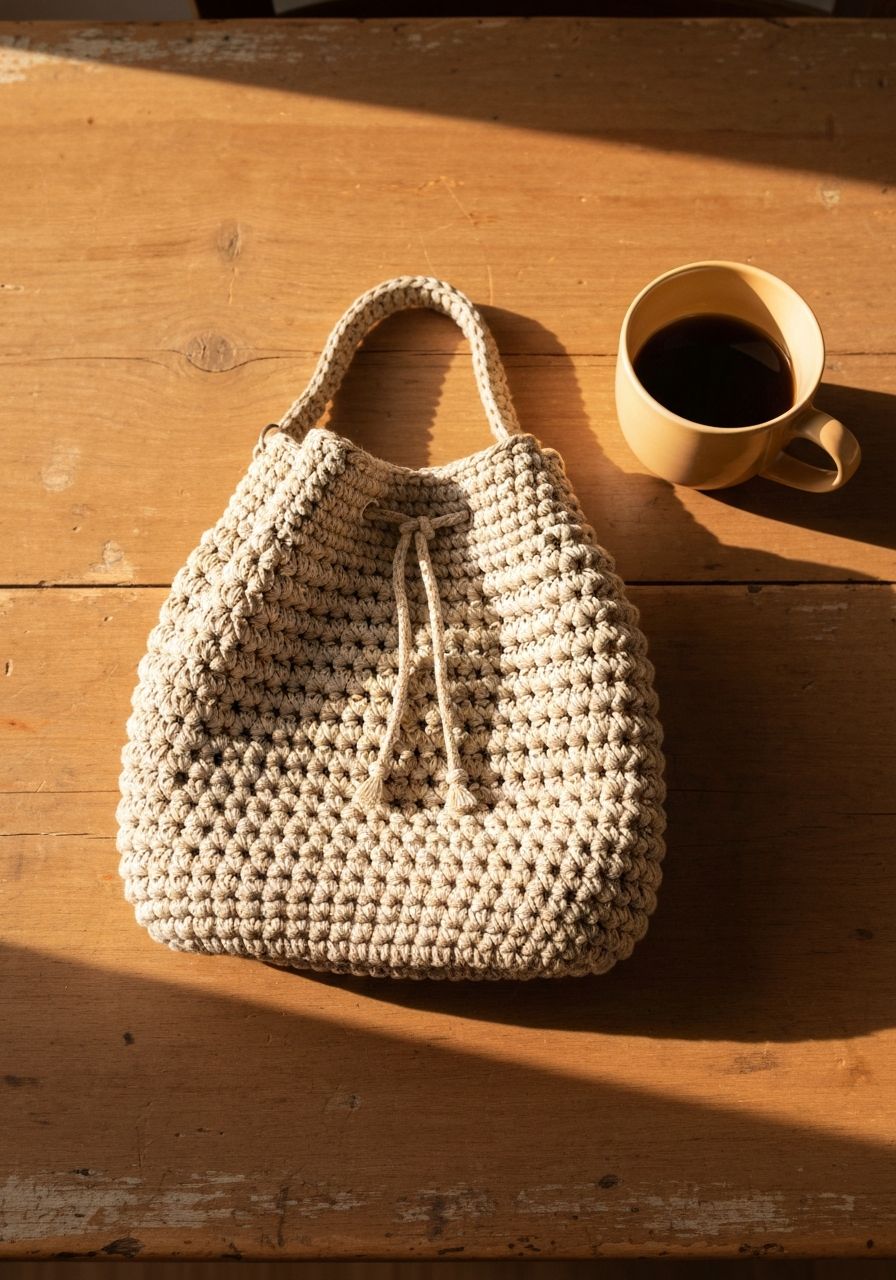
- Versatile & Stylish: The bucket bag silhouette is timeless and incredibly practical. It's perfect for everyday errands, a casual outing, a beach trip, or even as a chic project bag. Its relaxed yet structured shape makes it suitable for almost any occasion.
- Customizable Fun: This pattern is a blank canvas for your creativity! Experiment with different yarn colors for a striped effect, add tassels or pompoms, or even try a textured stitch for the body. The possibilities are endless to make it uniquely yours.
- Skill-Building Project: While beginner-friendly, this pattern introduces you to essential bag construction techniques – working in the round for a sturdy base, creating height, and forming a drawstring casing. It's a fantastic way to expand your crochet repertoire.
- Quick Gratification: Using a worsted weight yarn and a relatively large hook, you'll see your bag take shape surprisingly quickly. It’s the perfect weekend project that yields a tangible, usable item almost instantly.
- Handmade Gift Potential: A handmade bucket bag makes an incredibly thoughtful and personal gift for friends, family, or anyone who appreciates artisanal crafts. Imagine giving a custom-colored bag tailored to their style!
Materials Needed
- Yarn: Approximately 400-450 yards of Worsted Weight (Category 4) cotton or cotton blend yarn. Cotton provides excellent stitch definition and durability for a bag. (E.g., Lion Brand 24/7 Cotton, Dishie Yarn).
- Crochet Hook: 5.0 mm (H) or size needed to obtain gauge.
- Stitch Marker: Essential for keeping track of rounds when working in continuous spirals.
- Yarn Needle: For weaving in ends and assembling the drawstring/strap.
- Scissors: For cutting yarn.
- Optional: Fabric for lining, magnetic snap closure, leather or pre-made bag strap.
Gauge & Sizing
Achieving the correct gauge is important for your bag to turn out the intended size and shape. Take a moment to make a swatch!
- Gauge: 13 hdc x 10 rounds = 4" x 4" (10 cm x 10 cm) in half double crochet.
- Finished Bag Dimensions: Approximately 9.5 inches (24 cm) diameter at base, 10.5 inches (27 cm) tall (excluding drawstring).
If your swatch is larger than the gauge, try a smaller hook. If your swatch is smaller, try a larger hook. Don't skip this step for best results!
Abbreviations
- ch: chain
- sc: single crochet
- hdc: half double crochet
- dc: double crochet
- sl st: slip stitch
- inc: increase (work 2 stitches into the same stitch)
- dec: decrease (work 2 stitches together)
- MR: Magic Ring (also Magic Circle or Adjustable Ring)
- Rnd: Round
- st(s): stitch(es)
- rep: repeat
- BLO: Back Loop Only
- FO: Fasten Off
Step-by-Step Pattern
This pattern is worked in continuous rounds unless otherwise specified. Use a stitch marker to mark the first stitch of each round and move it up as you go.
Base of the Bag
We'll start by creating a flat circular base using half double crochet (hdc) stitches, increasing evenly in each round.
- Rnd 1: Make a MR, ch 1 (does not count as a st), work 10 hdc into the MR. Pull tail to close MR. (10 sts)
- Rnd 2: Ch 1, 2 hdc in each st around. (20 sts)
- Rnd 3: Ch 1, *hdc in next st, 2 hdc in next st*. Rep from * to * around. (30 sts)
- Rnd 4: Ch 1, *hdc in next 2 sts, 2 hdc in next st*. Rep from * to * around. (40 sts)
- Rnd 5: Ch 1, *hdc in next 3 sts, 2 hdc in next st*. Rep from * to * around. (50 sts)
- Rnd 6: Ch 1, *hdc in next 4 sts, 2 hdc in next st*. Rep from * to * around. (60 sts)
- Rnd 7: Ch 1, *hdc in next 5 sts, 2 hdc in next st*. Rep from * to * around. (70 sts)
- Rnd 8: Ch 1, *hdc in next 6 sts, 2 hdc in next st*. Rep from * to * around. (80 sts)
- Rnd 9: Ch 1, *hdc in next 7 sts, 2 hdc in next st*. Rep from * to * around. (90 sts)
- Rnd 10: Ch 1, *hdc in next 8 sts, 2 hdc in next st*. Rep from * to * around. (100 sts)
Your base should now be approximately 9.5 inches in diameter.
Body of the Bag
Now we'll work straight up to create the sides of the bag. The first round worked in BLO will create a crisp edge between the base and the body.
- Rnd 11: Ch 1, hdc in BLO of each st around. (100 sts) - This creates a defined edge for the bag's base.
- Rnd 12-34 (23 Rounds): Ch 1, hdc in each st around. (100 sts) - Continue working in regular hdc for the height of the bag.
At the end of Rnd 34, your bag body should be approximately 9-10 inches tall from the BLO ridge.
Drawstring Casing & Rim
This section creates the channel for your drawstring, giving the bucket bag its classic cinching ability.
- Rnd 35: Ch 1, sc in each st around. (100 sts)
- Rnd 36 (Drawstring Holes): Ch 1, *hdc in next 3 sts, ch 1, skip next st*. Rep from * to * around. You should have 25 ch-1 spaces evenly distributed. (75 hdc, 25 ch-1 spaces)
- Rnd 37: Ch 1, hdc in each hdc and each ch-1 space around. (100 sts)
- Rnd 38: Ch 1, sc in each st around. Sl st to the first sc to join. FO and weave in ends. (100 sts)
Drawstring
You can make a simple crocheted chain drawstring or use a cord/ribbon.
- Crocheted Drawstring: Ch 160-180 (or desired length). Sl st in the 2nd ch from hook and in each ch across to create a sturdy, non-stretching cord. FO, leaving long tails.
- Weaving: Using your yarn needle, weave the drawstring in and out of the ch-1 spaces created in Rnd 36, starting and ending at the front center of the bag (or wherever you prefer). Tie the ends in a knot.
Strap (Optional - Crocheted Version)
If you're not using a pre-made strap, here’s how to crochet a simple, sturdy one.
- Chain: Ch 6.
- Row 1: Sc in 2nd ch from hook and in each remaining ch across. (5 sc)
- Row 2: Ch 1, turn, sc in each st across. (5 sc)
- Repeat: Continue repeating Row 2 until your strap measures approximately 40-45 inches (or desired length for a shoulder/crossbody strap).
- Attach: FO, leaving long tails. Using your yarn needle, securely sew each end of the strap to the inside top rim of the bag, opposite each other. Reinforce with several passes for durability.
Pro Tips
- Stitch Markers are Your Best Friend: Especially when working in continuous rounds, a stitch marker at the beginning of each round will save you from endless counting and potential mistakes.
- Yarn Choice Matters: Cotton or cotton blend yarns are recommended for bags due to their durability, minimal stretch, and excellent stitch definition. Acrylic can work but may stretch more over time. Wool can also be used, but consider its care requirements.
- Blocking for Shape: If your bag feels a bit wobbly or uneven, a gentle blocking can do wonders. Wet the bag, gently squeeze out excess water, stuff it with towels or plastic bags to shape, and let it air dry completely.
- Adding a Fabric Lining: For extra durability and to prevent small items from slipping through stitches, consider adding a fabric lining. This is a great beginner sewing project and elevates the finished look of your bag.
- Customize Your Strap: Instead of a crocheted strap, consider attaching a store-bought leather or fabric strap for a different look. D-rings or swivel clasps can be crocheted into the bag for removable strap options.
- Magnetic Snap: For added security, a magnetic snap can be sewn into the top inside rim of the bag.
Frequently Asked Questions
Can I use a different yarn weight for this pattern?
Yes, you can! However, be aware that changing the yarn weight will significantly alter the final size of your bag. If you use a lighter weight yarn (e.g., DK), your bag will be smaller, and you might need to add more increase rounds to the base and more rounds to the body to achieve a similar size. Conversely, a bulkier yarn will result in a larger bag. Always check your gauge and adjust your hook size accordingly to achieve the fabric density you desire.
How do I add a lining to my crochet bucket bag?
Adding a lining is a fantastic way to finish your bag! You'll need a piece of fabric (like cotton or linen) slightly larger than your bag. Measure the base diameter and the height of your bag. Cut a circle for the base and a rectangle for the sides, adding a 1/2-inch seam allowance to all edges. Stitch the side rectangle into a tube, then sew it to the fabric circle. Hem the top edge of the fabric lining, then hand-stitch or machine-stitch it securely to the inside top rim of your crochet bag. There are many great video tutorials online if you're new to bag lining!
How can I make the bag sturdier?
Several factors contribute to a sturdy bag: 1. Yarn Choice: Cotton and linen yarns naturally offer more structure than acrylic. 2. Hook Size: Using a slightly smaller hook than recommended for your yarn will create a denser fabric. 3. Stitch Definition: Stitches like single crochet or half double crochet create a tighter, more robust fabric than taller stitches like double crochet. 4. Lining: A fabric lining adds significant structure and prevents stretching. 5. Blocking: While not adding rigidity, proper blocking can help the bag maintain its intended shape.
And there you have it – your very own handmade Crochet Bucket Bag! We hope you enjoyed creating this functional and fashionable accessory. There's immense satisfaction in crafting something beautiful and practical with your own hands. Don't forget to share your finished bags with us and the vibrant crochet community. Happy hooking!