Imagine the feeling of slipping into a garment you poured your heart and skill into, a piece that perfectly blends handmade charm with sophisticated style. Envision yourself confidently stepping out, knowing your outfit features a unique, handcrafted element that turns heads and sparks conversation. That’s the magic of a Crochet Blazer! This free pattern and comprehensive guide will empower you to create a stunning, versatile wardrobe staple that you’ll be proud to wear again and again. Get ready to elevate your crochet game and craft a blazer that's as comfortable as it is chic!
Welcome, fellow fiber artist, to an exciting journey into the world of garment crocheting! If you've ever dreamt of expanding your handmade wardrobe beyond scarves and blankets, a crochet blazer is a fantastic next step. This pattern is designed to be approachable for intermediate crocheters, offering clear instructions for constructing a stylish, comfortable blazer that will quickly become your favorite layering piece. Whether you’re dressing it up for a night out or down for a casual brunch, this versatile design is sure to impress.
Why You'll Love This Pattern
This isn't just another crochet project; it's an opportunity to create a timeless piece that will enhance your personal style and showcase your crafting prowess. Here’s why this free crochet blazer pattern will quickly become a favorite:
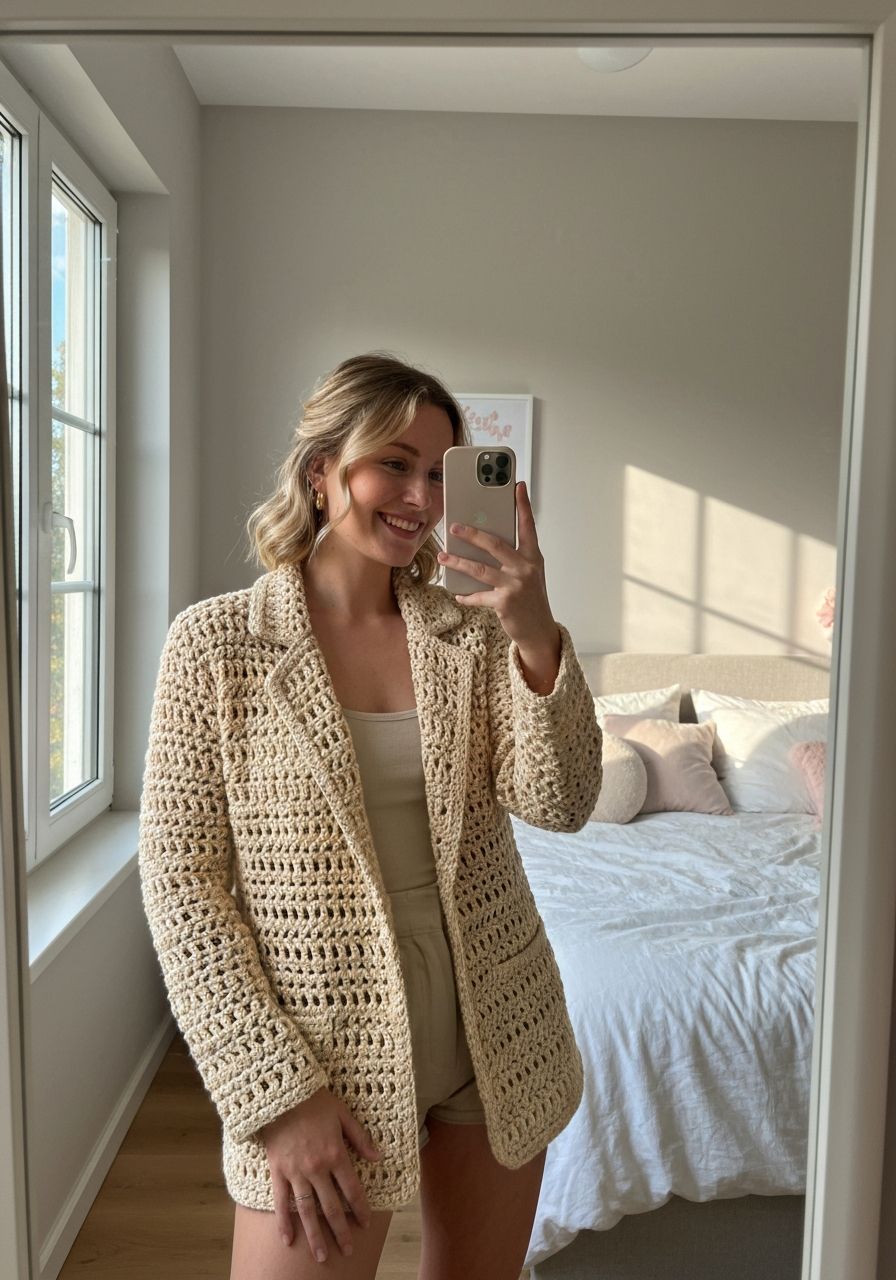
- Sophisticated Style: Blazers are a fashion essential, and this crocheted version offers a unique, textured alternative to traditional fabric blazers. It adds an artistic touch to any outfit, from jeans and a t-shirt to a dress or tailored trousers.
- Versatile Wardrobe Staple: Designed with an open-front, relaxed fit, this blazer is incredibly versatile. It's perfect for layering in any season, adding warmth without bulk, and effortlessly transitioning from casual to semi-formal occasions.
- Comfortable & Cozy: Unlike stiff tailored jackets, a crocheted blazer offers exceptional comfort and drape. Choose a soft yarn, and you'll have a wearable hug that you won't want to take off.
- Skill Building: This pattern introduces you to essential garment construction techniques, including working in panels, seaming, and adding a polished finish. It's a fantastic way to level up your crochet skills.
- Customizable: While designed for a specific size, the pattern provides guidance on how to adjust length and fit, allowing you to truly make it your own. Experiment with different yarn colors and textures to match your unique taste.
- Free & Detailed: You get a complete, step-by-step pattern with clear instructions, gauge information, and helpful tips, all without a cost!
Materials Needed
- Yarn: Worsted Weight (Aran/Category 4) yarn, approximately 1100-1300 yards (1000-1200 meters) for size S/M. A cotton blend or acrylic yarn with good drape is recommended. (e.g., Lion Brand Comfy Cotton Blend, Paintbox Yarns Simply Aran)
- Crochet Hook: H/8 (5.0 mm) or size needed to obtain gauge.
- Scissors: For cutting yarn tails.
- Yarn Needle: For weaving in ends and seaming.
- Stitch Markers: Essential for marking rows, armholes, and seams.
- Measuring Tape: Crucial for checking gauge and measurements.
Gauge & Sizing
Gauge is absolutely critical for garment projects! Taking the time to check your gauge will ensure your blazer turns out the correct size. If your gauge is off, your finished garment will be too big or too small.
Gauge Swatch: Chain 16. Work 15 Half Double Crochet (hdc) stitches for 12 rows. Your swatch should measure 4 inches (10 cm) square. If your swatch is larger, try a smaller hook. If your swatch is smaller, try a larger hook. Repeat until you achieve the correct gauge.
Finished Measurements (Approximate for Size Small/Medium):
- Back Panel Width: 18 inches (45.7 cm)
- Front Panel Width (each): 9 inches (22.8 cm)
- Body Length: 24 inches (61 cm)
- Sleeve Length (from underarm): 18 inches (45.7 cm)
- Sleeve Cuff Circumference: 10 inches (25.4 cm)
- Sleeve Upper Arm Circumference: 14 inches (35.5 cm)
Sizing Adjustments: To adjust width, add or subtract stitches in multiples of 1 for each panel. To adjust length, add or subtract rows. Remember to adjust yarn requirements accordingly.
Abbreviations
- ch: Chain
- sl st: Slip Stitch
- sc: Single Crochet
- hdc: Half Double Crochet
- dc: Double Crochet
- inc: Increase (work 2 stitches into the same stitch)
- dec: Decrease (work 2 stitches together)
- st(s): Stitch(es)
- yo: Yarn Over
- RS: Right Side
- WS: Wrong Side
- FO: Fasten Off
Step-by-Step Pattern
This blazer is worked in separate flat panels (Back, 2 Fronts, 2 Sleeves) and then seamed together.
Back Panel
- Row 1 (RS): Ch 81. Hdc in the 2nd ch from hook and in each ch across. (80 hdc)
- Row 2: Ch 1, turn. Hdc in each st across. (80 hdc)
- Repeat Row 2 until the piece measures 24 inches (approx. 60 rows from beginning).
- FO, leaving a long tail for seaming.
Front Panels (Make 2)
Work two identical front panels.
- Row 1 (RS): Ch 41. Hdc in the 2nd ch from hook and in each ch across. (40 hdc)
- Row 2: Ch 1, turn. Hdc in each st across. (40 hdc)
- Repeat Row 2 until the piece measures 24 inches (approx. 60 rows from beginning).
- FO, leaving a long tail for seaming on one panel. For the second panel, you can cut a shorter tail as it will not be seamed directly to the back from that side.
Sleeves (Make 2)
The sleeves are worked flat and then seamed.
- Row 1 (RS - Cuff Edge): Ch 36. Hdc in the 2nd ch from hook and in each ch across. (35 hdc)
- Row 2: Ch 1, turn. Hdc in each st across. (35 hdc)
- Row 3 (Increase Row): Ch 1, turn. Hdc inc in the first st, hdc in each st until the last st, hdc inc in the last st. (37 hdc)
- Rows 4-6: Ch 1, turn. Hdc in each st across. (37 hdc)
- Row 7 (Increase Row): Ch 1, turn. Hdc inc in the first st, hdc in each st until the last st, hdc inc in the last st. (39 hdc)
- Repeat Rows 4-7, increasing by 2 hdc every 4th row, until you have 51 hdc (approx. Row 27). Your piece should measure approximately 14 inches wide at this point.
- Continue working even (hdc in each st across) until the piece measures 18 inches from the beginning (approx. 45 rows total).
- FO, leaving a long tail for seaming.
Assembly
- Shoulder Seams: Lay the Back Panel flat with the RS facing up. Place one Front Panel on top, RS down, aligning the top edge. Using a yarn needle and the long tail, seam across the top 40 stitches for the shoulder. Repeat for the second Front Panel. Leave the central 40 stitches of the back panel unseamed for the neckline.
- Side Seams: Fold the blazer in half lengthwise, RS together. Align the side edges of the Front and Back Panels. Starting from the bottom edge, seam upwards for 16 inches, leaving the top 8 inches unseamed for the armholes. Repeat for the other side seam.
- Sleeve Seams: Fold each sleeve lengthwise, RS together. Seam along the long edge from the cuff to the top.
- Attaching Sleeves: Turn the blazer RS out. Turn each sleeve RS out. Insert one sleeve into an armhole opening. Align the sleeve seam with the side seam of the blazer and the top of the sleeve with the shoulder seam. Use stitch markers to secure the sleeve evenly around the armhole opening. Using a yarn needle, seam the sleeve to the armhole. Repeat for the second sleeve.
Collar & Edging
- Edging: With the RS of the blazer facing you, join yarn with a sl st at the bottom front corner (either side). Ch 1. Work sc stitches evenly around the entire front opening, up the front, around the back neckline, and down the other front to the bottom corner. Aim for approximately 1 sc per hdc row along the vertical edges and 1 sc per stitch along the neckline. Join with a sl st to the first sc.
- Collar Rows: Ch 1, turn. Work 2 more rows of sc evenly around the entire opening, working 3 sc in the corner stitches at the bottom front for a neat turn. Join with a sl st.
- Optional Lapel Effect: For a slightly more defined lapel, on the 3rd or 4th edging row, you can work hdc stitches instead of sc along the front panels and neckline, creating a slightly wider border. You can also add additional rows of sc or hdc to create a wider, more pronounced collar.
- FO and weave in all remaining ends securely.
Pro Tips
- Block Your Panels: Before seaming, wet block each crocheted panel (back, fronts, sleeves). This will even out your stitches, relax the yarn, and ensure your pieces have a beautiful drape and consistent measurements, leading to a much more professional-looking finished garment.
- Seam as You Go: Instead of leaving all seaming until the very end, seam the shoulder and side seams as soon as your panels are complete. This breaks up the task and allows you to try on the garment to check the fit.
- Try On Frequently: As you assemble the blazer, try it on! This is the best way to catch any fit issues early and make adjustments before it's too late.
- Yarn Choice Matters: For a garment like a blazer, yarn with good drape is key. Avoid very stiff yarns. Blends of cotton, bamboo, or acrylic with good elasticity will give the best results.
- Weave In Ends as You Go: This is a golden rule for all crochet projects, but especially for garments. It saves you a massive headache at the end and ensures a clean finish.
- Invisible Seaming: Use the mattress stitch for nearly invisible seams. It's strong, neat, and helps maintain the stretch and drape of your crocheted fabric.
Frequently Asked Questions
Q: Can I use a different yarn weight?
A: Yes, you can! However, be aware that changing the yarn weight will significantly alter your gauge and therefore the finished size of the blazer. If you choose a different weight, you will need to swatch extensively and recalculate the initial chain stitches and row counts for all panels to achieve your desired measurements. A lighter weight yarn might create a lacier, more drapey blazer, while a bulkier yarn would result in a warmer, more structured garment.
Q: How do I adjust the length of the blazer?
A: Adjusting the length is quite straightforward. Before you begin the assembly step, simply add or subtract rows from your Back and Front Panels until they reach your desired total length. Be sure to make the same number of adjustments to both the front and back pieces to maintain a balanced look. Remember to account for a bit of stretch that might occur with wear.
Q: What if my gauge is off, even after trying different hooks?
A: If you've tried different hook sizes and still can't match the exact gauge, don't despair! You have a couple of options. You can either embrace the gauge you achieved and use the finished measurements as a guide to adjust your initial chain counts and row counts (e.g., if your stitches are smaller, you'll need more of them). Alternatively, you might consider trying a different brand of yarn, as tension can vary slightly even within the same weight category. The most important thing is that *your* fabric feels good and has a nice drape for a blazer.
Congratulations on embarking on such a rewarding project! This crochet blazer is more than just a pattern; it's an opportunity to create a truly unique piece that reflects your dedication and creativity. Wear it with pride, knowing you handcrafted a stylish staple that will elevate any outfit. Happy crocheting!