Imagine the pure delight of creating something beautiful with your own hands – a cozy blanket, a charming amigurumi, or a stylish scarf. Crochet offers this incredible satisfaction, a meditative rhythm that transforms simple yarn into intricate fabric. But let's be honest, starting a new craft can feel a little overwhelming, and those first few stitches can sometimes look… well, not quite like the pretty pictures. Don't let initial hiccups dim your creative spark! We're here to guide you through the most common Crochet Beginner Mistakes, turning potential frustration into a smooth, joyful, and ultimately rewarding journey. Get ready to crochet with confidence!
Welcome, aspiring crocheter! You've taken the first exciting step into a wonderful world of creativity. Whether you dream of crafting gifts for loved ones or simply enjoy the calming process of working with yarn, learning crochet opens up endless possibilities. While the basics are simple, it's easy to fall into a few common traps that can make your early projects feel challenging. This comprehensive guide is designed to identify those pitfalls and equip you with the knowledge and techniques to avoid them, ensuring your crochet journey is as enjoyable and successful as possible from the very first stitch.
Why It Matters
Addressing common beginner mistakes early on is more than just about fixing a wonky edge; it's about building a strong foundation for all your future projects. Ignoring these initial challenges can lead to frustration, stalled progress, and even cause you to abandon the craft altogether. By understanding what usually goes wrong and how to correct it, you'll develop good habits, improve your technique, and gain the confidence to tackle more complex patterns. A solid start ensures consistent stitchwork, correctly sized projects, and a much more satisfying creative experience. Think of this guide as your roadmap to becoming a happy, skilled crocheter, one perfectly formed stitch at a time!
What You Need to Know
Before diving into specific mistakes, let's briefly touch upon the foundational elements every beginner should understand. Getting these right sets the stage for success:
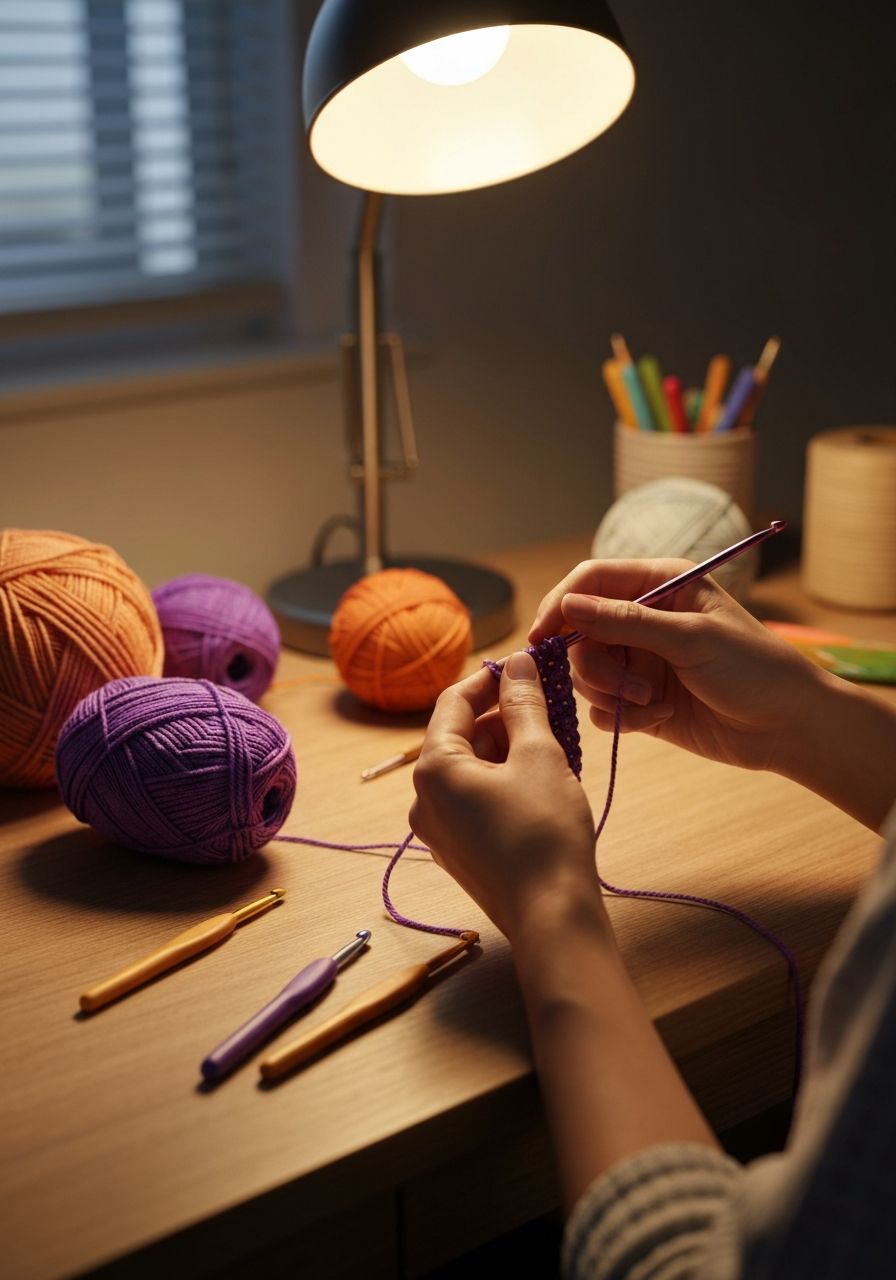
- Yarn & Hook Pairing: Not all yarns are created equal, and neither are hooks. Patterns will specify a recommended yarn weight and hook size, but generally, beginners do well with a smooth, light-colored worsted weight (medium/4) yarn and a corresponding hook (typically H/5.0mm or I/5.5mm). This combination makes stitches easy to see and manipulate.
- Basic Crochet Terminology: Familiarize yourself with common abbreviations like ch (chain), sc (single crochet), hdc (half double crochet), dc (double crochet), sl st (slip stitch), inc (increase), dec (decrease), and magic ring (adjustable ring). Most patterns include a key, but knowing these will speed up your learning.
- Understanding Stitch Anatomy: Knowing where to insert your hook is crucial. Most stitches are worked into both loops (the "V" at the top of the previous stitch), but sometimes patterns call for working into the front loop only (FLO) or back loop only (BLO).
- The Importance of Tension: This refers to how tightly or loosely you hold your yarn and pull your loops. Consistent tension is key to uniform stitches and even fabric. It takes practice, but it's vital for gauge and project appearance.
Step-by-Step Guide to a Perfect Start
Let's walk through the very first steps of crochet, focusing on techniques that prevent common issues right from the beginning.
Mastering the Slip Knot & Foundation Chain
- The Perfect Slip Knot: This isn't just the start; it sets the tone for your tension. Make sure your slip knot is snug on your hook but not so tight that it can't slide easily. If it's too tight, your first chain will be a struggle. If it's too loose, it will create a sloppy start.
- Consistent Foundation Chain: Your chain is the base for your entire project, so consistency is key. Each chain stitch should be roughly the same size. Too tight chains make it hard to work into the next row, while loose chains create a wavy edge. Practice making even chains until they look uniform.
The First Row: Finding Your Stitches
- Identifying the "Second Chain from Hook": When a pattern says "sc in 2nd ch from hook," it means to skip the chain closest to your hook and insert your hook into the next one. This skipped chain often acts as the turning chain and prevents the edge from curling.
- Inserting Your Hook Correctly: For your first row into the foundation chain, you'll typically insert your hook under the top "V" of the chain and also the "back bump." This creates a neat, sturdy bottom edge similar to the top edge of your stitches.
- Counting Your Stitches Accurately: This is perhaps the most critical step. Count your stitches after every single row. It's much easier to catch an error early than to unravel several rows later. Use stitch markers to mark the first and last stitch of a row, especially when you're starting.
Common Mistakes to Avoid
Mistake 1: Inconsistent Tension
The Problem: Your fabric looks uneven, with some stitches tight and others loose, leading to a wavy or distorted project.
The Fix: Tension takes practice. Focus on holding the working yarn consistently. Some prefer to wrap the yarn around their index finger once or twice; others prefer a looser hold. Experiment to find what feels natural and produces even stitches for you. Slow down and be mindful of how tightly you pull each loop. Remember, consistency is more important than extreme tightness or looseness.
Mistake 2: Incorrect Stitch Counting (Adding or Losing Stitches)
The Problem: Your project mysteriously gets wider or narrower with each row, resulting in a trapezoid instead of a rectangle.
The Fix: This is extremely common! Here’s how to prevent it:
- Count Religiously: Count your stitches after every row. If your pattern says "9 sc," make sure you have exactly 9.
- Use Stitch Markers: Place a stitch marker in the very first stitch and the very last stitch of each row. This clearly shows you where to begin and end.
- Identify the Last Stitch: Beginners often miss the very last stitch of a row (which can be hidden near the turning chain) or accidentally work into the turning chain itself.
Example of a Common Counting Issue with Single Crochet:
Let's say you want to make a simple swatch that is 10 single crochet stitches wide.
- Ch 11.
- Row 1: Sc in 2nd ch from hook and in each ch across. (10 sc)
- Row 2: Ch 1, turn. Sc in first sc and in each sc across. (10 sc)
A common mistake is to either skip the very first stitch (making 9 sc) or to accidentally work an extra stitch into the turning chain from the previous row (making 11 sc). Always visually identify the actual stitches and the turning chain.
Mistake 3: Incorrect Stitch Insertion
The Problem: Your fabric looks different from the pattern, or the stitches feel weak and prone to holes.
The Fix: Unless specifically instructed otherwise (e.g., "front loop only" or "back loop only"), you should always insert your hook under both loops of the previous stitch. When you look at the top of a stitch, you'll see a "V" shape; both strands of that "V" should be on your hook when you make your stitch. Inserting into only one loop will create a different texture and sometimes a weaker fabric.
Example of Stitch Insertion Difference (Single Crochet):
Let's assume you have a row of 5 sc stitches.
- Correct Insertion (Both Loops): Ch 1, turn. Insert hook under both strands of the "V" at the top of the first sc. Yarn over, pull up a loop, yarn over, pull through both loops. Repeat for next 4 sc. (5 sc). This creates a dense, classic fabric.
- Front Loop Only (FLO) Mistake: If you accidentally insert your hook under only the loop closest to you, you'll create a ribbed effect and a horizontal bar on the back. This is only done if the pattern specifies "FLO."
- Back Loop Only (BLO) Mistake: Similarly, inserting only under the loop farthest from you creates a different ribbed effect and a bar on the front. Only do this if the pattern specifies "BLO."
Mistake 4: Ignoring Gauge
The Problem: Your finished project is the wrong size – too big, too small, or uses too much/too little yarn. This is especially critical for wearables like garments.
The Fix: Gauge is the number of stitches and rows per inch (or centimeter) achieved with a specific yarn and hook. Always make a small gauge swatch (e.g., 4x4 inches) before starting a project. If your swatch is too small, your tension is too tight or your hook is too small; go up a hook size. If your swatch is too large, your tension is too loose or your hook is too big; go down a hook size. Adjust until your swatch matches the pattern's gauge.
Mistake 5: Not Understanding Turning Chains
The Problem: Your edges are uneven, or your stitch counts are off because you're either skipping a stitch after the turning chain or working into the turning chain as if it were a regular stitch.
The Fix: Turning chains are used to bring your yarn to the correct height for the next row of stitches. Their function (and whether they count as a stitch) varies by stitch type and pattern:
- Single Crochet (sc): Ch 1 at the beginning of the row. This usually DOES NOT count as a stitch. You will work your first sc into the first actual stitch of the previous row.
- Half Double Crochet (hdc): Ch 2 at the beginning of the row. Sometimes counts as a stitch, sometimes not. ALWAYS check your pattern. If it counts, you skip the first actual hdc of the previous row. If it doesn't count, you work into the first actual hdc.
- Double Crochet (dc): Ch 3 at the beginning of the row. This usually DOES count as a stitch. You will skip the first actual dc of the previous row and work your first dc into the second actual dc.
When in doubt, consult the pattern's instructions or a reliable tutorial.
Pro Tips for Success
- Practice, Practice, Practice: Crochet is a skill that improves with repetition. Don't be afraid to make "practice swatches" without a specific project in mind.
- Embrace "Frogging": Unraveling your work (called "frogging" because you "rip it, rip it") is a crucial part of learning. It's not a failure; it's an opportunity to correct mistakes and improve.
- Use Stitch Markers: These inexpensive tools are a beginner's best friend. Use them to mark the first and last stitch, specific pattern repeats, or anything you need to keep track of.
- Watch Video Tutorials: Seeing a stitch formed in real-time can be incredibly helpful. There are countless free resources online for every stitch imaginable.
- Join a Community: Online forums, local crochet groups, or social media communities offer support, inspiration, and answers to your questions.
- Start Simple: Begin with small, straightforward projects like dishcloths, scarves, or basic granny squares. Master the fundamentals before attempting complex designs.
Frequently Asked Questions
What's the best yarn and hook for beginners?
For beginners, a smooth, light-colored worsted weight (medium/4) acrylic yarn is ideal because it's inexpensive, easy to see stitches, and doesn't split easily. Pair this with a corresponding aluminum hook, typically an H/5.0mm or I/5.5mm, which is comfortable to hold and provides good visibility for stitches.
How do I stop my edges from getting wavy?
Wavy edges are often a sign of inconsistent stitch count (adding stitches) or inconsistent tension (too loose). Ensure you are counting your stitches accurately at the end of every row and maintaining even tension throughout your work. Using stitch markers on the first and last stitch of each row can significantly help maintain straight edges.
Should I count my turning chain as a stitch?
It depends on the stitch and the pattern. For single crochet (sc), the chain 1 turning chain typically does NOT count as a stitch. For half double crochet (hdc), the chain 2 may or may not count, so always check the pattern. For double crochet (dc), the chain 3 usually DOES count as a stitch. Always refer to your pattern's specific instructions for clarity.
Learning crochet is a journey, not a race. Embrace the process, celebrate your progress, and don't be discouraged by a few wonky stitches along the way. Every mistake is a learning opportunity, bringing you closer to mastering this beautiful craft. With patience, practice, and the tips in this guide, you'll soon be creating stunning crochet pieces with confidence and joy. Happy crocheting!